Warm HA Setup, Failover, and Automated Backups
The Device42 Warm High Availability (HA) configuration lets you keep a second appliance on standby and run periodic restores to it for use as a failover. This page covers automating restores to the standby appliance, switching the appliance mode via API, and configuring automated failover with a monitoring system.
Automate Restores to Back Up Your Main Appliance for Warm HA
Setting up Warm HA consists of two steps:
- Configure automated restores to the standby appliance.
- Switch the standby appliance to production mode in the event of a failure.
From the Device42 Appliance Manager, you can set the appliance to standby mode and configure it to restore from a backup file on a remote server. The appliance will then automatically restore from the backup file at the intervals you specify.
Set Up Automated Restores for a Warm HA Appliance
Log in to the Appliance Manager and navigate to Global Settings > Appliance Mode. The Appliance Mode screen includes an Enable Standby option:
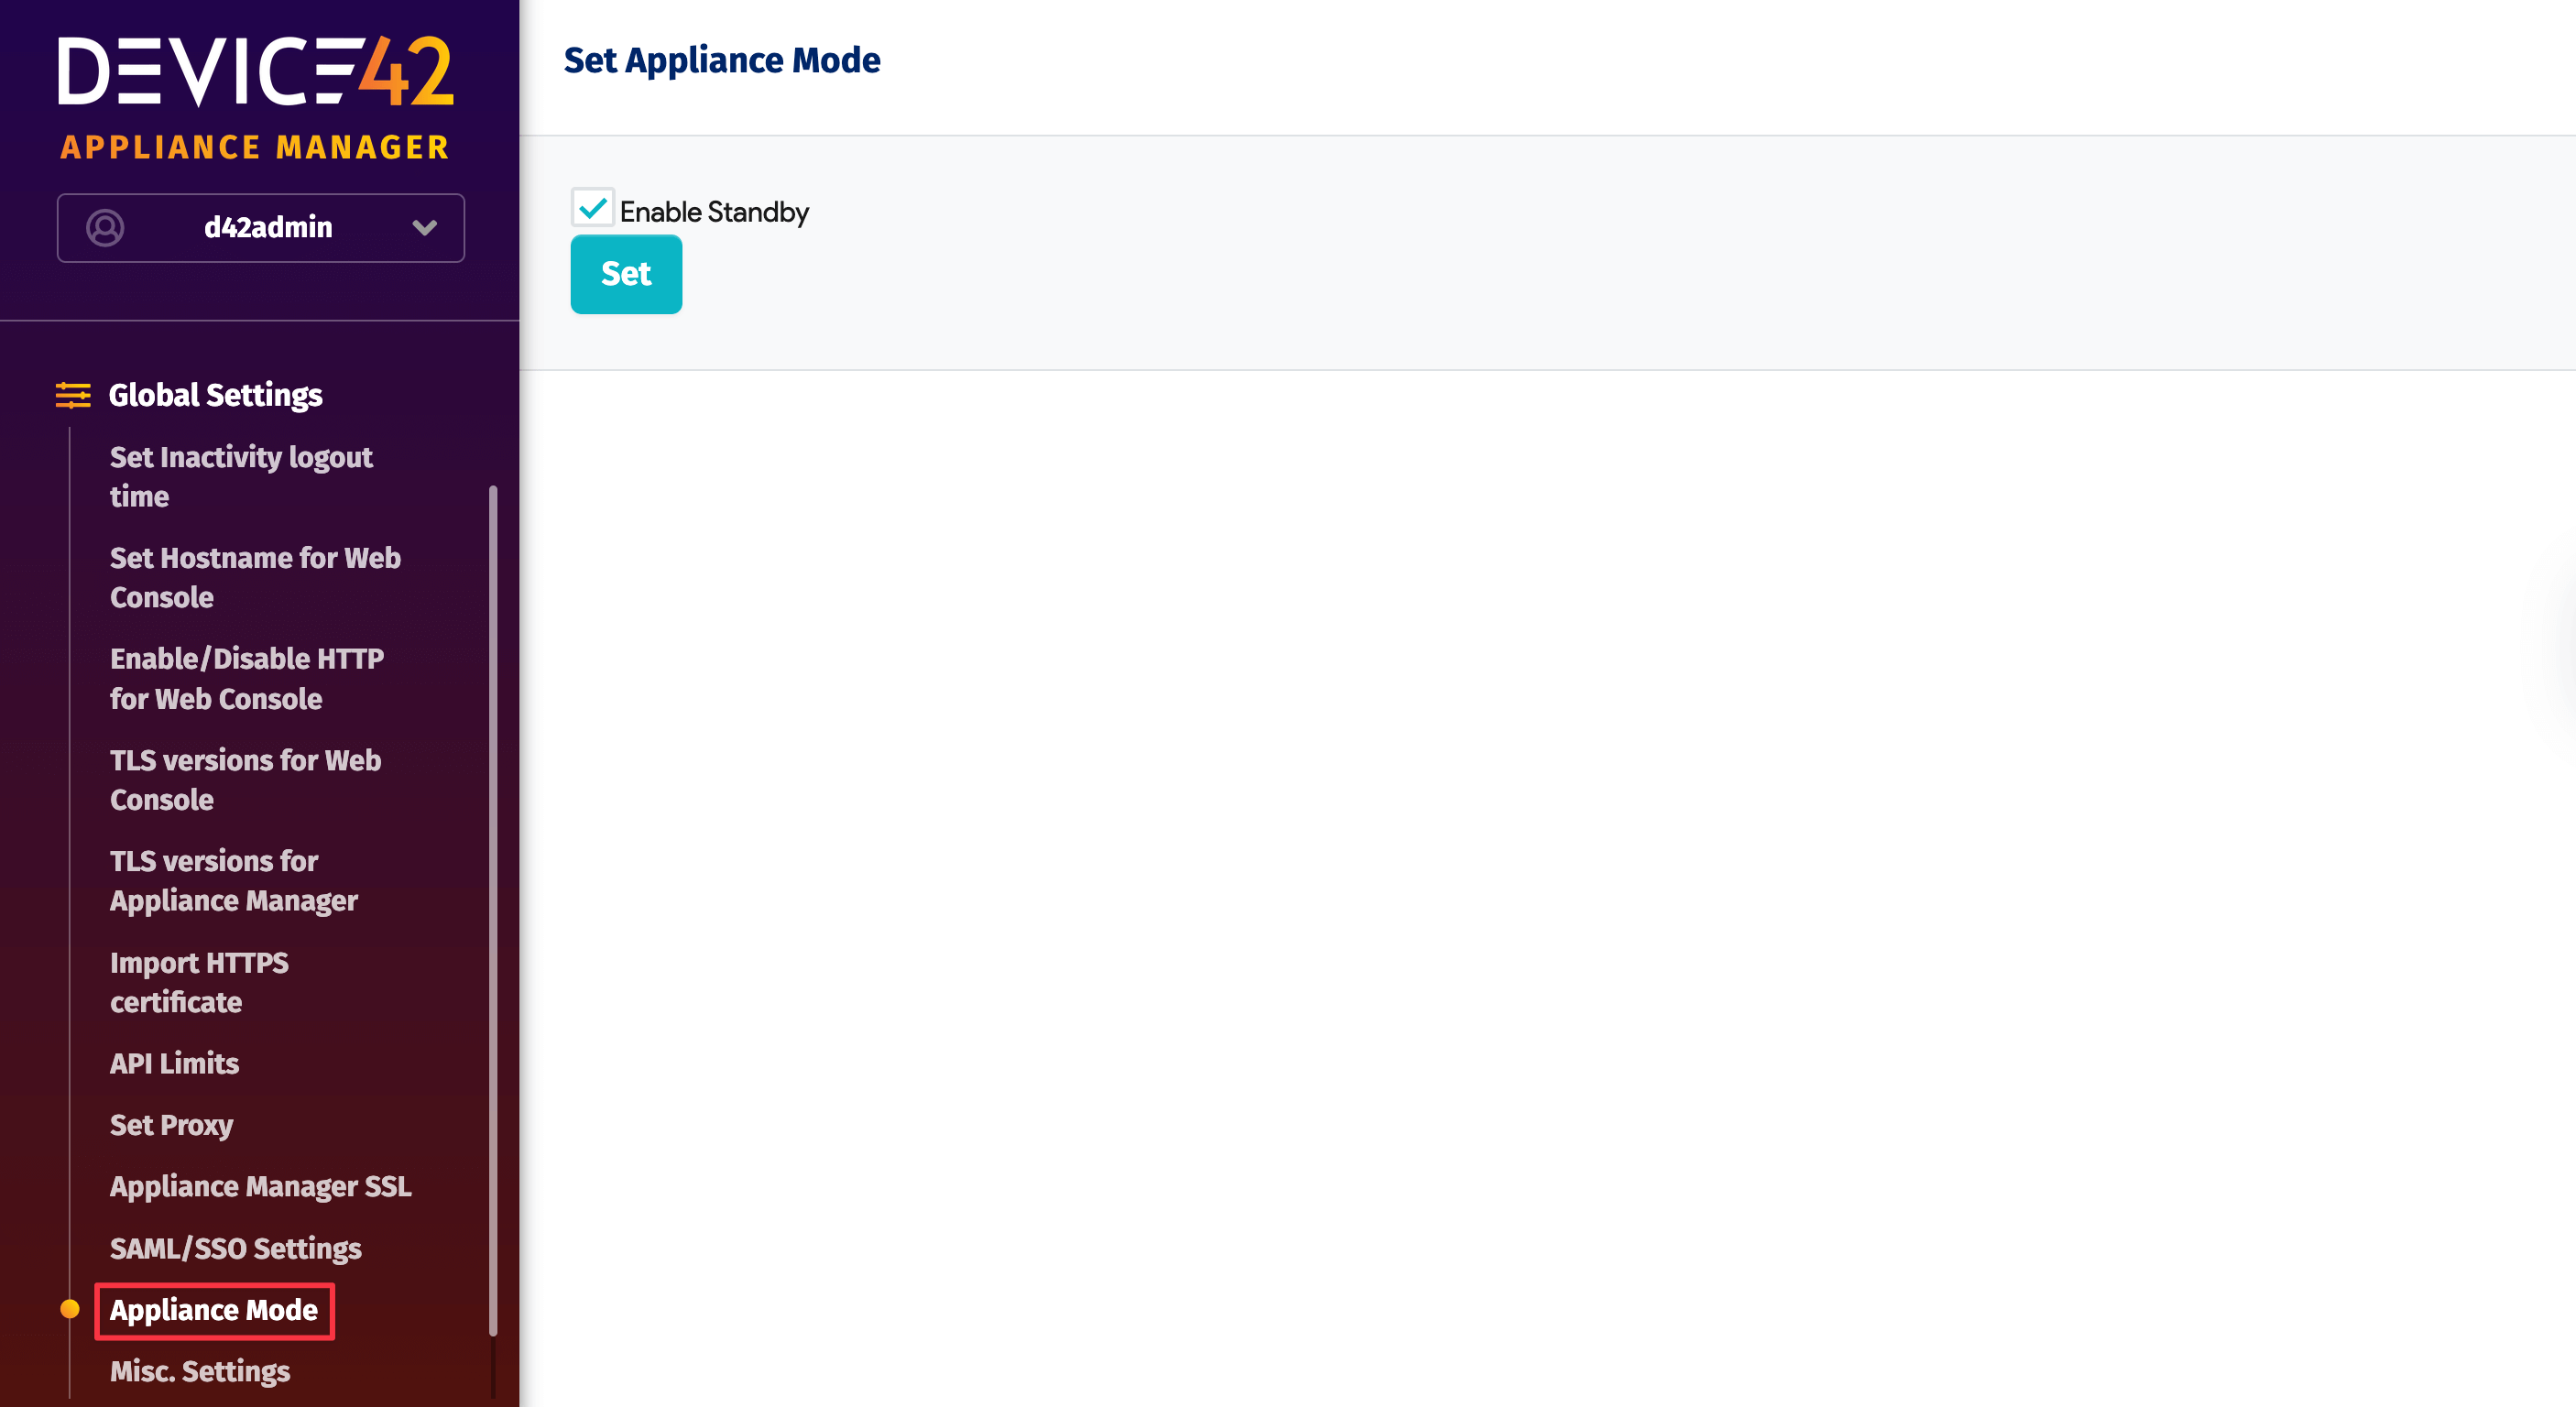
You can mark an appliance as standby and then enable regular restores from an NFS export or SFTP location. Putting the appliance in standby mode does the following:
- Disables the background scheduler that runs discovery jobs
- Disables scheduled reports
- Disables backups from the appliance
Add the auto-restore schedule using crontab syntax. Configure how often you want the standby appliance to pick up the backup file from the remote server.
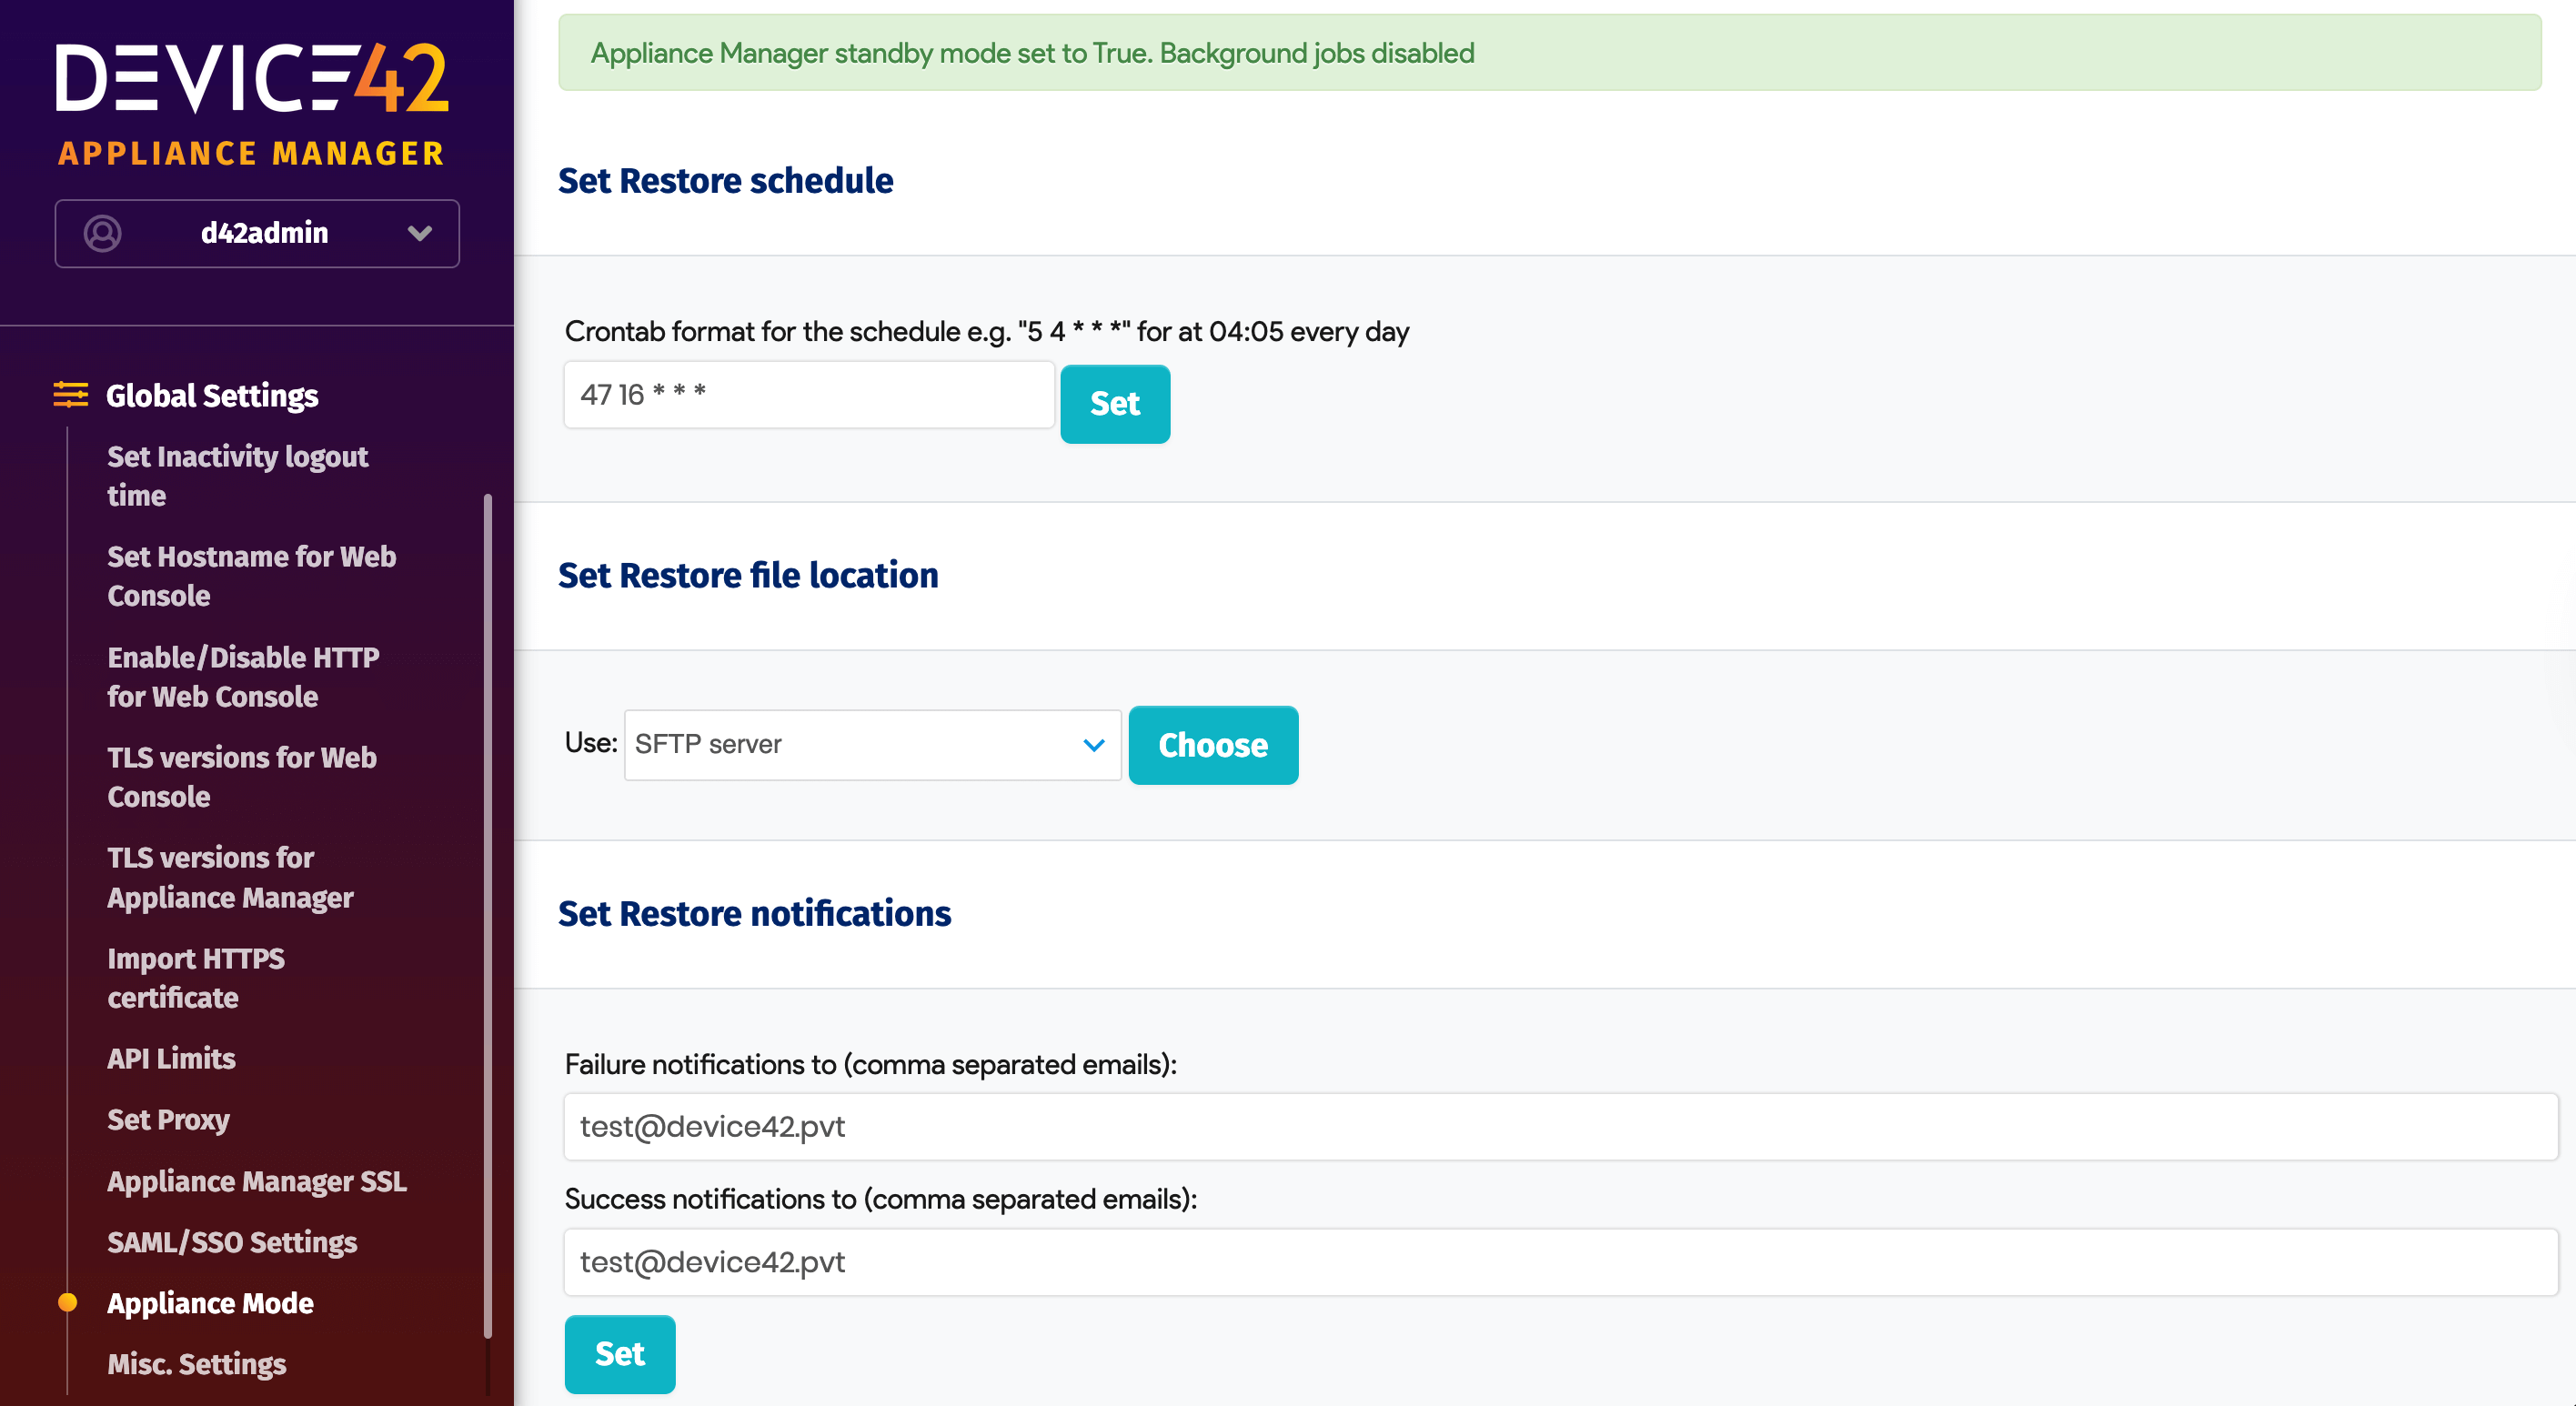
The passphrase, SFTP credentials, and backup file name must be identical on both the production and standby appliances. You can use Amazon S3, NFS, or SFTP as the backup location.
NFS, SFTP, and S3 paths and credentials are configured in their respective submenus in the Device42 Appliance Manager. Once you have chosen your restore method, look for NFS Server Settings, SFTP Server Settings, and Amazon S3 Settings in the left sidebar.
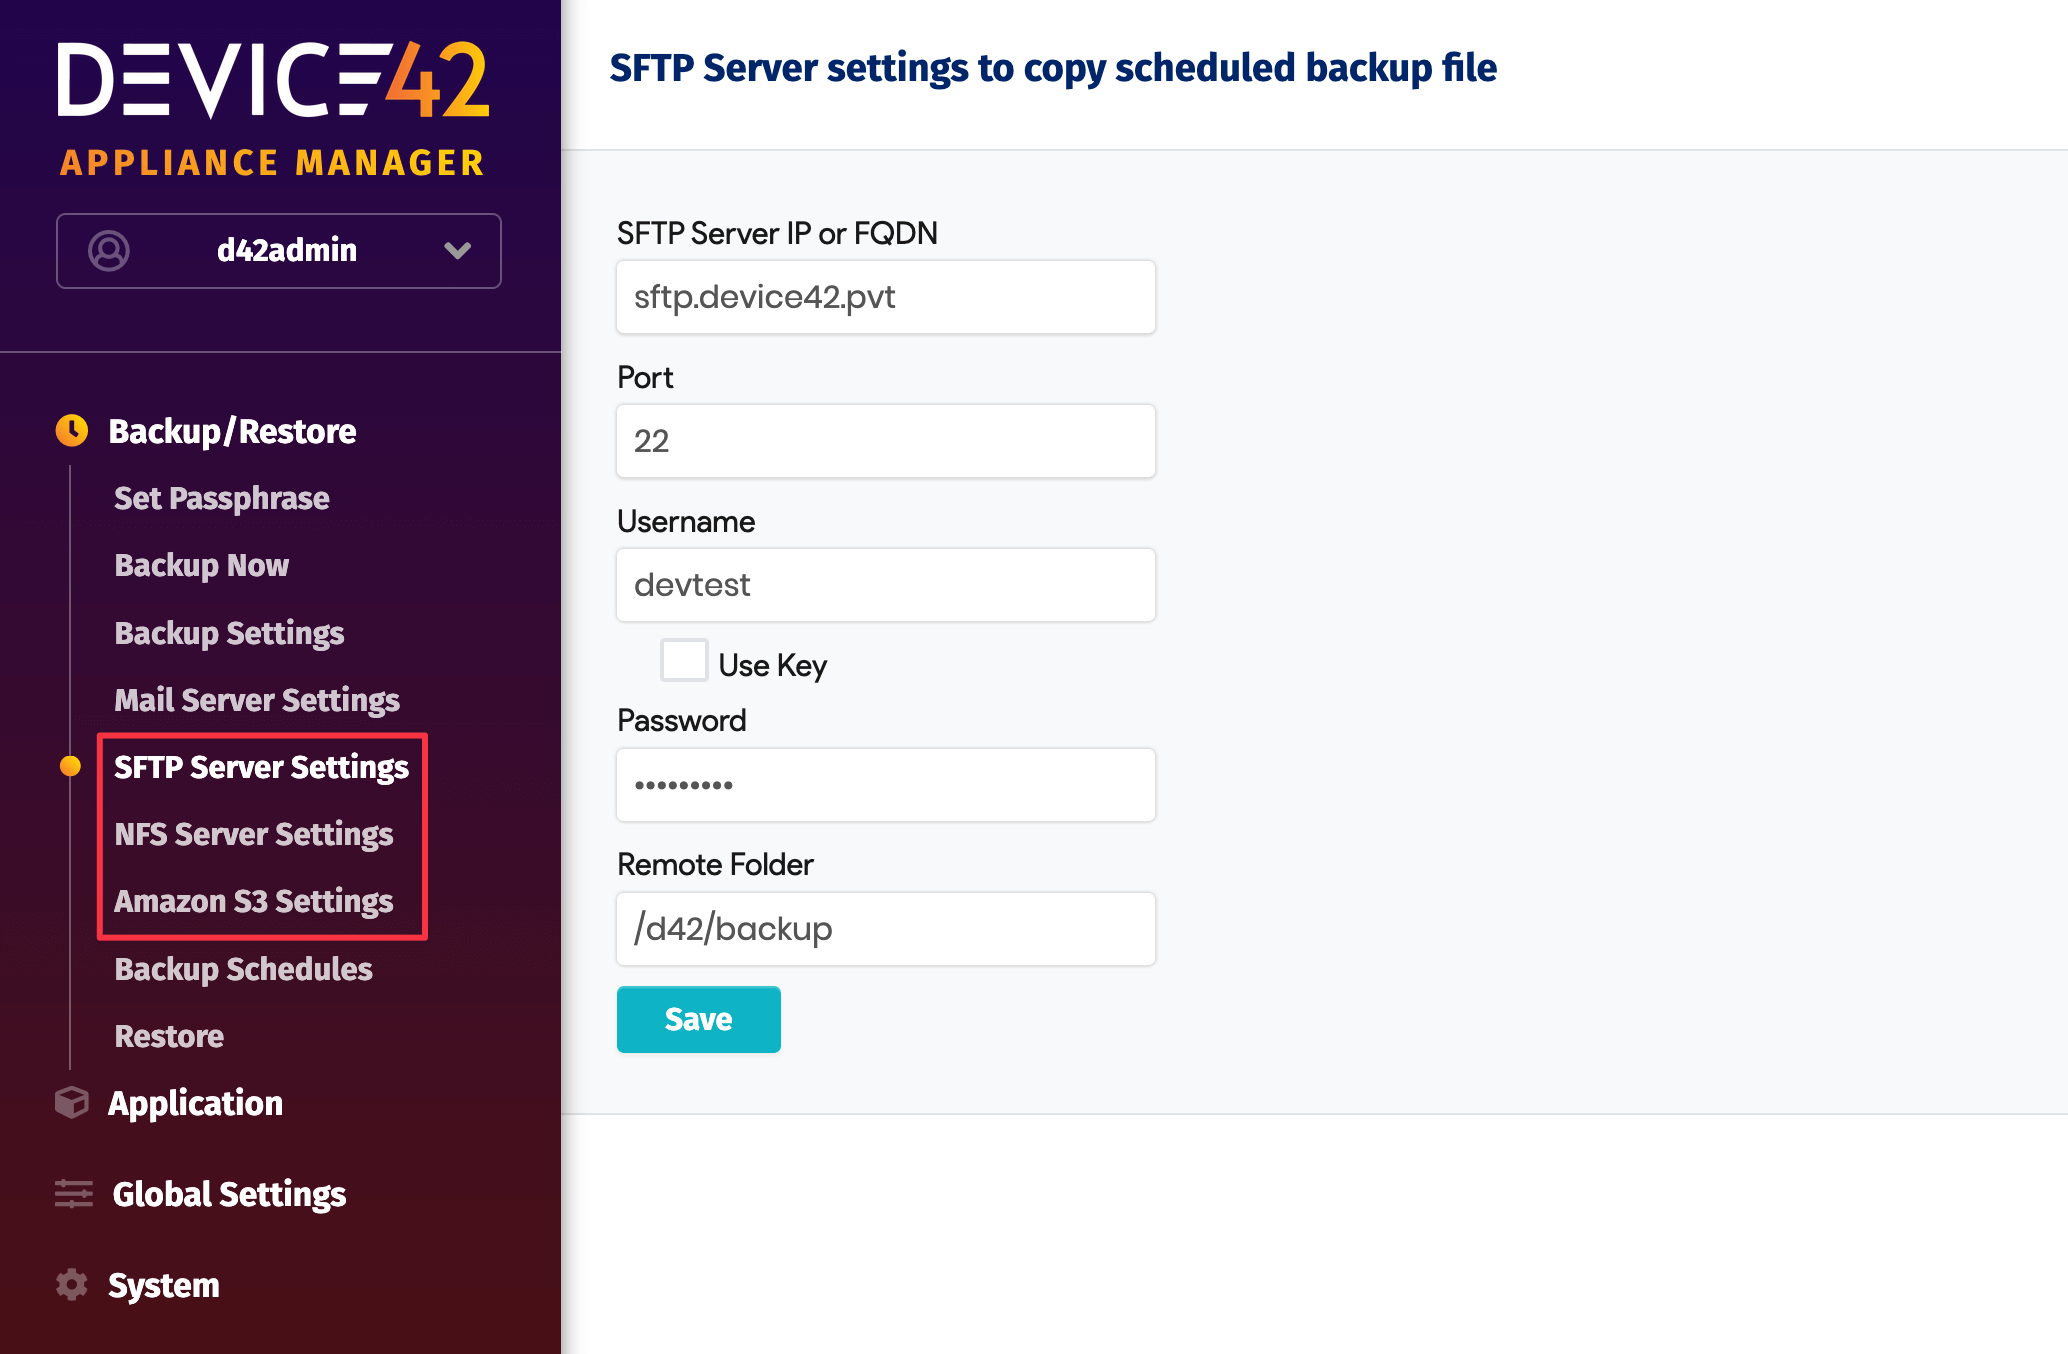
While an auto-restore is running, all schedules are disabled, so any auto-restore that falls within the same window will not start. Success and failure notifications for auto-restore are also available — mail server settings must be configured for these notifications to work.
Important Note for Backup Schedules with Auto-Restore
Any attempt to auto-restore from a backed-up file will fail if the metadata is not included in the backup.
You must select Backup Meta Data under Backup schedules for backups to your SFTP, NFS, or S3 storage.
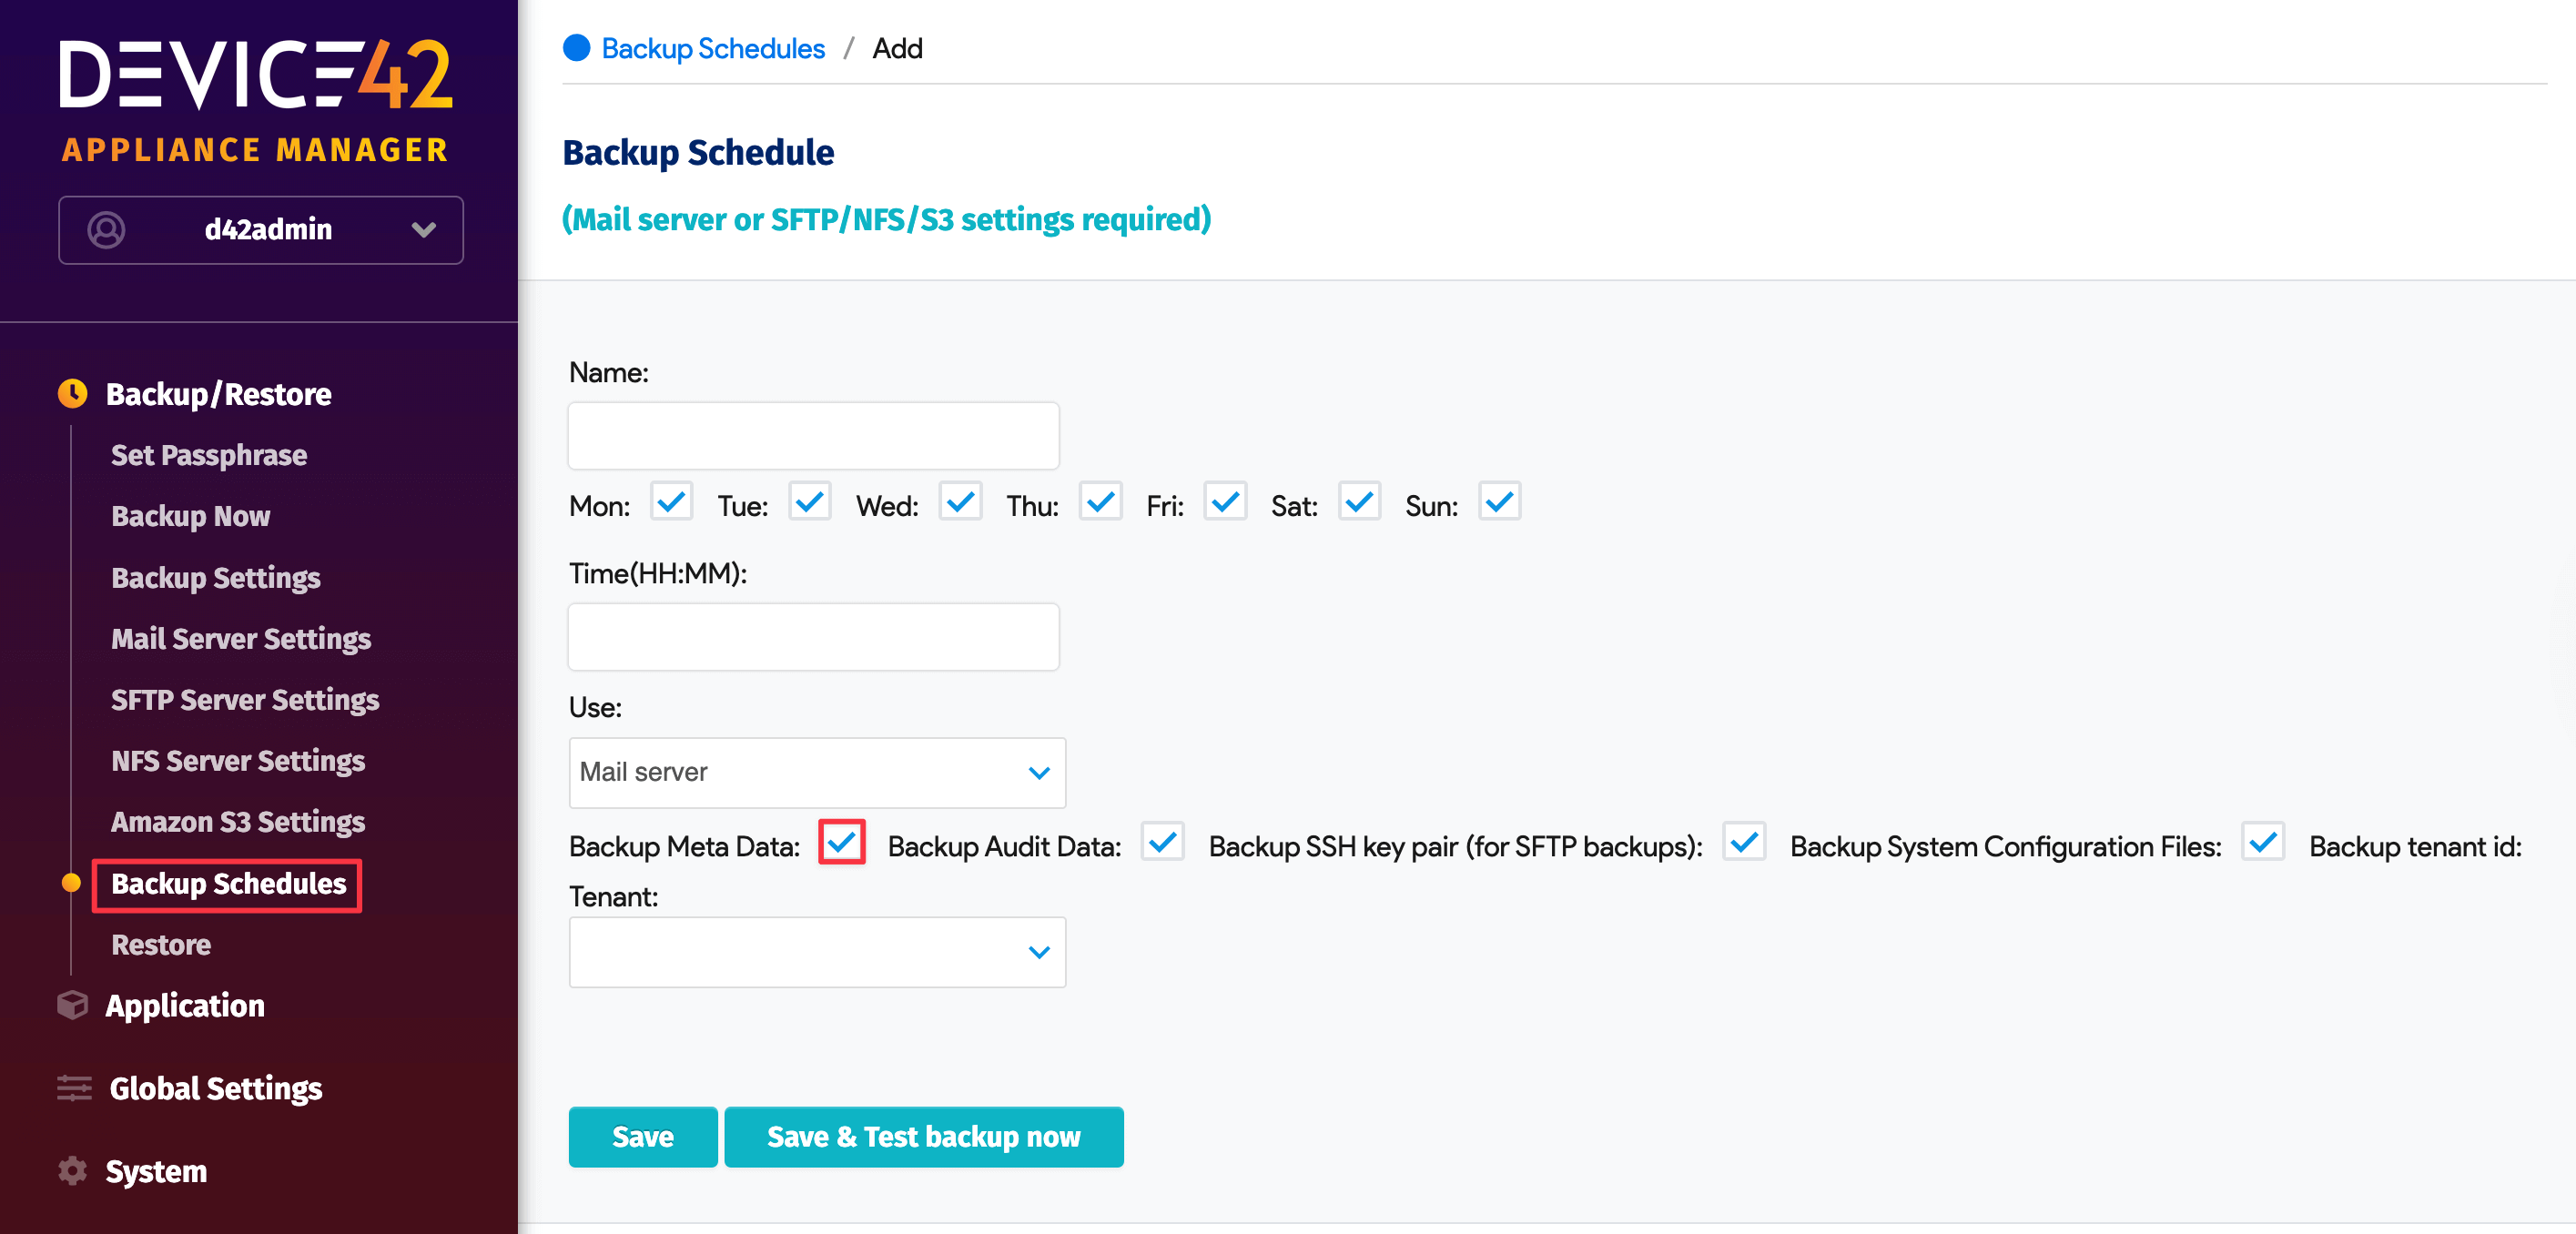
Without the metadata, restore and passphrase settings are not included in the backup archive, and the appliance has no reference for using the data when attempting a scheduled restore.
A backup file without metadata can still be used for an on-demand restore.
For details, see backup metadata and scheduling the backup.
Set Appliance Mode via API
With automated restores in place on your backup appliance, you can switch the backup appliance to production mode in the event of a failure. Send a POST call to /api/1.0/appliancemode/ with the payload appliance_mode=production or appliance_mode=standby to switch modes. This is intended to be triggered from your monitoring software (see the example below). After switching, update DNS settings to point your domain to the new production instance IP for continuous use of Device42 without downtime.
Automatic Failover Using Your Monitoring System
When running Device42 in HA mode with a warm standby, the secondary instance must be promoted from warm standby (with job processing, scheduler, and backups deactivated) to a fully active production state if the primary fails. A Device42 appliance can be toggled between warm standby and production mode with a simple API call.
To toggle between warm standby and production, pass the appliance_mode parameter in a POST call to /api/1.0/appliancemode/:
appliance_mode=productiontoggles a warm standby appliance to production mode.appliance_mode=standbytoggles a production appliance to warm standby mode.
For example, the following curl call toggles a Device42 appliance from standby to production:
curl -X POST -d "appliance_mode=production" -u 'd42admin:default' https://Device42Instance:4343/api/1.0/appliancemode/ --insecure

By embedding this call in a script triggered by a failure event from your monitoring system, you can fully automate the failover process.
Nagios Automated Failover Example
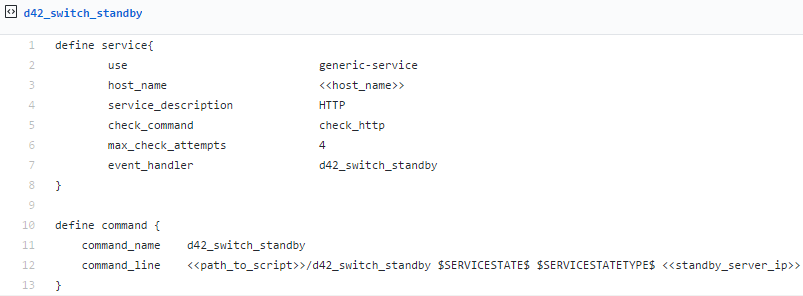
The following example uses Nagios with the API call above to automatically switch a Device42 backup appliance from warm standby to production mode in a failover scenario.
-
Add the following configuration to your Nagios host file:
-
Create a script file similar to the following example:
If used as written, the example script enables automated failover to the secondary instance only, not failback. The failback provisions are present in the script but commented out (lines 11 and 12). Depending on the failure mode of the primary instance, it can be useful for the production script to send an API call to place the primary instance into standby mode as a precaution — this prevents the primary from running jobs should it recover before a failback is intentionally initiated.
- Ensure the script runs as the proper Nagios user, and has the
chown nagios:nagios <file> && chmod 755 <file>execution permissions. - The example uses
check_httpto detect failure, but you can use other commands. - The production DNS entry must be edited to point at the new primary Device42 instance IP for reachability via the same URL. For Windows DNS environments, you can use this PowerShell example script (with usage examples in this blog post). For other platforms, you will need a custom script.
How it works: If the primary Device42 server goes down and the failure is detected by monitoring, the script switches the secondary server to production mode via a POST call to /api/1.0/appliancemode/ with the payload appliance_mode=production. If the primary comes back up, the script can switch the secondary back to standby mode, restoring the primary as authoritative — uncomment lines 11 and 12 to enable this. Ensure you also have provisions to switch the DNS entry back to the primary instance's IP address.