SAML 2.0 Configuration
Device42 integrates with SAML 2.0 alongside AD or LDAP user synchronization to provide Single Sign-On (SSO) support. Once users are added to Device42 via Active Directory or LDAP, they are automatically logged in when they load the site.
Authorization is handled by Device42, so SSO only works if the user account already exists in Device42 before the user logs in.
SAML configuration varies between providers. This page covers configuration steps for Microsoft ADFS, Azure AD, Okta, and OneLogin as examples. Device42 SSO also works with any SAML 2.0 compatible Identity Provider and has been confirmed to work with IDaaS providers, Centrify, and PingIdentity's PingOne and PingFederate.
For further assistance, contact Support.
Configure Microsoft ADFS
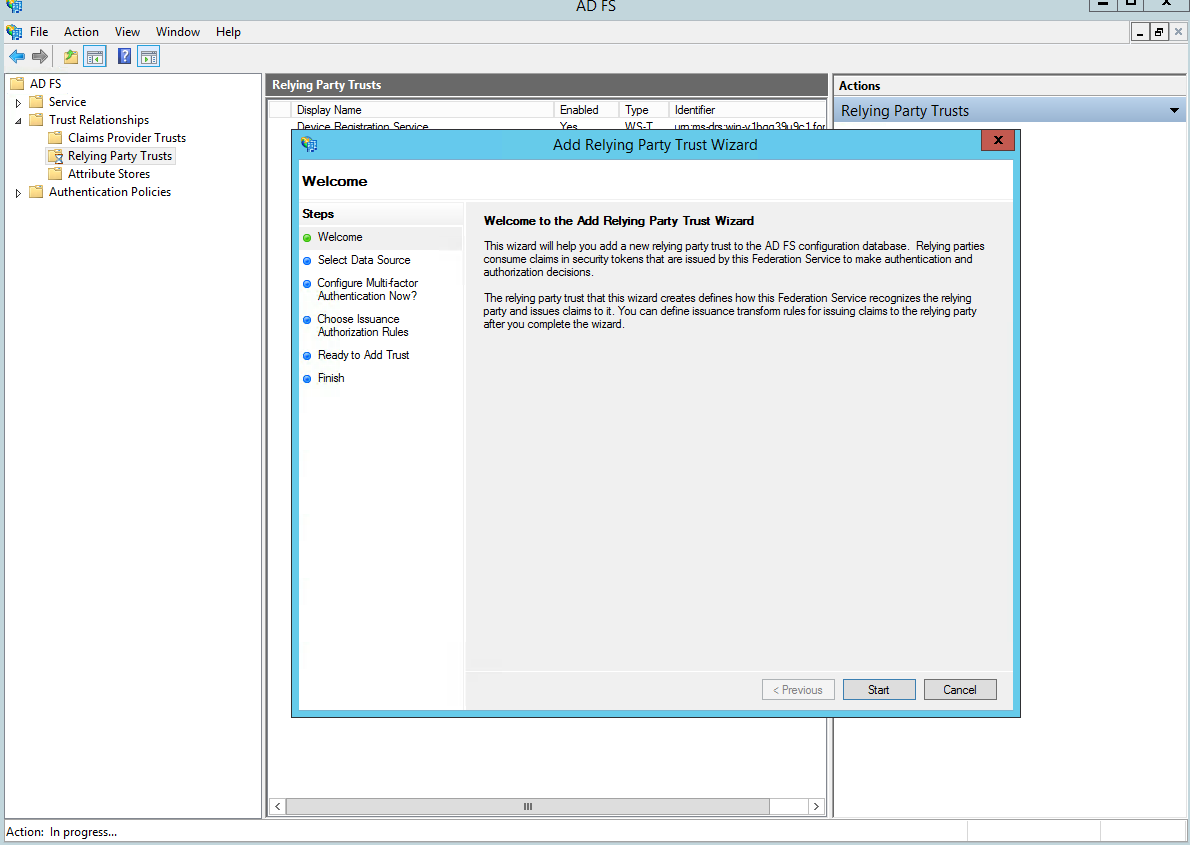
Add a new relying party trust.
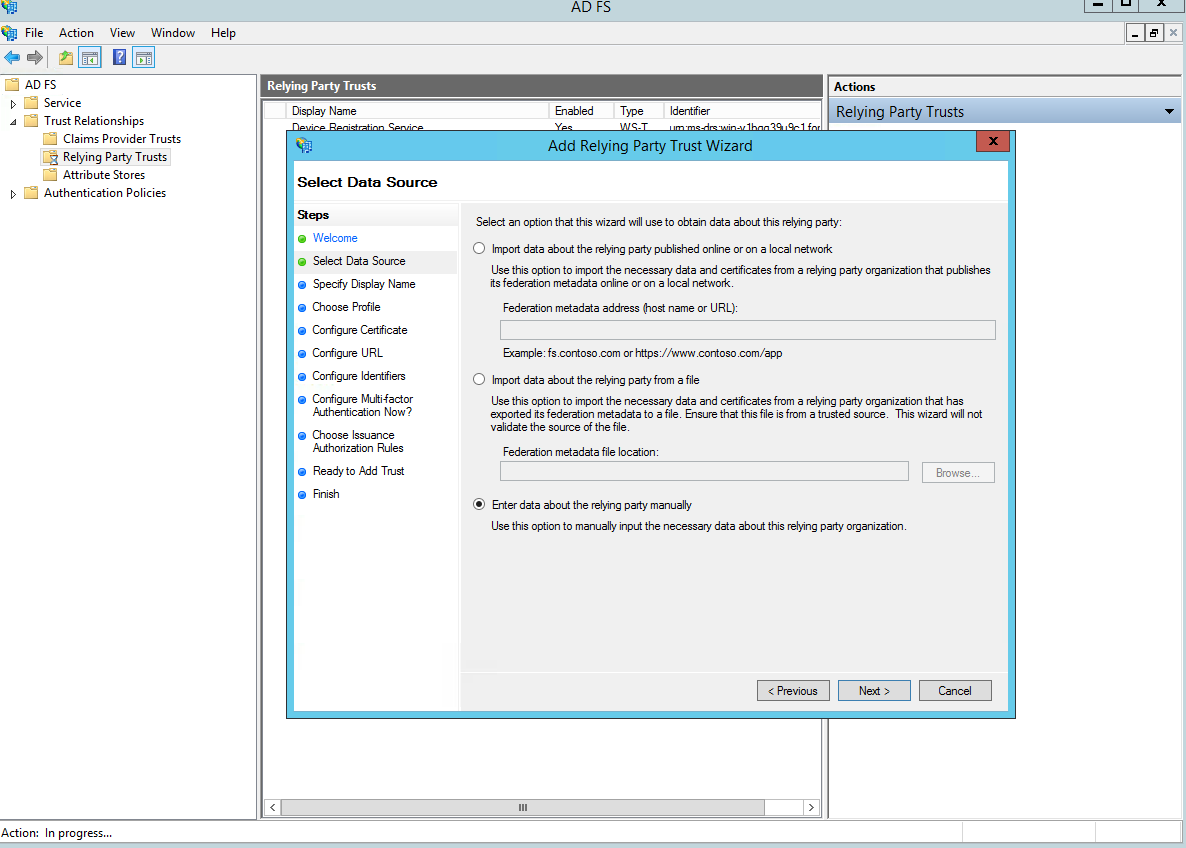
On the next screen, select Add data manually.
Specify your app display name, then choose the AD FS profile.
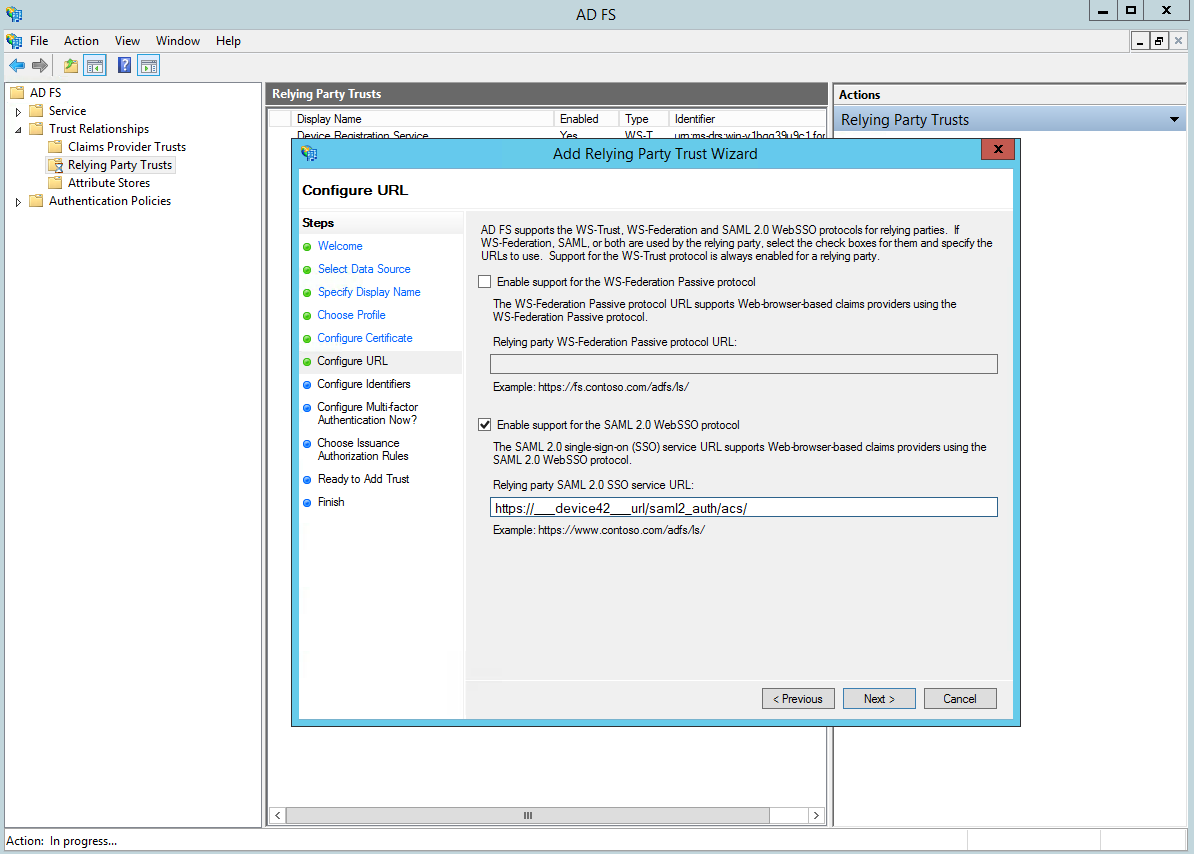
Select SAML 2.0 SSO and set the Device42 ACS URL: https://<device42-url>/saml2_auth/acs/.
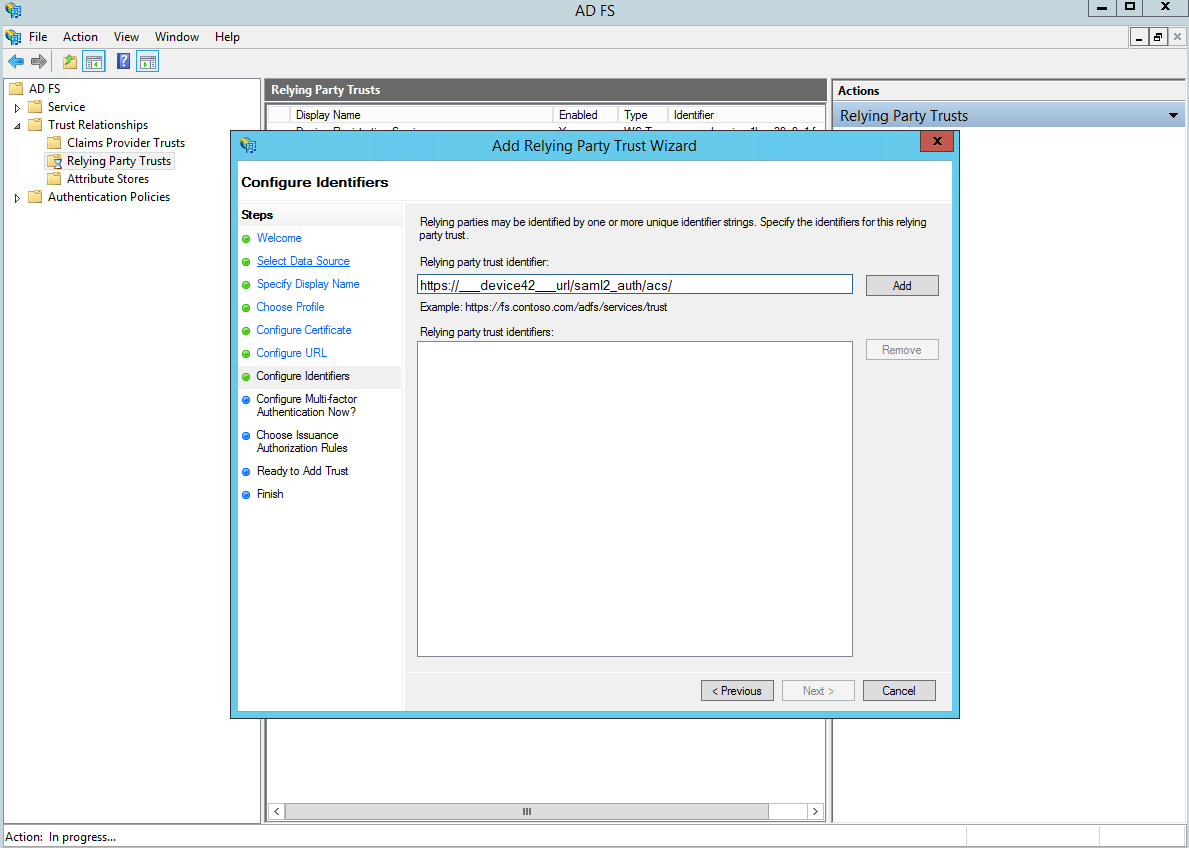
Set the identifier to https://<device42-url>/saml2_auth/acs/.
Select Permit all users.
In the claims section (click Edit claims on the relying party, or go there automatically after initial setup), add the following claims:
-
The
usernameclaim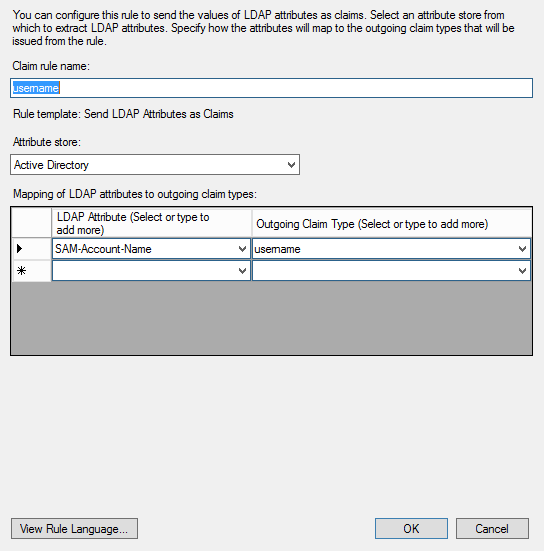
-
The
nameidclaim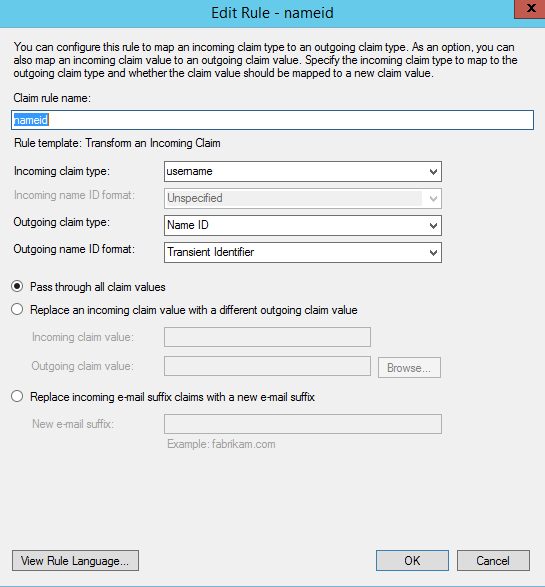
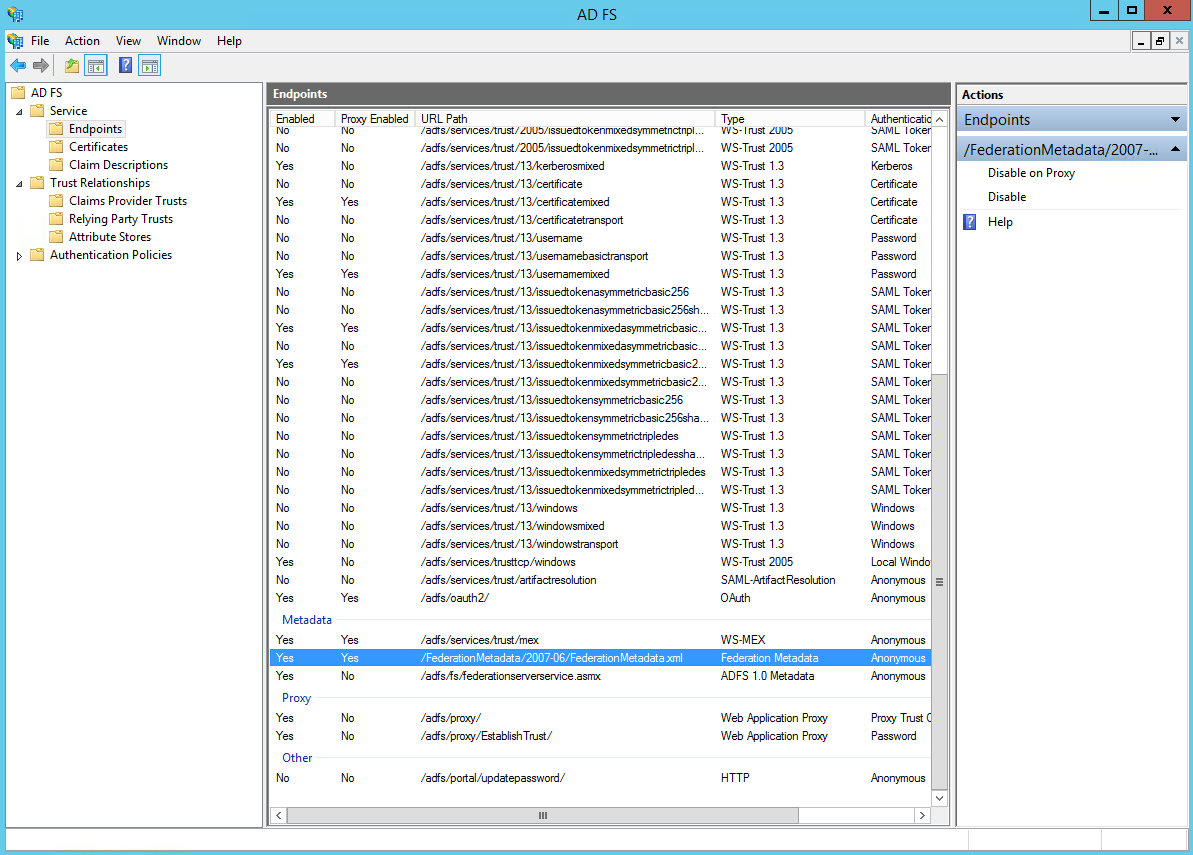
Copy the metadata URL from the endpoints.
If you receive a time synchronization error, run the following command in PowerShell:
Set-ADFSRelyingPartyTrust -TargetIdentifier "" -NotBeforeSkew 5
Configure Azure AD
-
Navigate to Azure AD in the Azure portal via Enterprise Applications > New Application > Create your own application. Give your app a name (the app shown in the screenshots is
Device42SAML) and select Integrate any other application..., then click Create.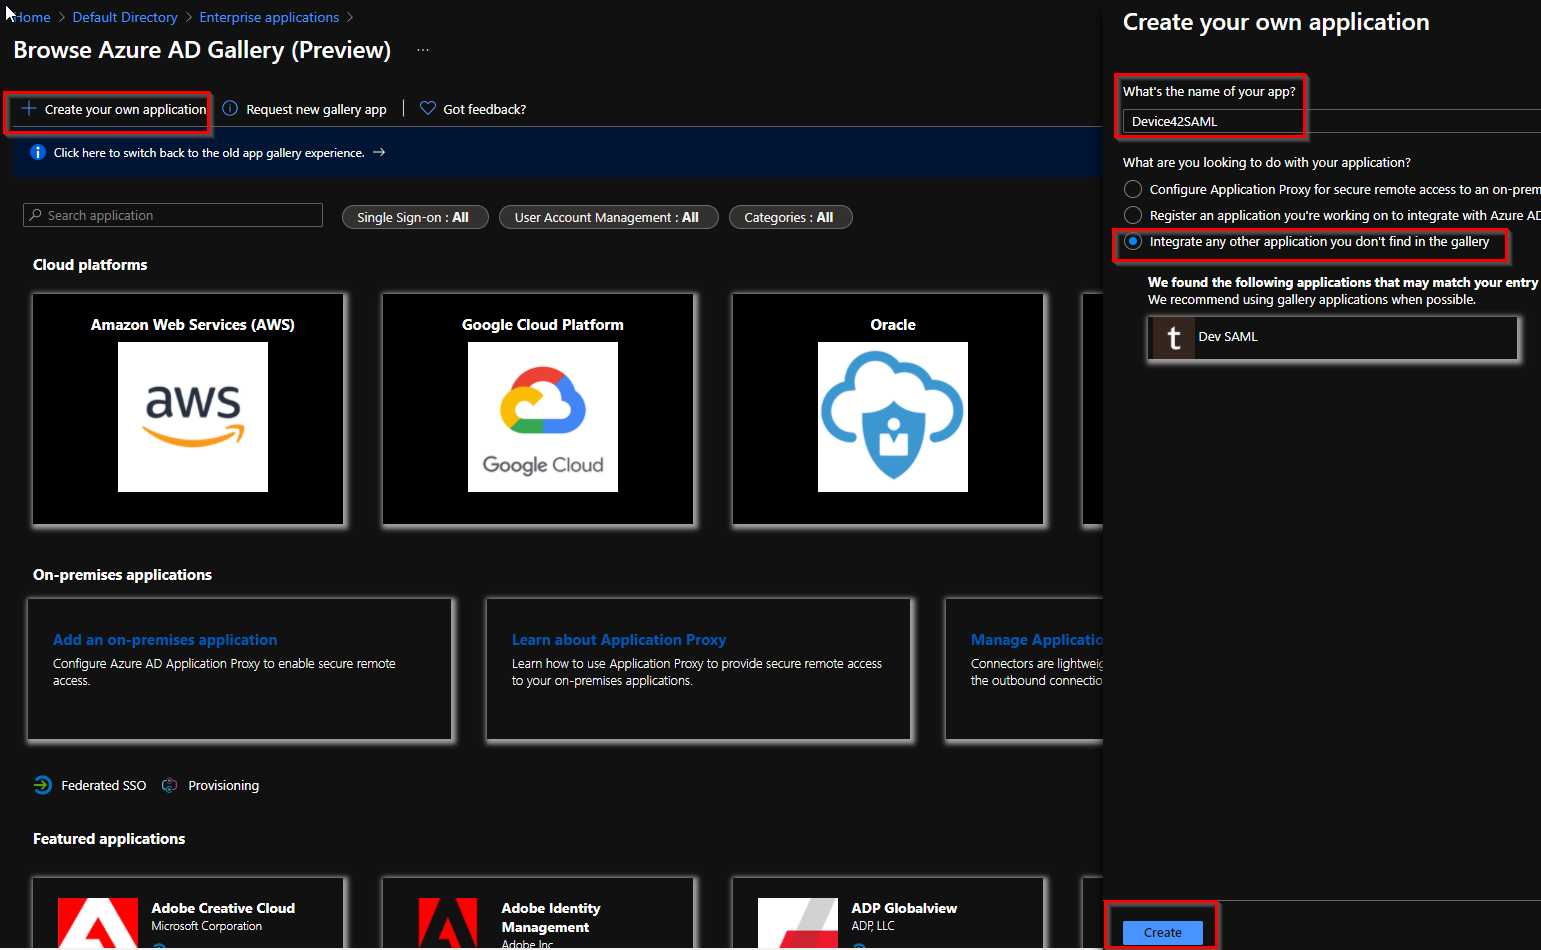
-
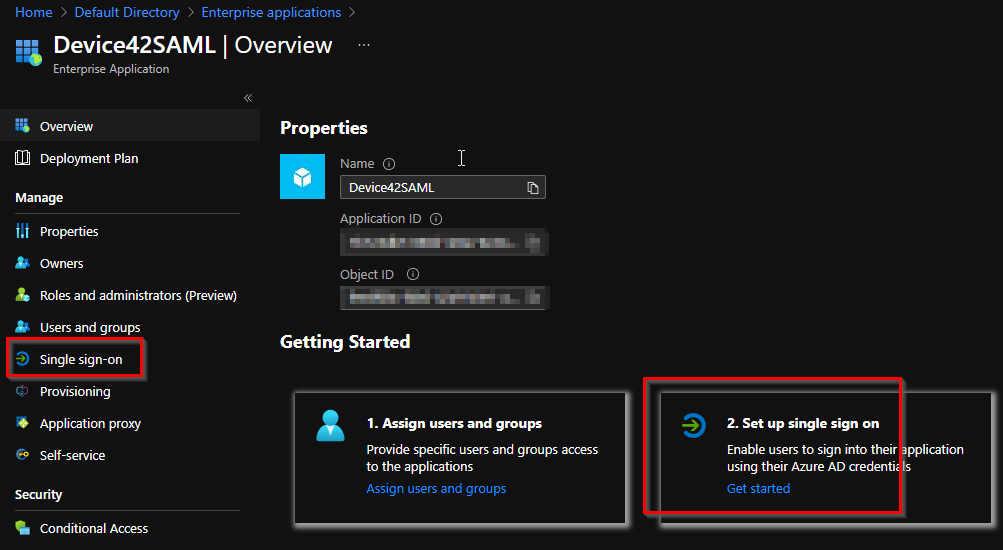
Open your newly created enterprise app. Under the Getting Started section, select Set up Single sign on, or select Single sign-on under Manage in the left-hand toolbar.
-
In the Basic SAML Configuration section, enter
https://<D42-FQDN-or-IP>/saml2_auth/acs/in both the Identifier (Entity ID) and Reply URL (Assertion Consumer Service URL) fields.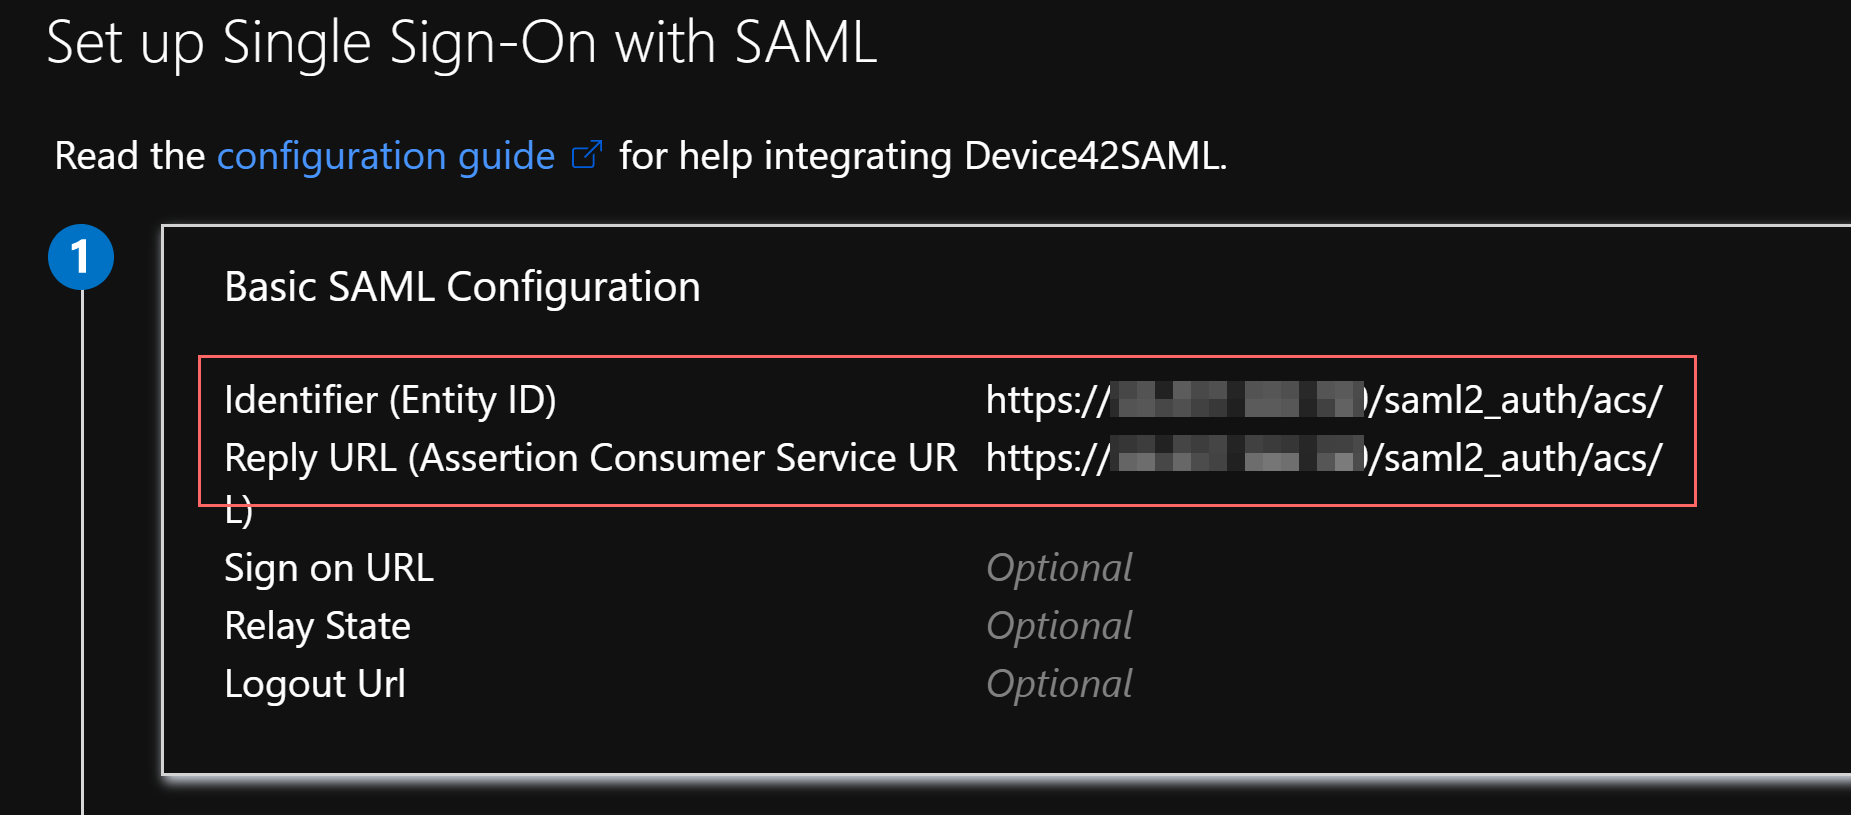
-
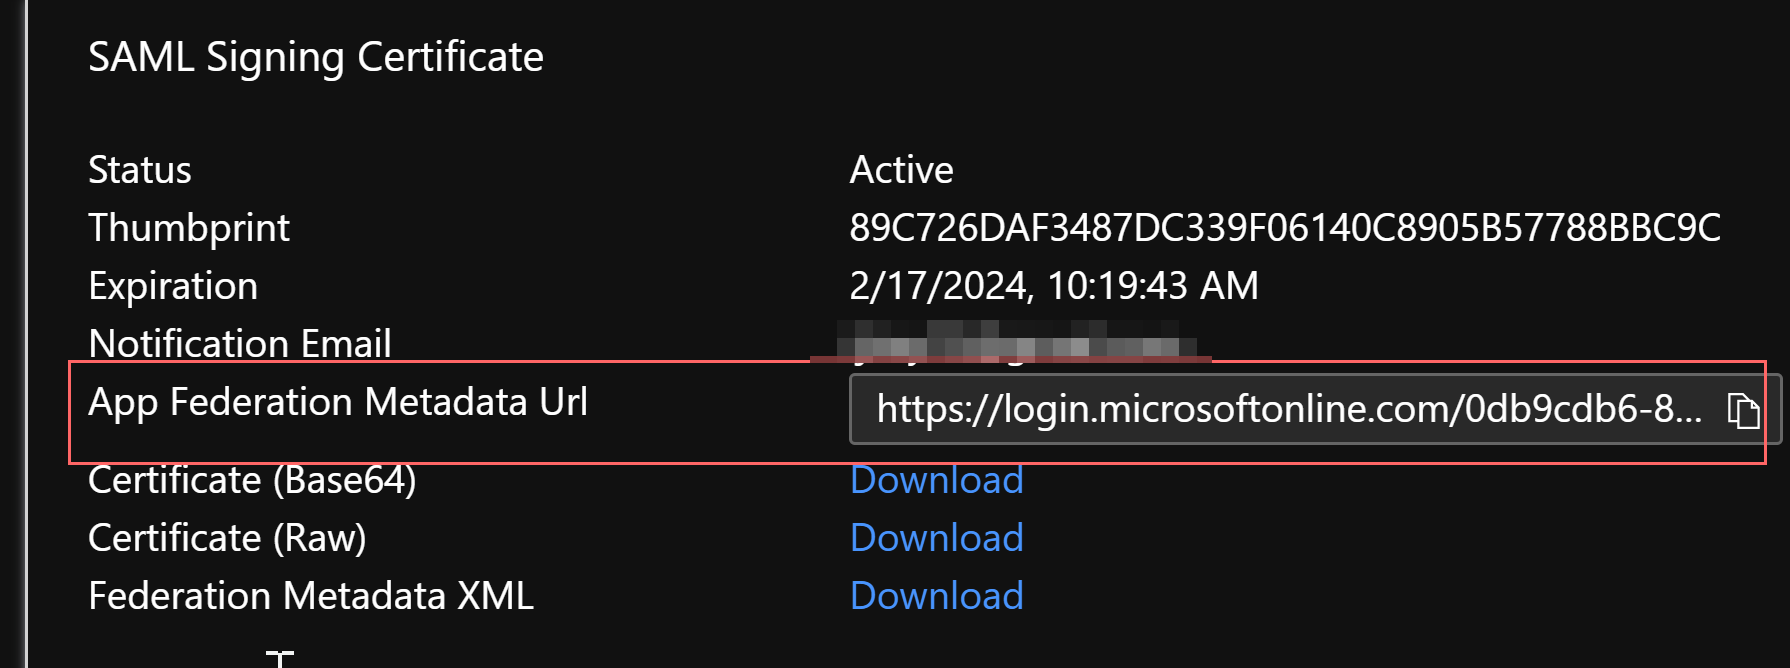
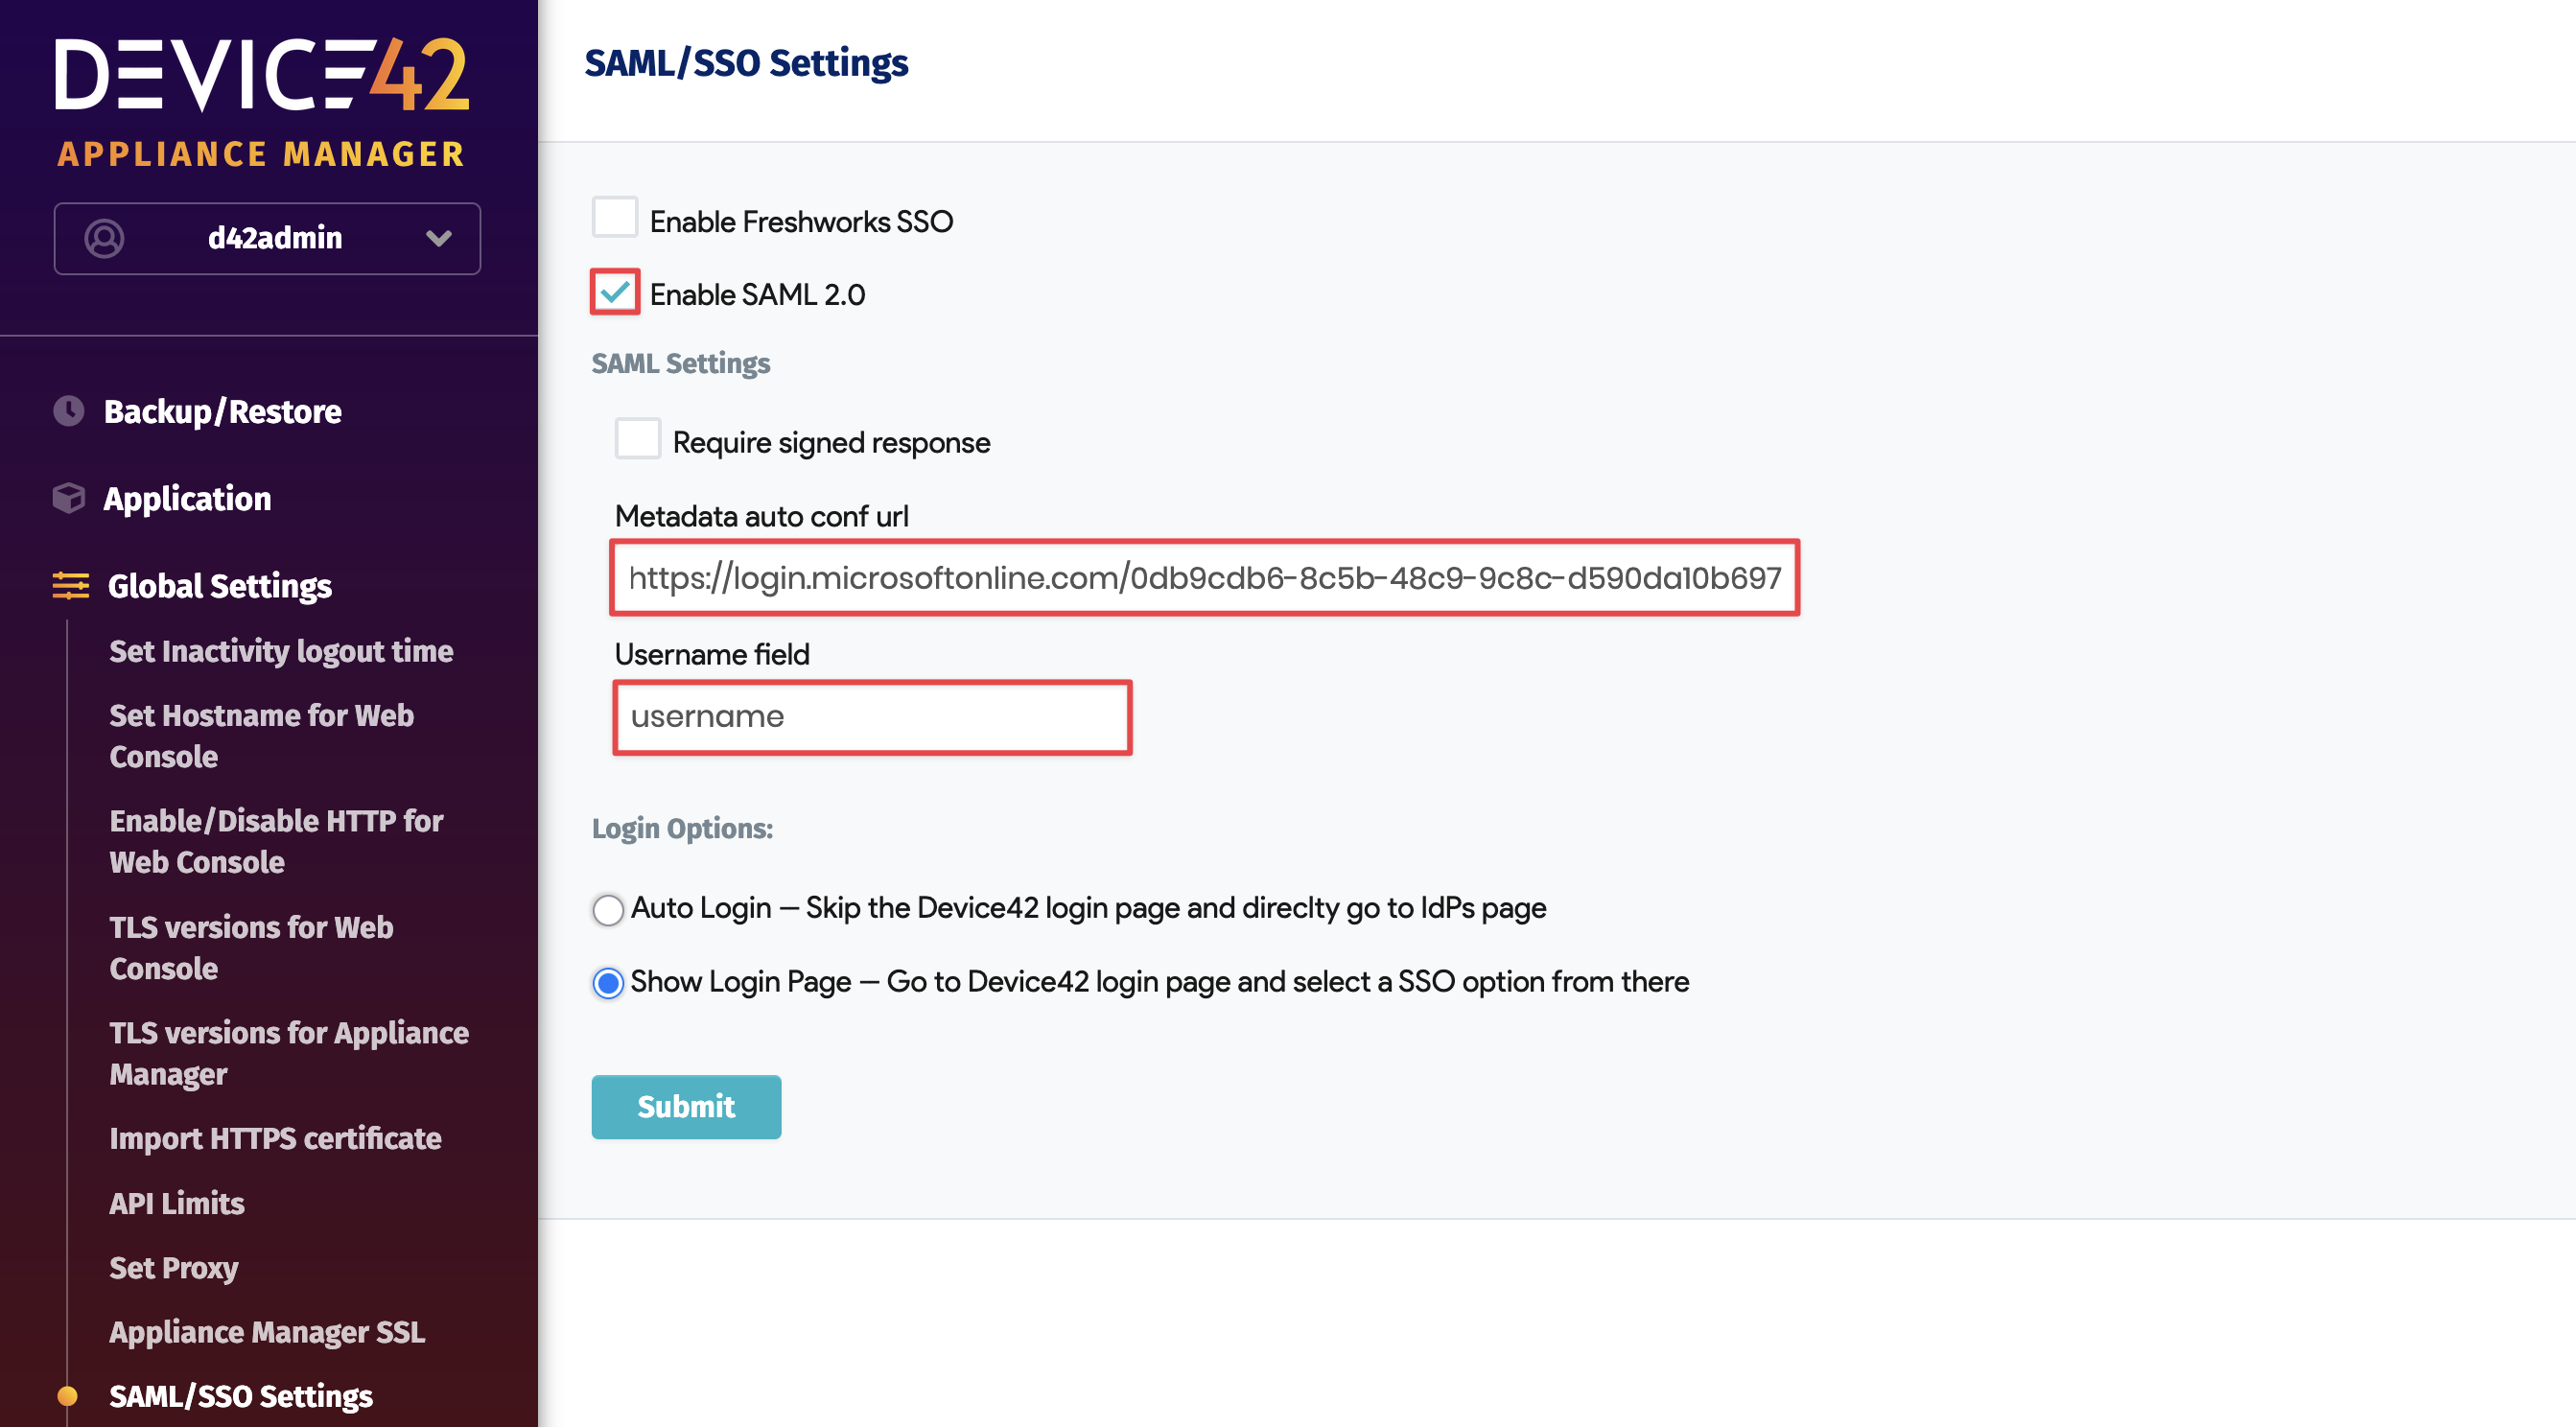
Navigate to the Device42 Appliance Manager and go to Global Settings > SAML/SSO Settings. Copy the App Federation Metadata URL from the SAML Signing Certificate section of your Azure AD enterprise app, and paste it into the Metadata auto conf url field.
-
In the SAML 2.0 Settings of the Appliance Manager, enter
usernameor another appropriate SAML attribute in the Username field. Unless you have signed responses configured on the Azure AD provider side, leave the Require signed response box unchecked — otherwise, you'll get an unavailable page error.Azure's built-in claims like
emailaddressmay not work with Device42, even though they appear in the Azure interface, because the built-in claim uses a namespace URI format. To resolve this, create a new claim foremailaddressin your Azure AD enterprise app, map the claim to the user attribute, and use the custom claim name in the Device42 SAML Username field.Save and restart the appliance from the VM console menu. You may want to complete steps 6 and 7 before saving or restarting, so that you can still log in to Device42 with the local admin account.
-
Assign users or groups to the SAML enterprise app in Azure AD — these should be the users or groups you want to allow to authenticate into Device42 via SAML.
-
For each user associated with the enterprise app in Azure AD, create the user in Device42 using the appropriate Azure AD value with a placeholder password. The integration does not create users directly from Azure AD, so users must exist in Device42 before they can authenticate via Azure AD.
-
Once the above steps are complete, you can log in to your Device42 instance with your Azure AD credentials.
Configure Okta
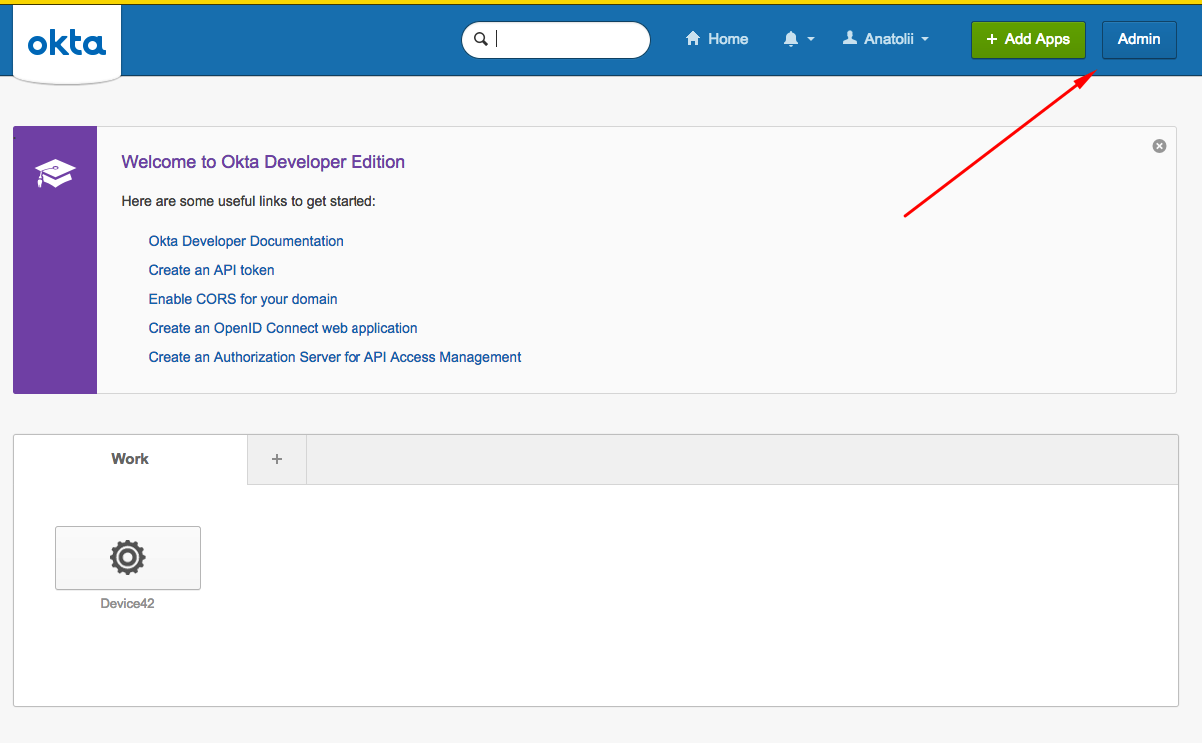
In Okta, click the Admin button.
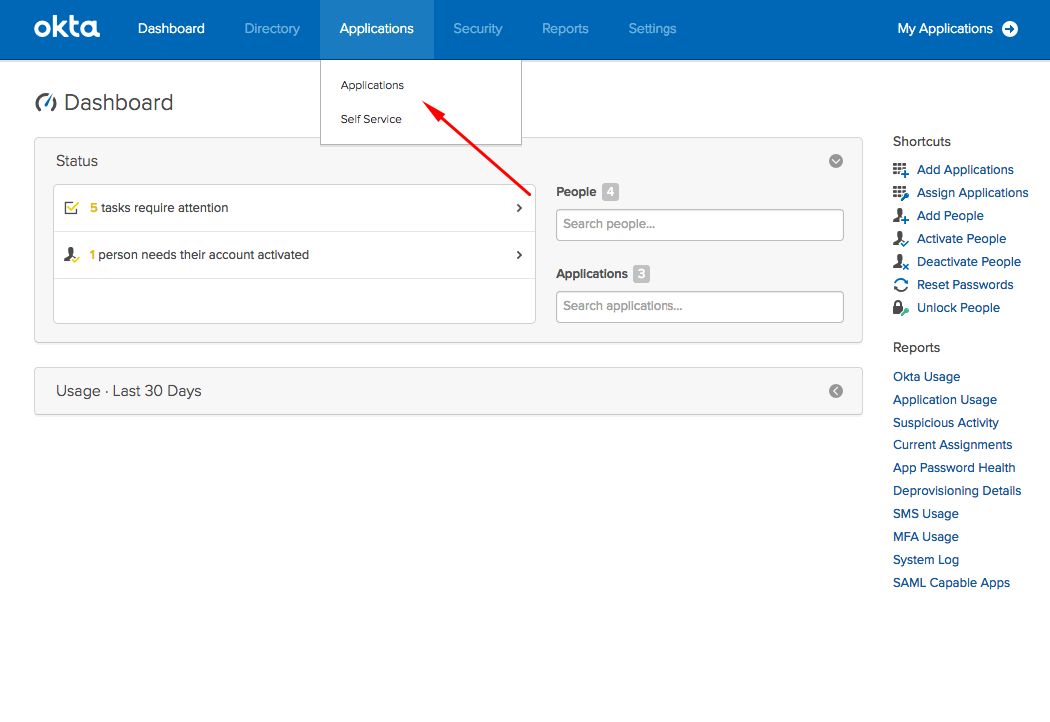
Click the Applications button.
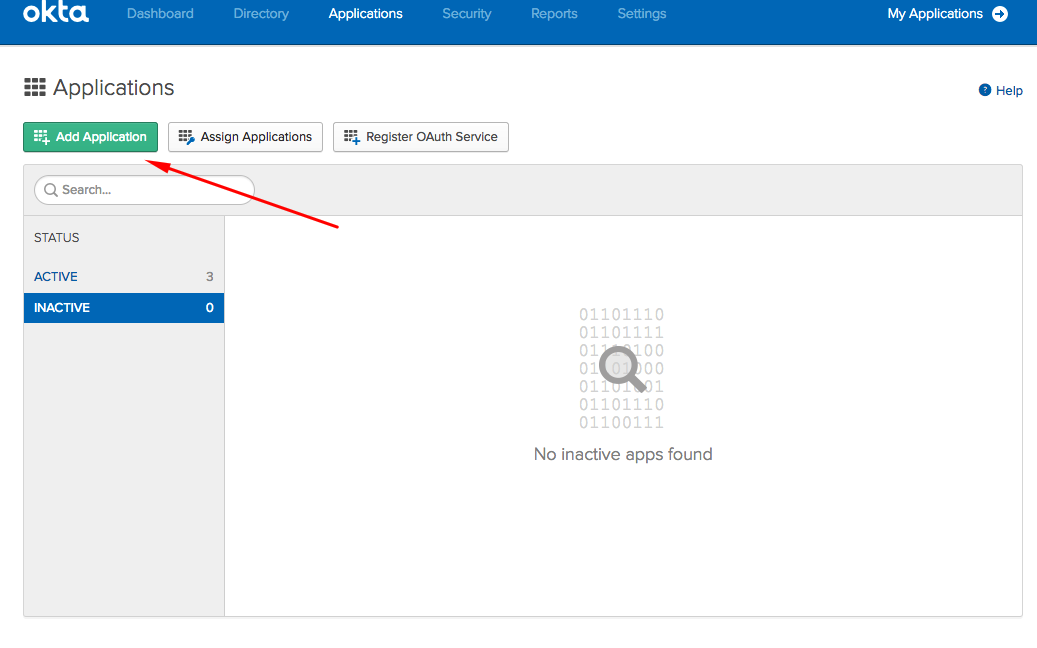
On the Applications page, click Add Application.
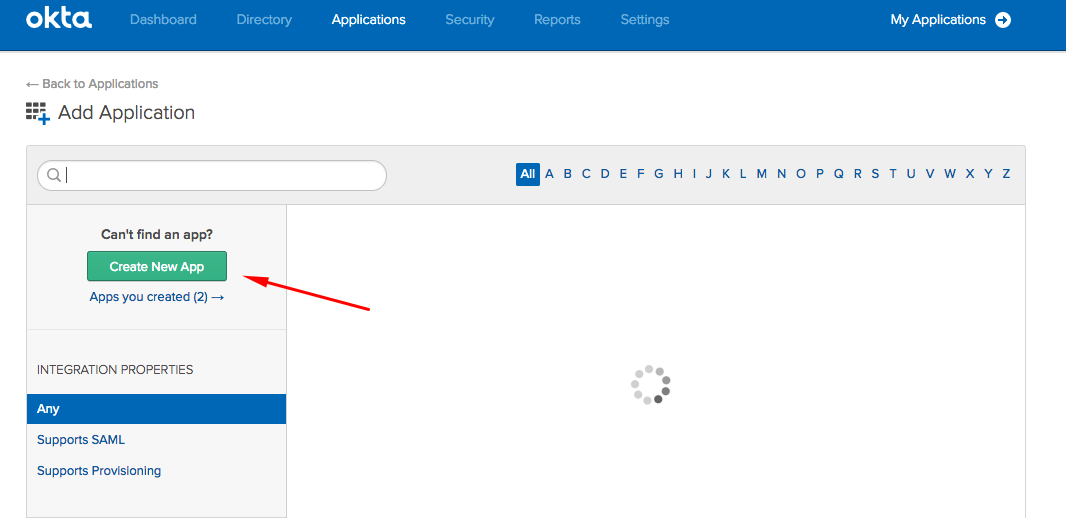
Choose Create New App.
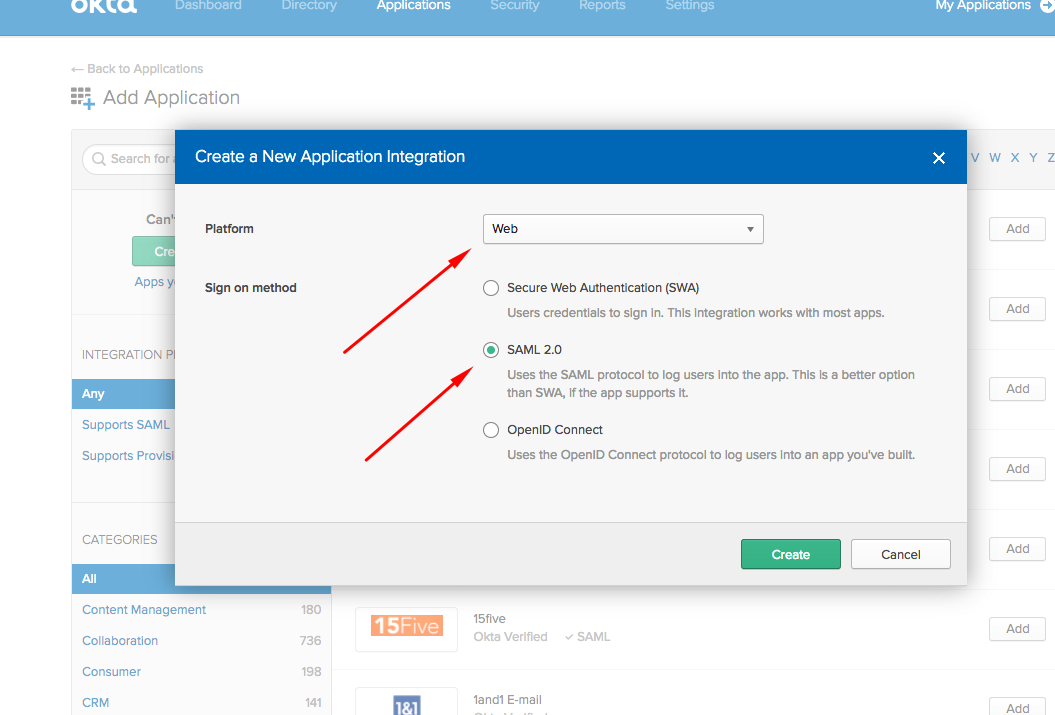
Select Web as the Platform and select SAML 2.0 as the Sign on method.
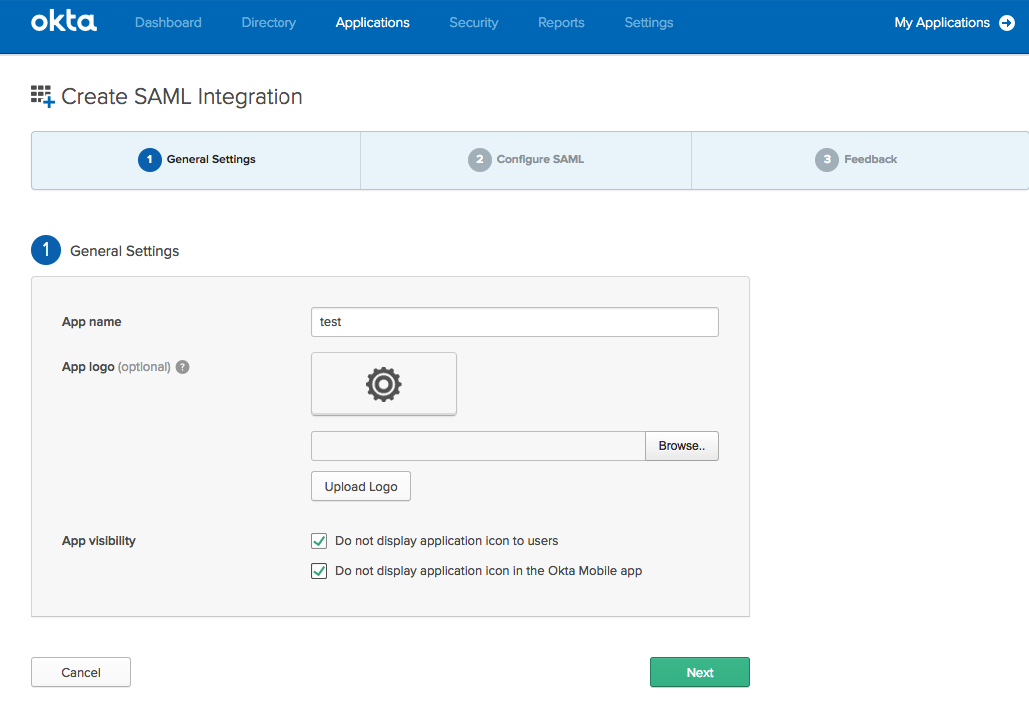
Set your application preferences and click Next.
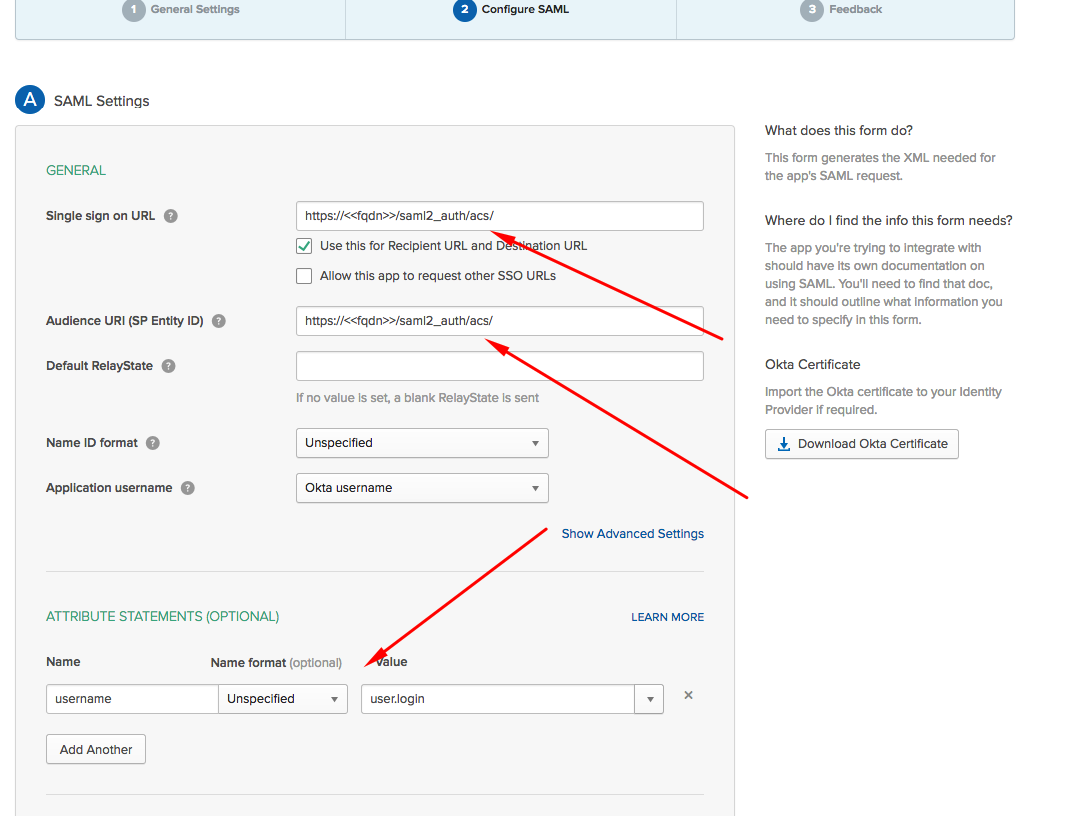
Set up the ACS URL and field mapping. Enter https://<device42-address>/saml2_auth/acs/ for both the Single sign on URL and the Audience URI (SP Entity ID) fields. In the Attribute Statements section, the Value should be the same AD or LDAP attribute your users will use to log in to Device42. Note the attribute statement Name, as it is required in the Device42 Appliance Manager configuration.
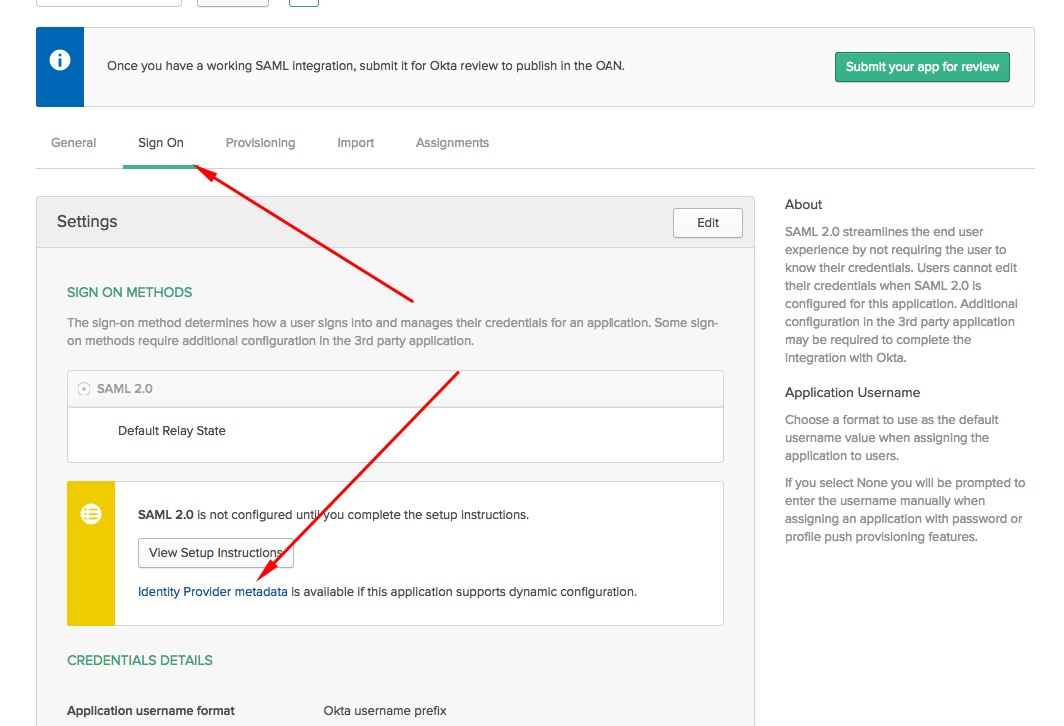
Click Next and finish the setup. Open your application settings, go to the Sign On tab, and copy the URL of the Identity Provider metadata link. You will use this URL as the Metadata auto conf url in the Device42 Appliance Manager.
Configure OneLogin
To configure SAML 2.0 integration between OneLogin and Device42, create a SAML2 connector app in OneLogin and add users to it so they can log in via their OneLogin accounts.
Create the SAML2 Connector App
-
Log in to your OneLogin account.
-
Create an app connector:
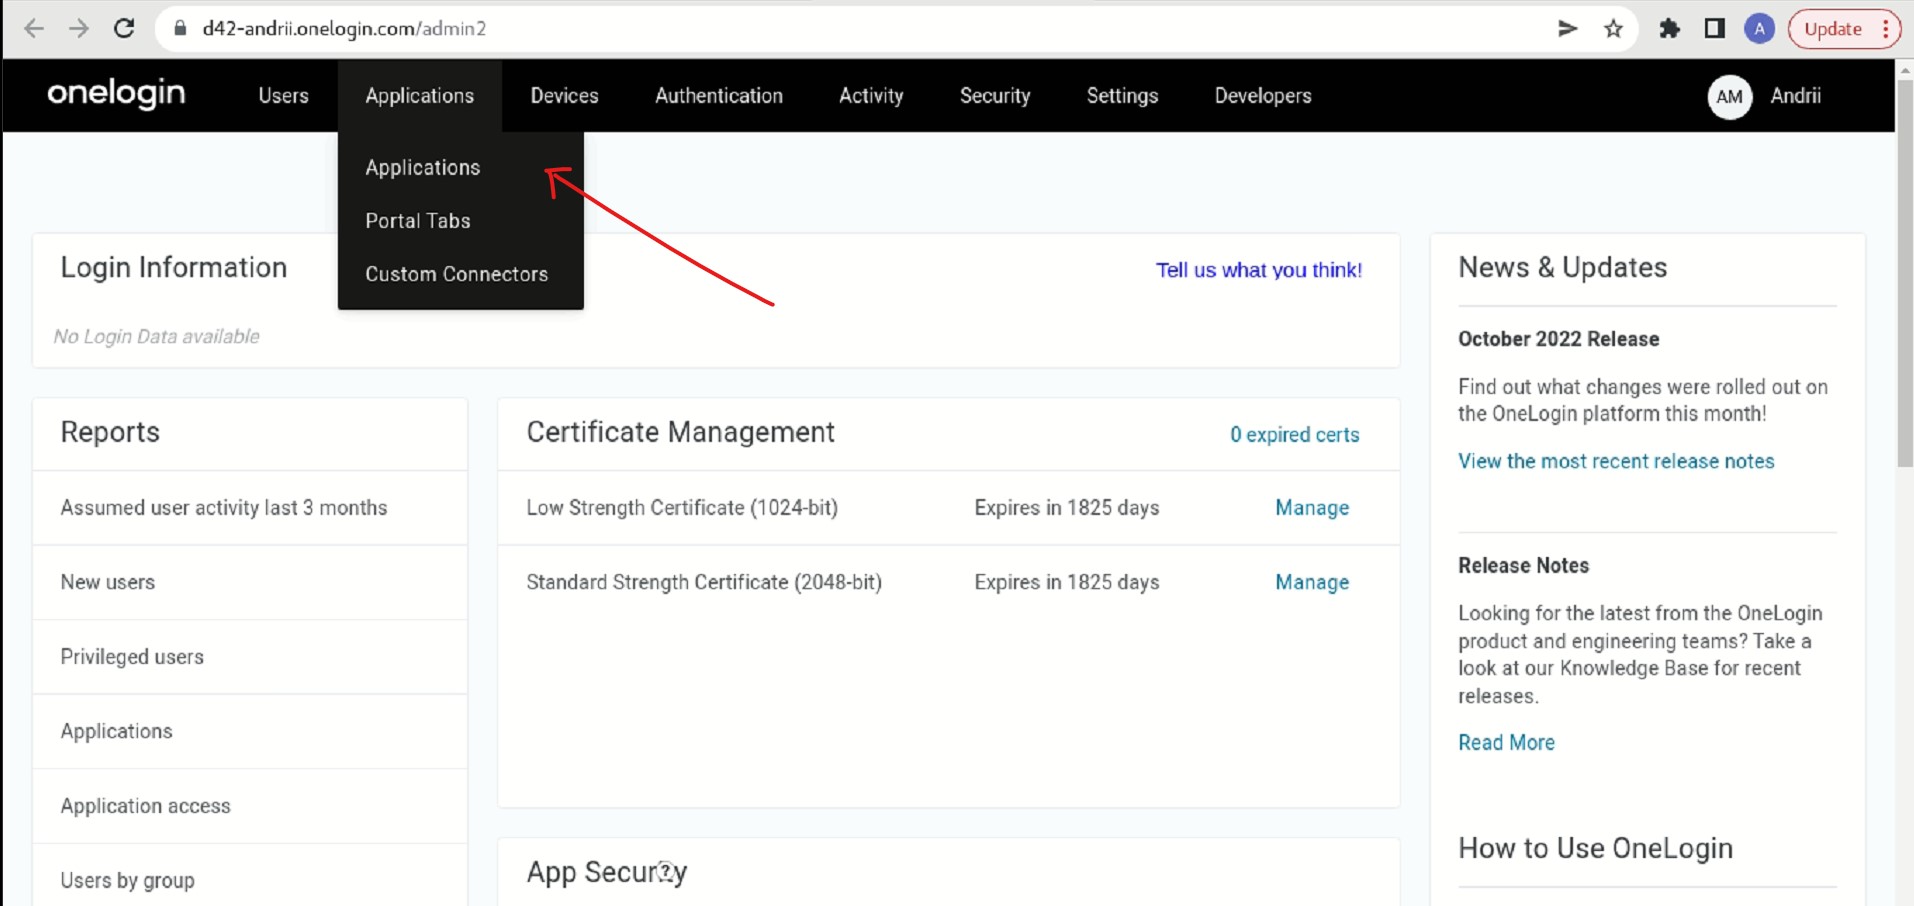
- Go to Applications > Applications.
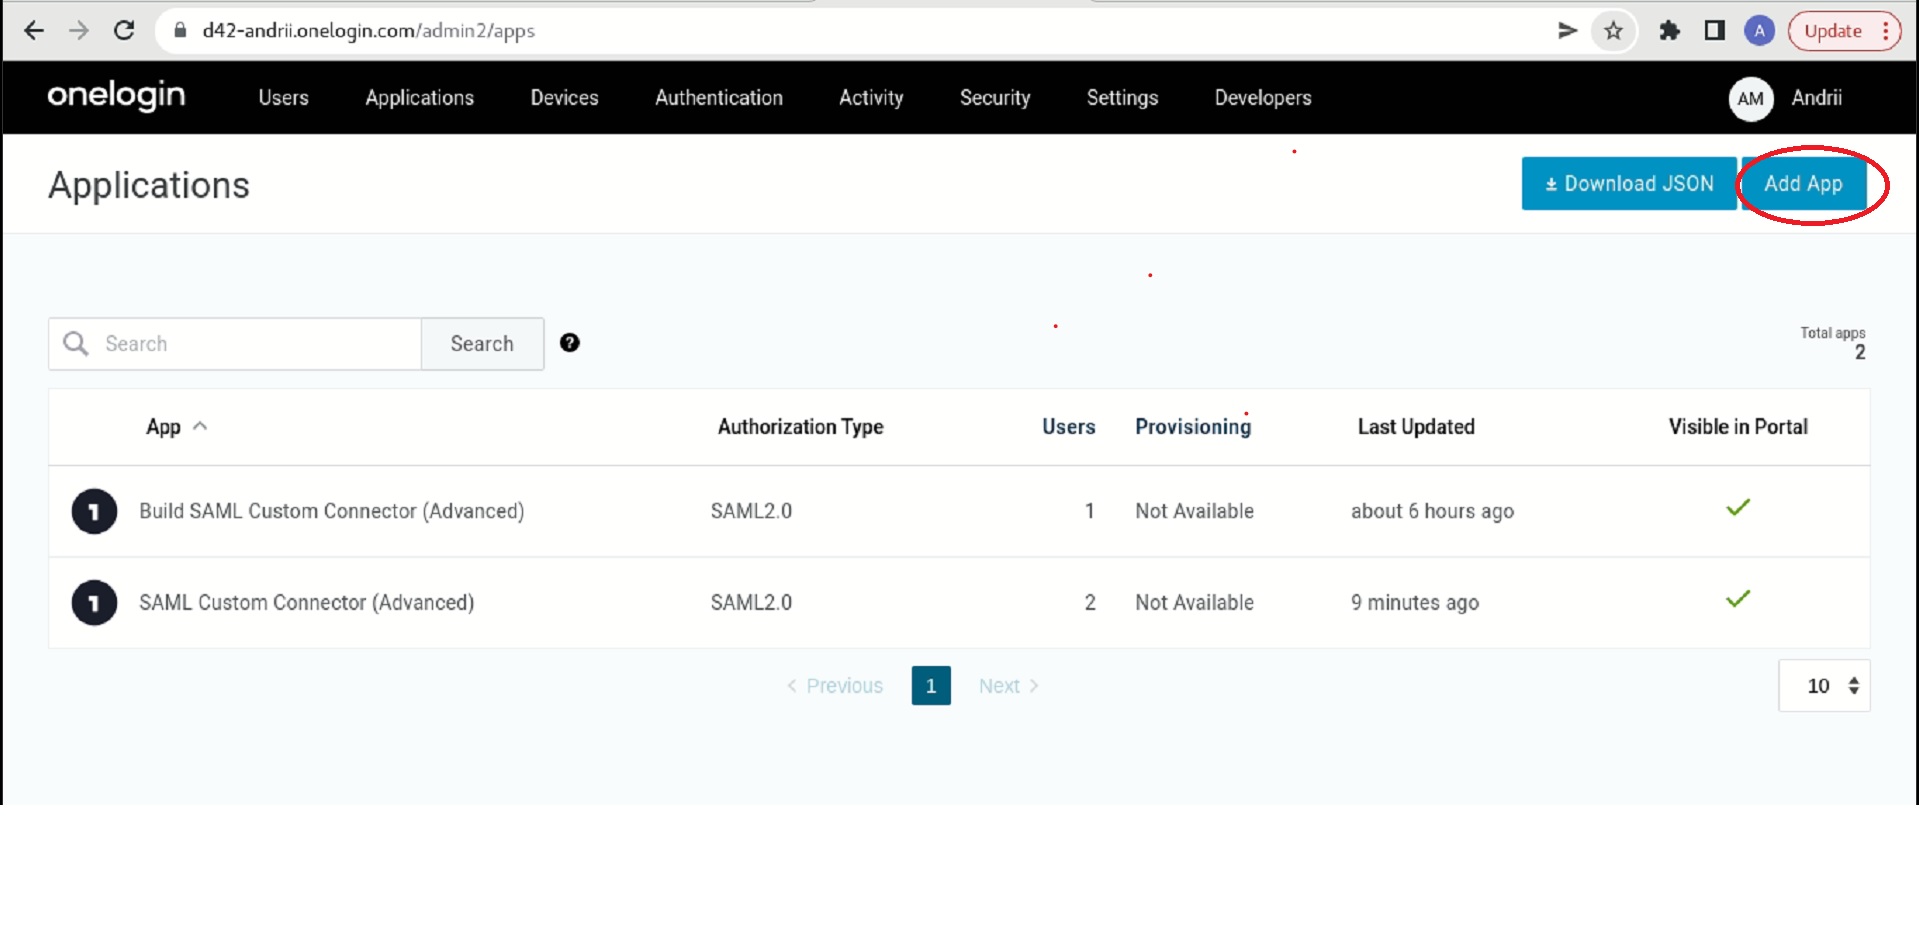
- Click Add App.
-
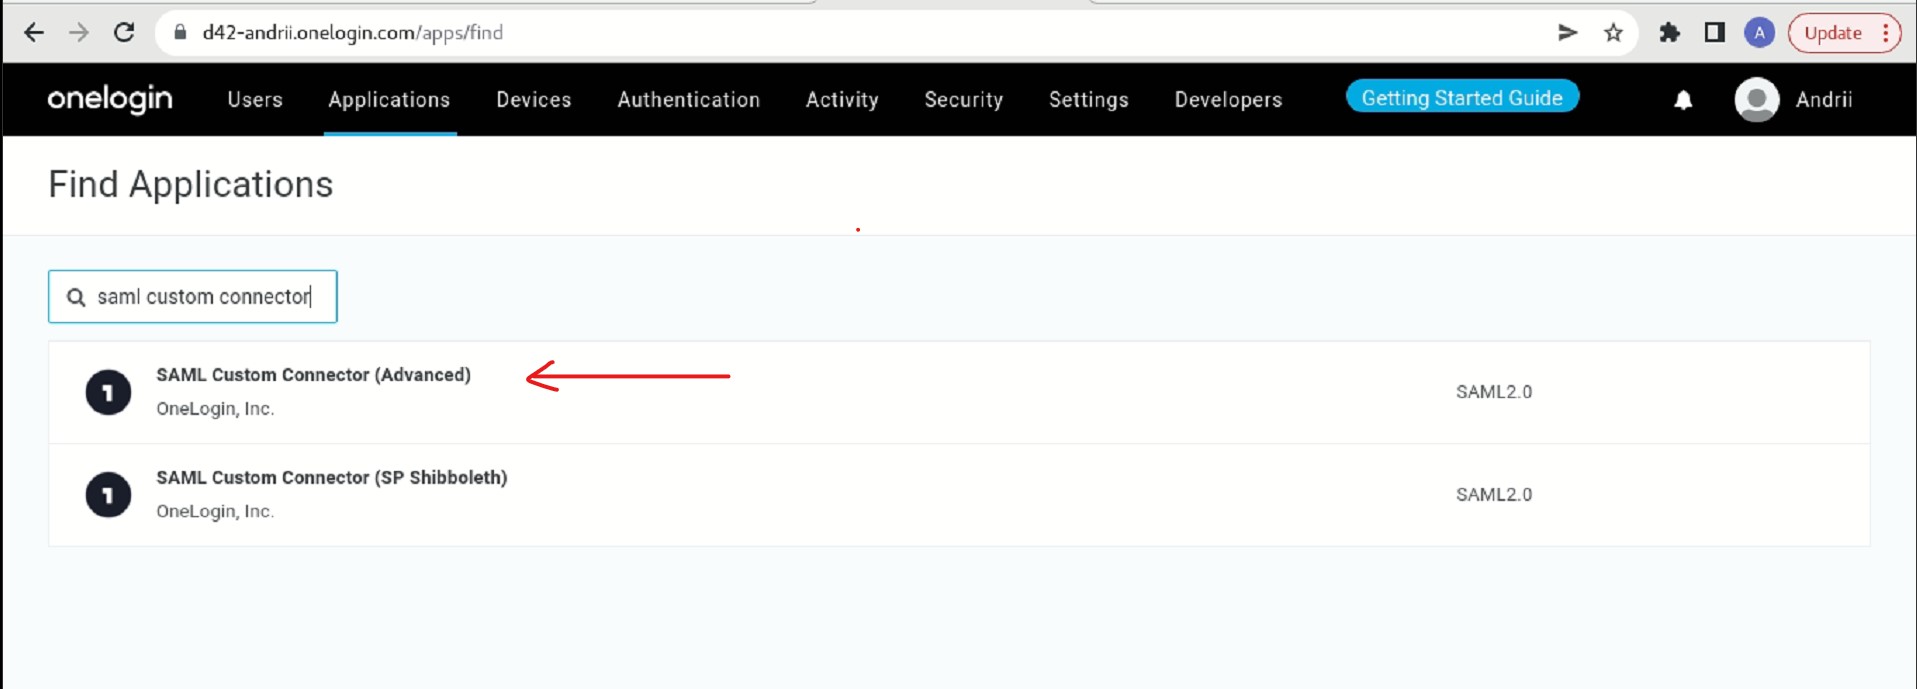
Search for SAML custom connector and select SAML Custom Connector (Advanced).
-
Enter a display name and click Save.
-
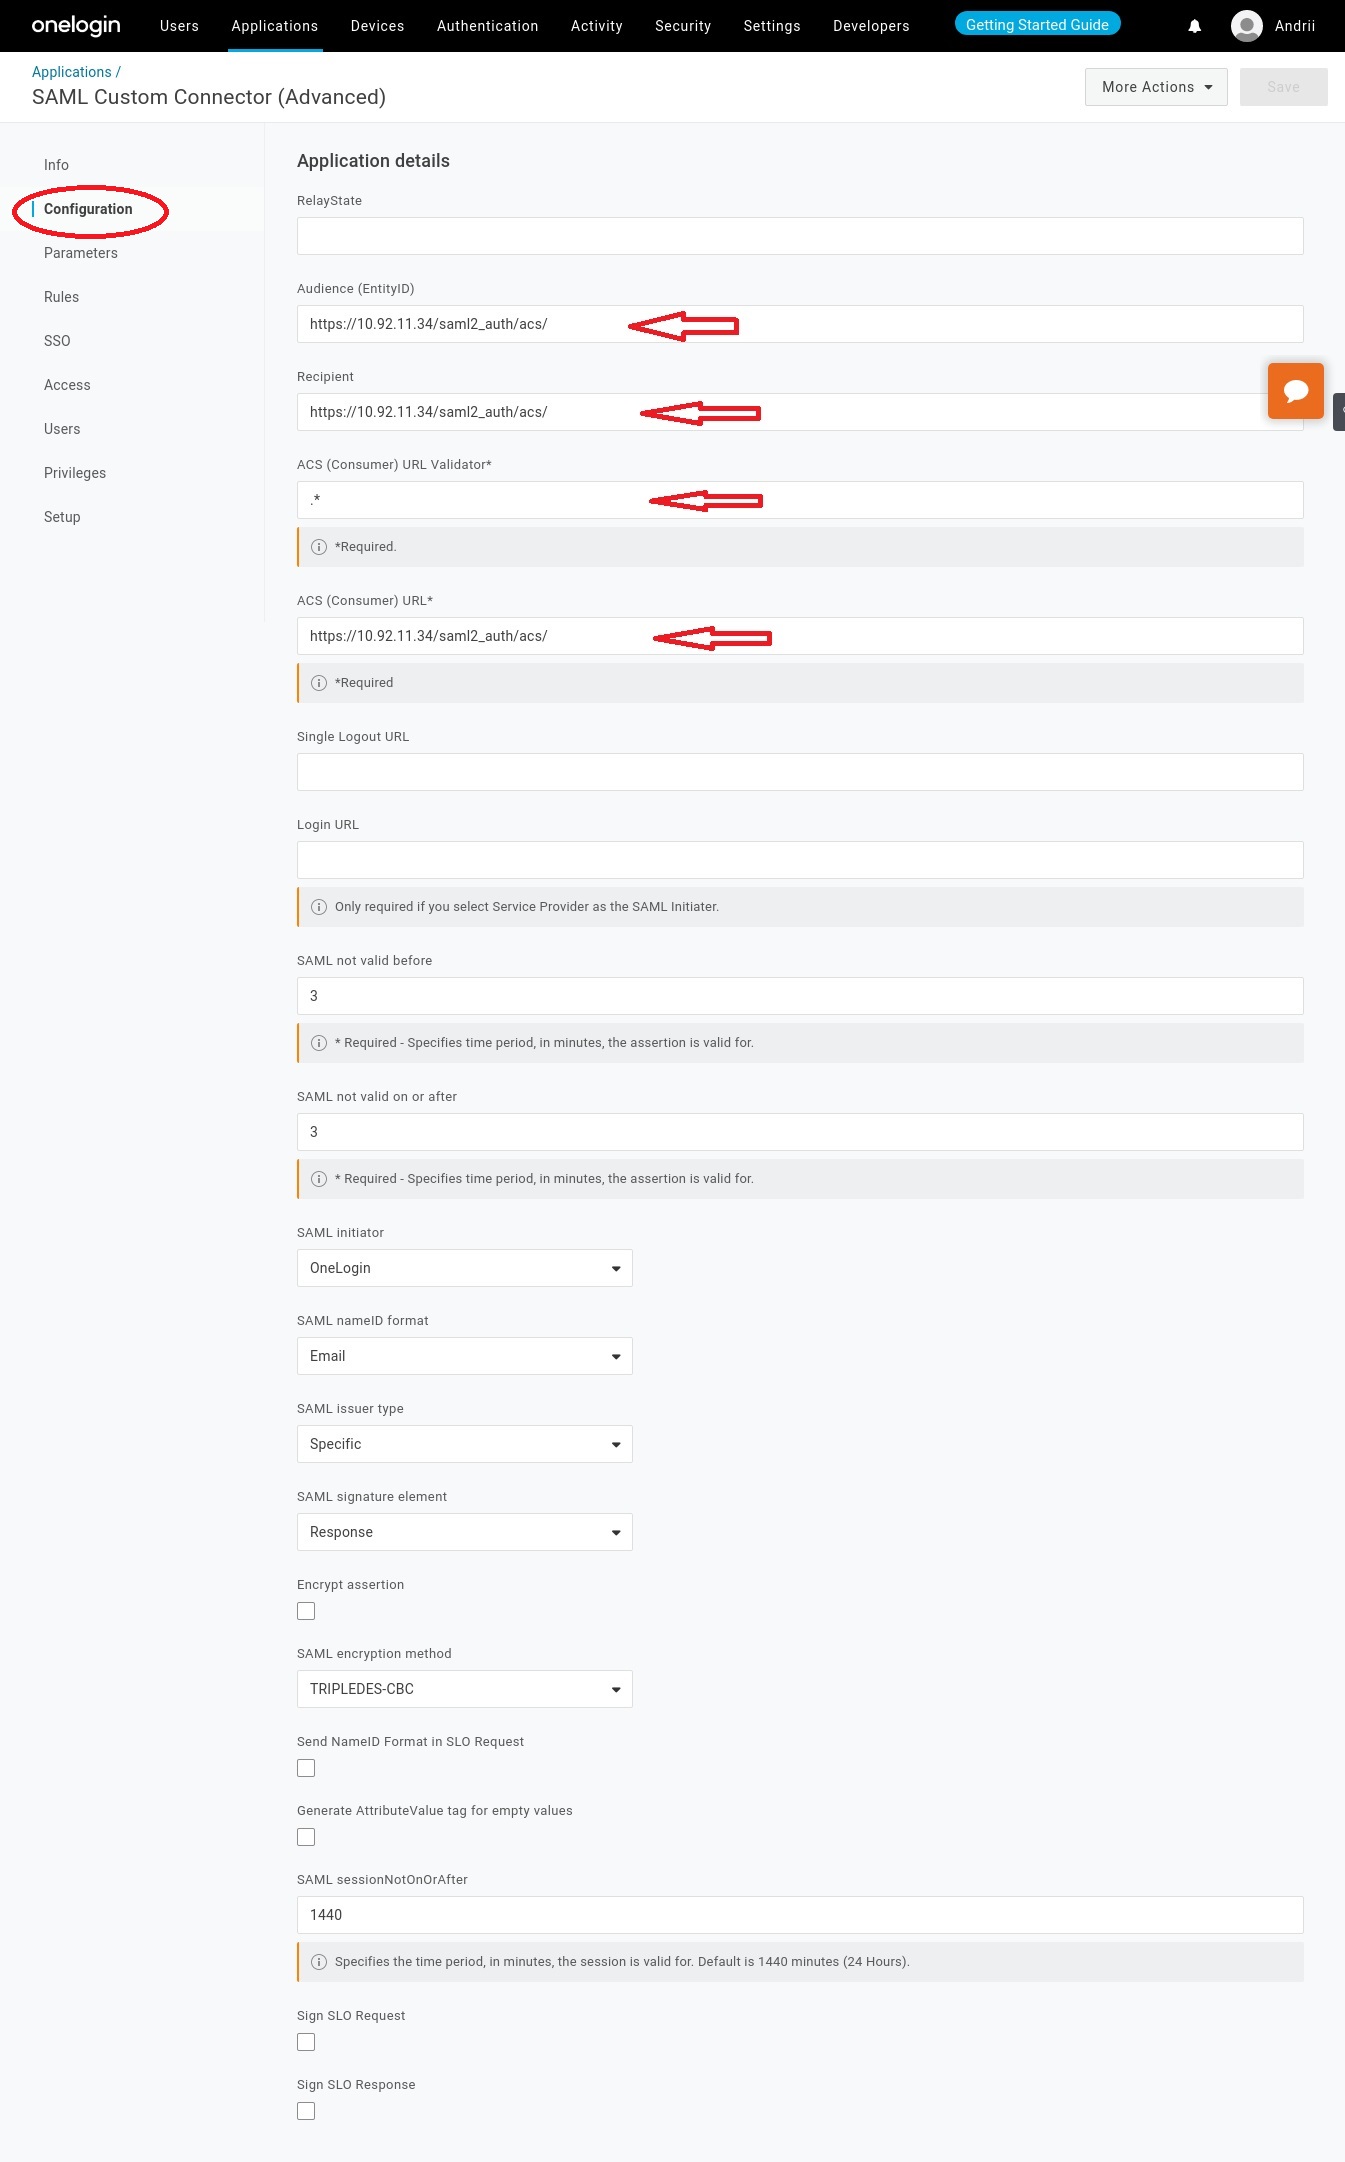
Go to the Configuration tab and fill in the following fields, then click Save:
- Audience (EntityID), Recipient, and ACS (Consumer) URL:
https://<fqdn>/saml2_auth/acs/ - ACS (Consumer) URL Validator:
.*
- Audience (EntityID), Recipient, and ACS (Consumer) URL:
-
Go to the Parameters tab and add a new field by clicking the plus icon.
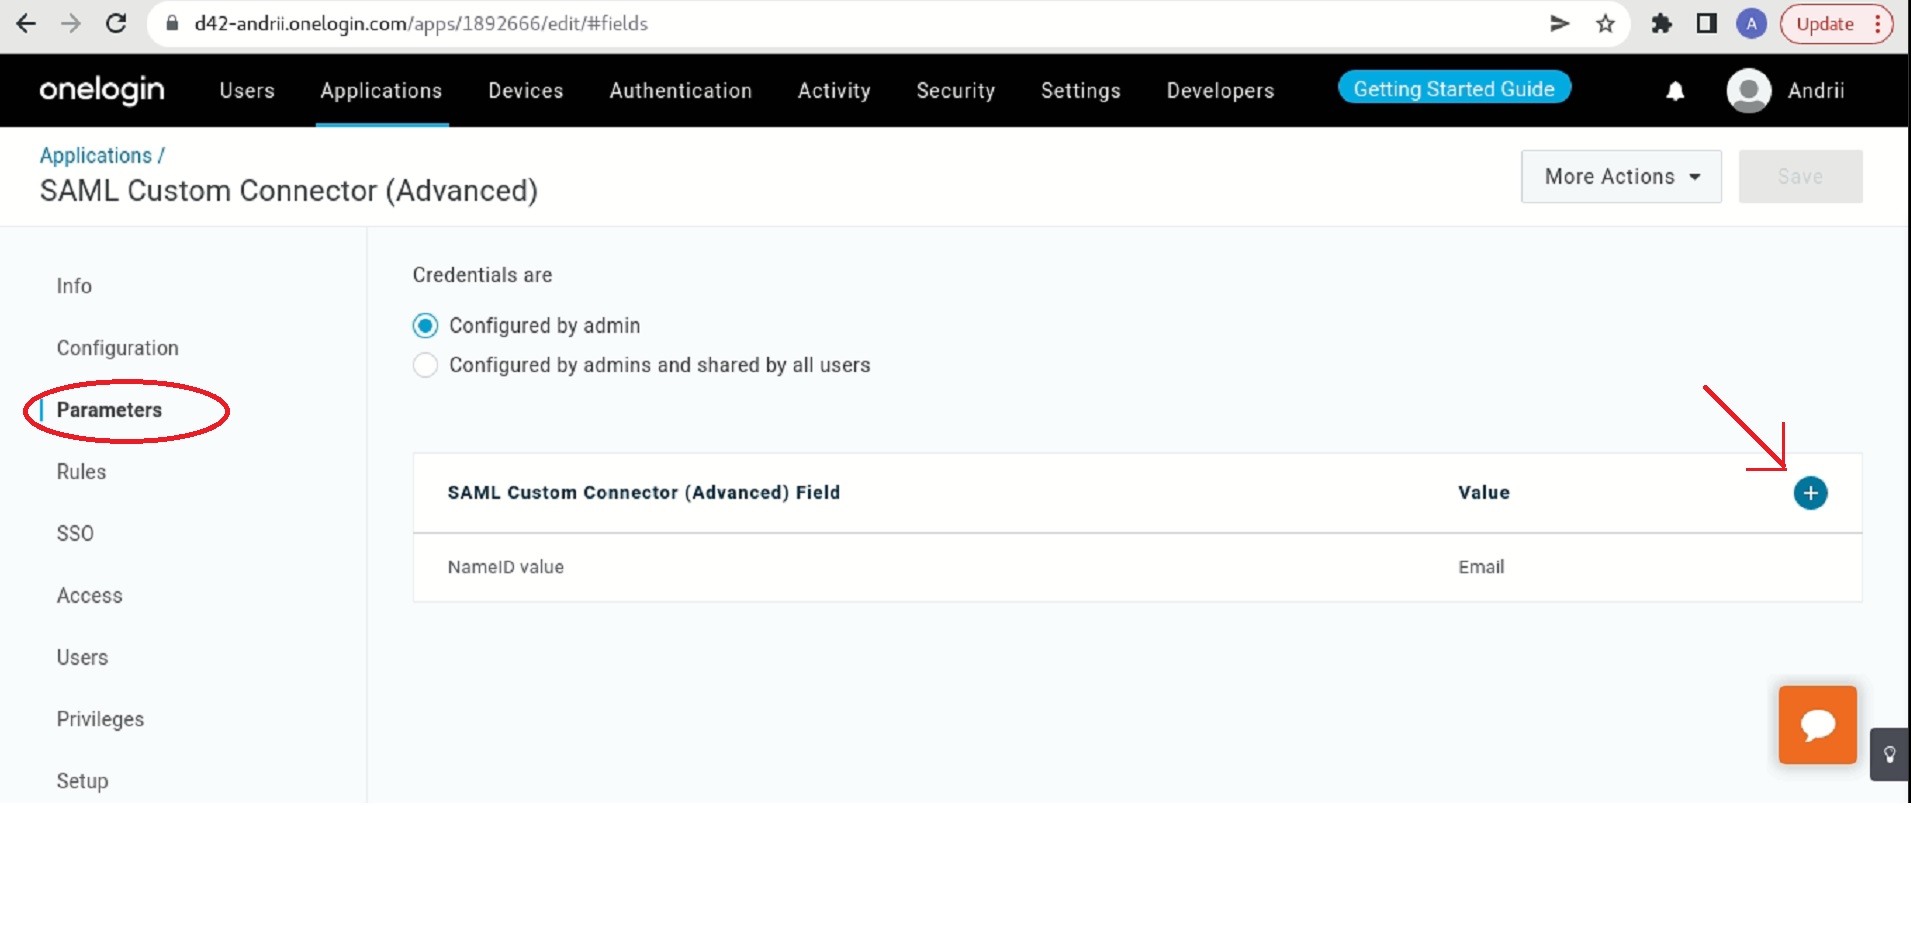
- Enter
usernameas the Field name. - Select the Include in SAML assertion checkbox.
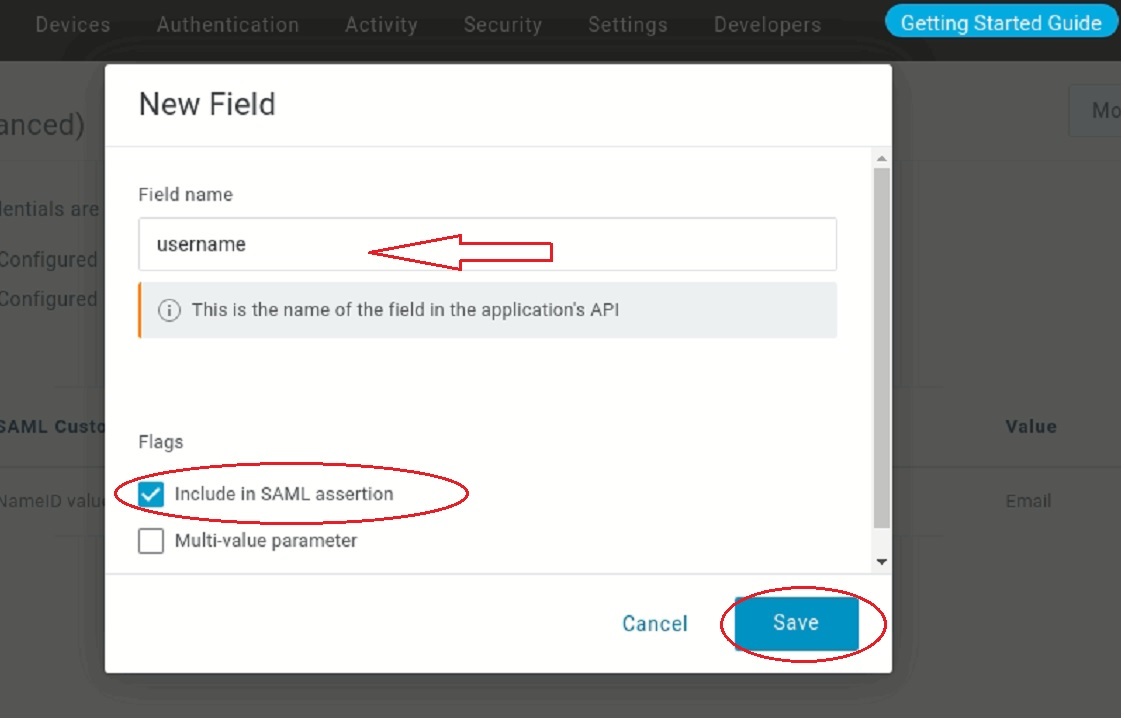
- Click Save.
- Choose Username from the dropdown as the Value.
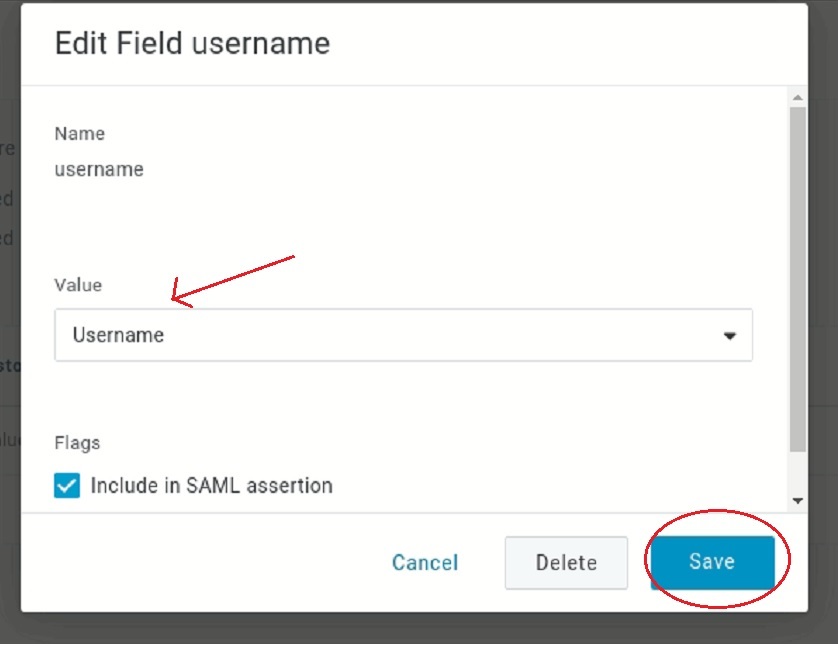
- Click Save.
- Enter
-
Go to the SSO tab and copy the Issuer URL. You will enter this in the Metadata auto conf url field in Device42.
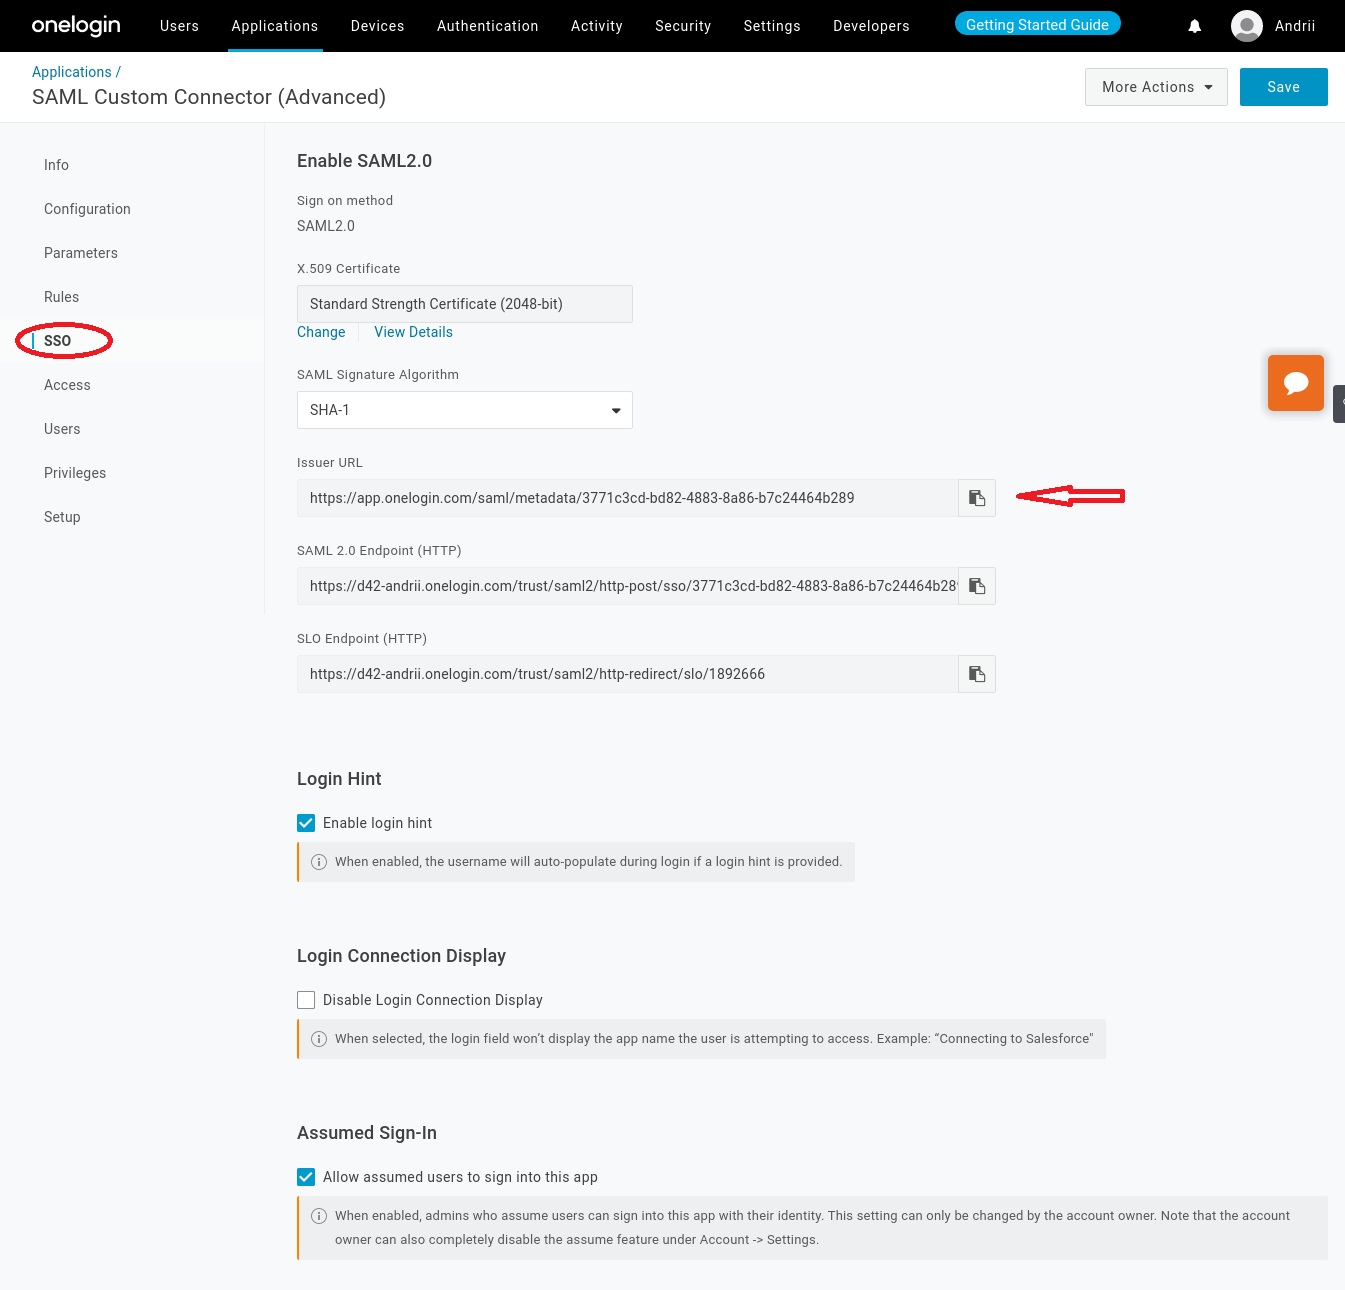
The SAML2 app is now created and ready to integrate with Device42.
Configure the Device42 Appliance Manager
Log in to the Device42 Appliance Manager at https://<device42-address>:4343, go to SAML/SSO Settings, and paste the Metadata auto conf url you copied above.
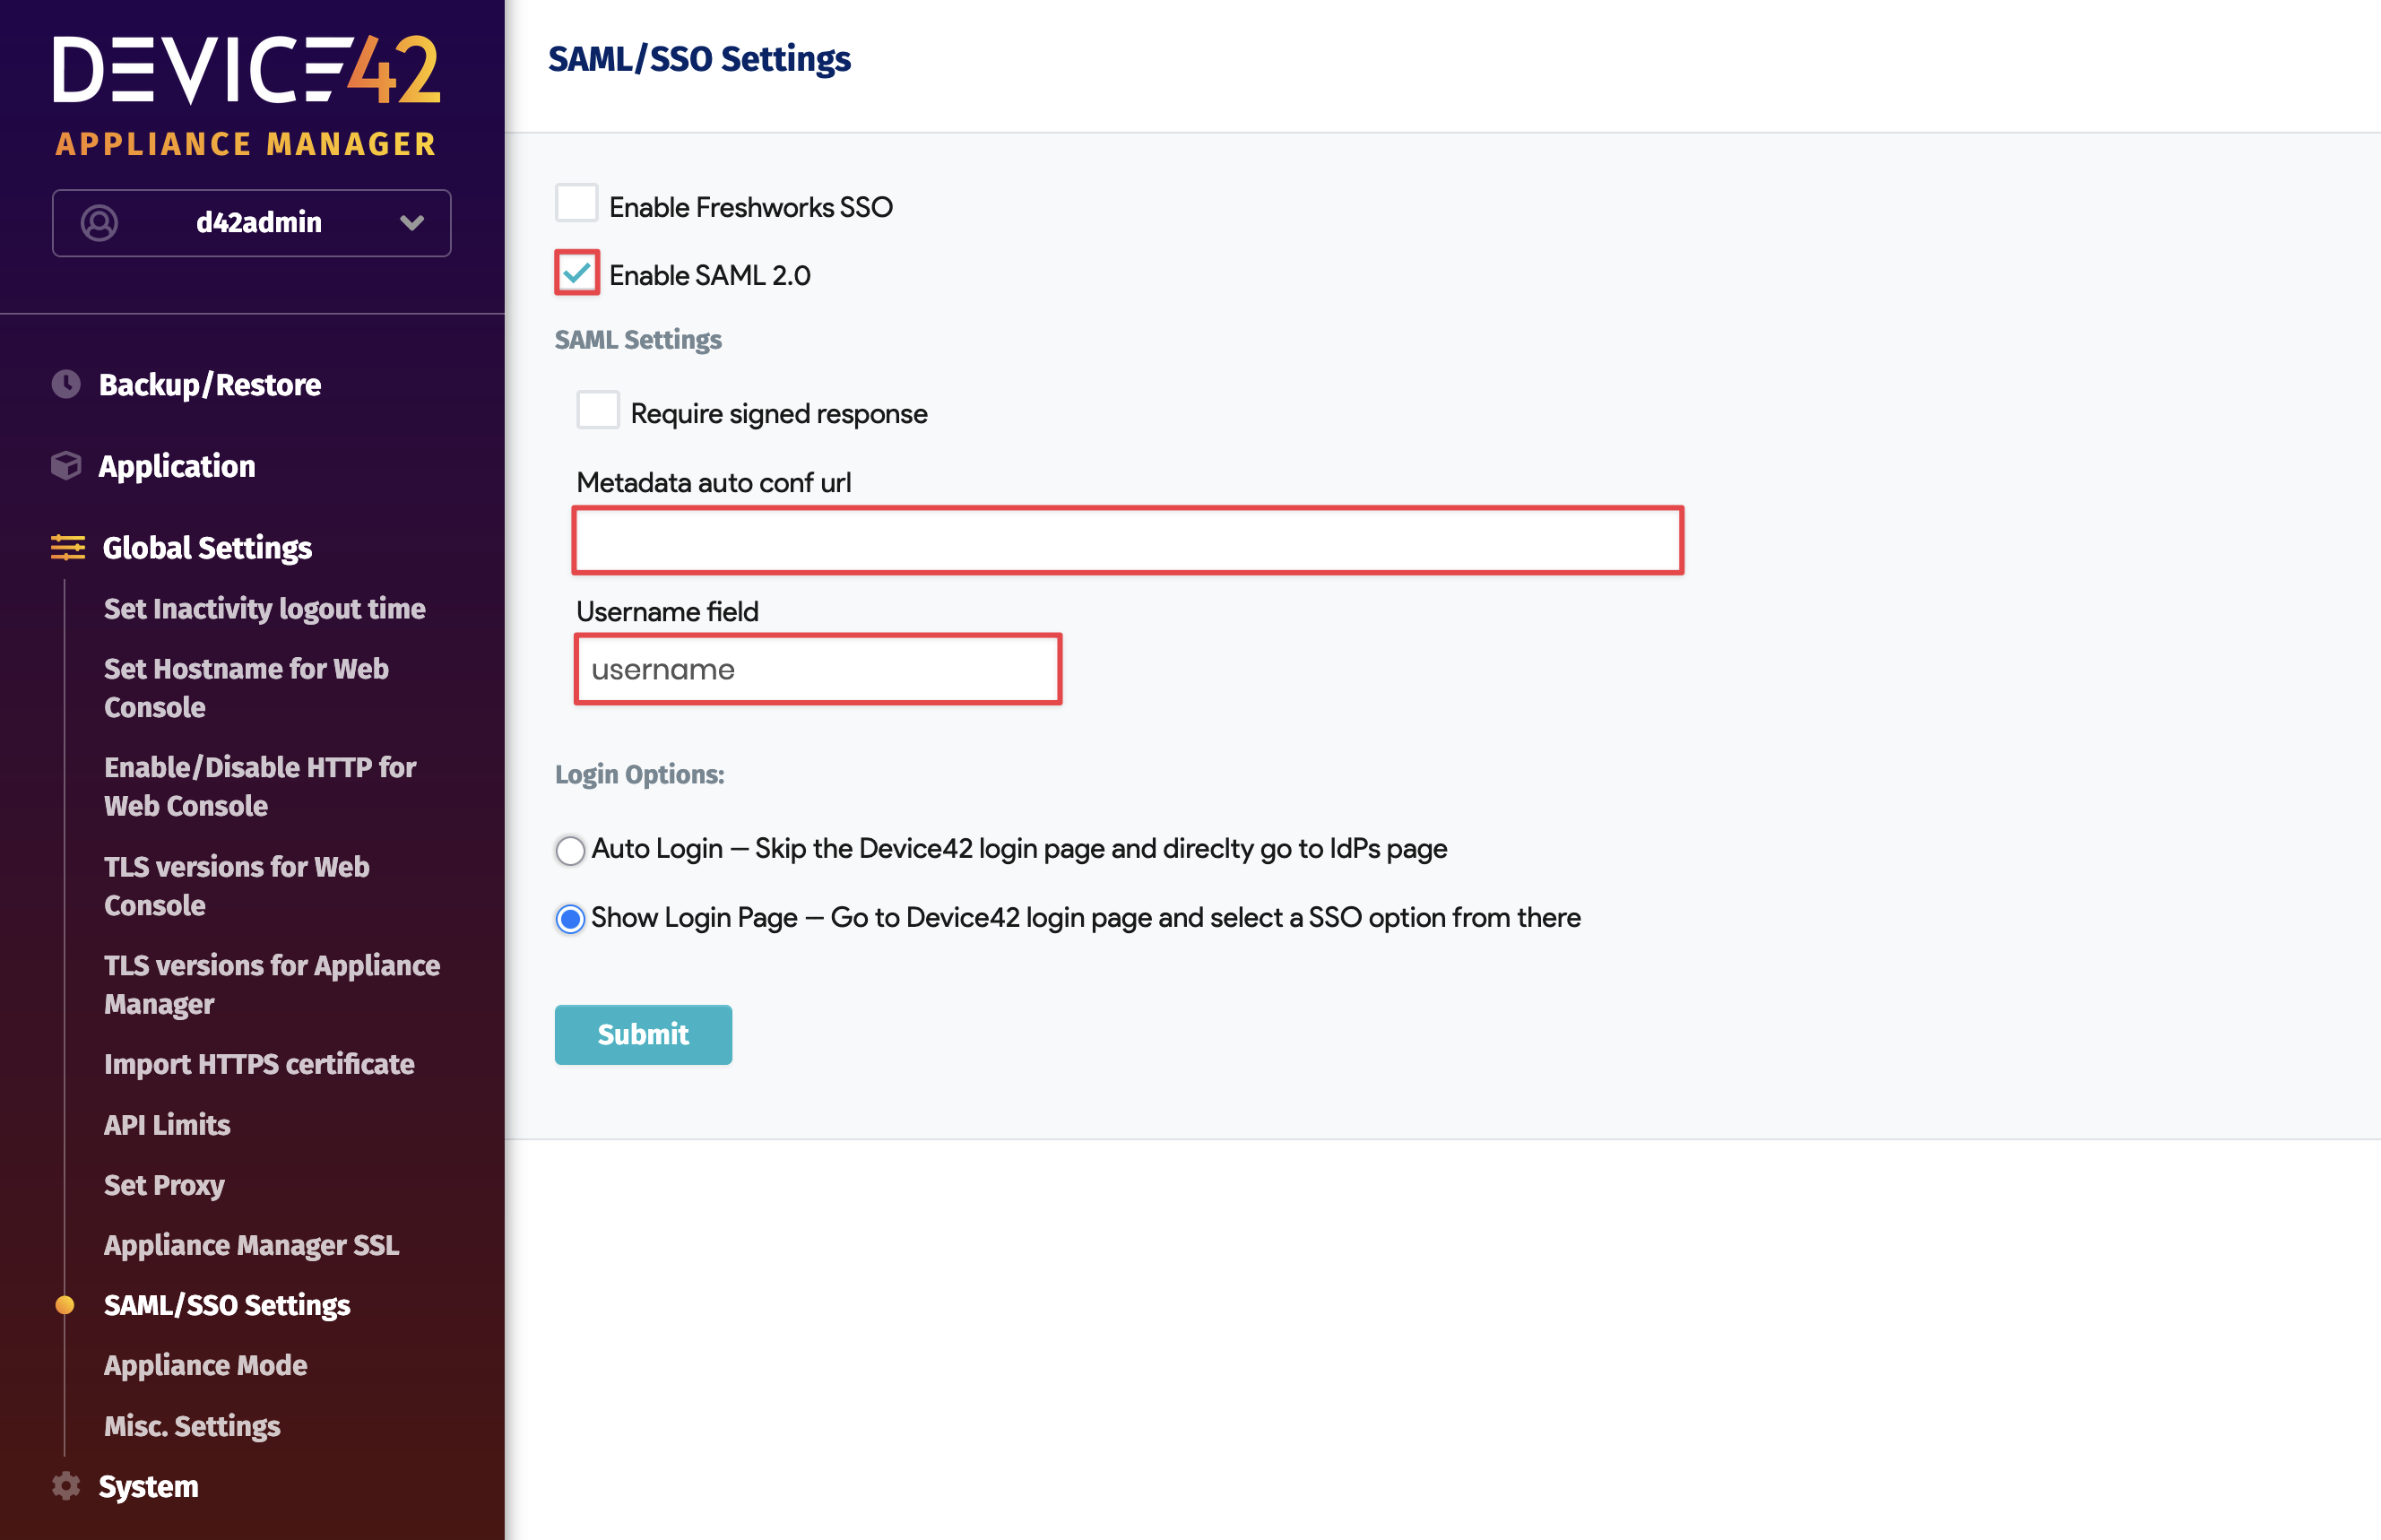
Once saved, the SAML integration is complete. You now need to add users to the SAML Connector App so they can log in to Device42 via their OneLogin accounts.
Create a User in OneLogin
Navigate to Users > Users and click New User.
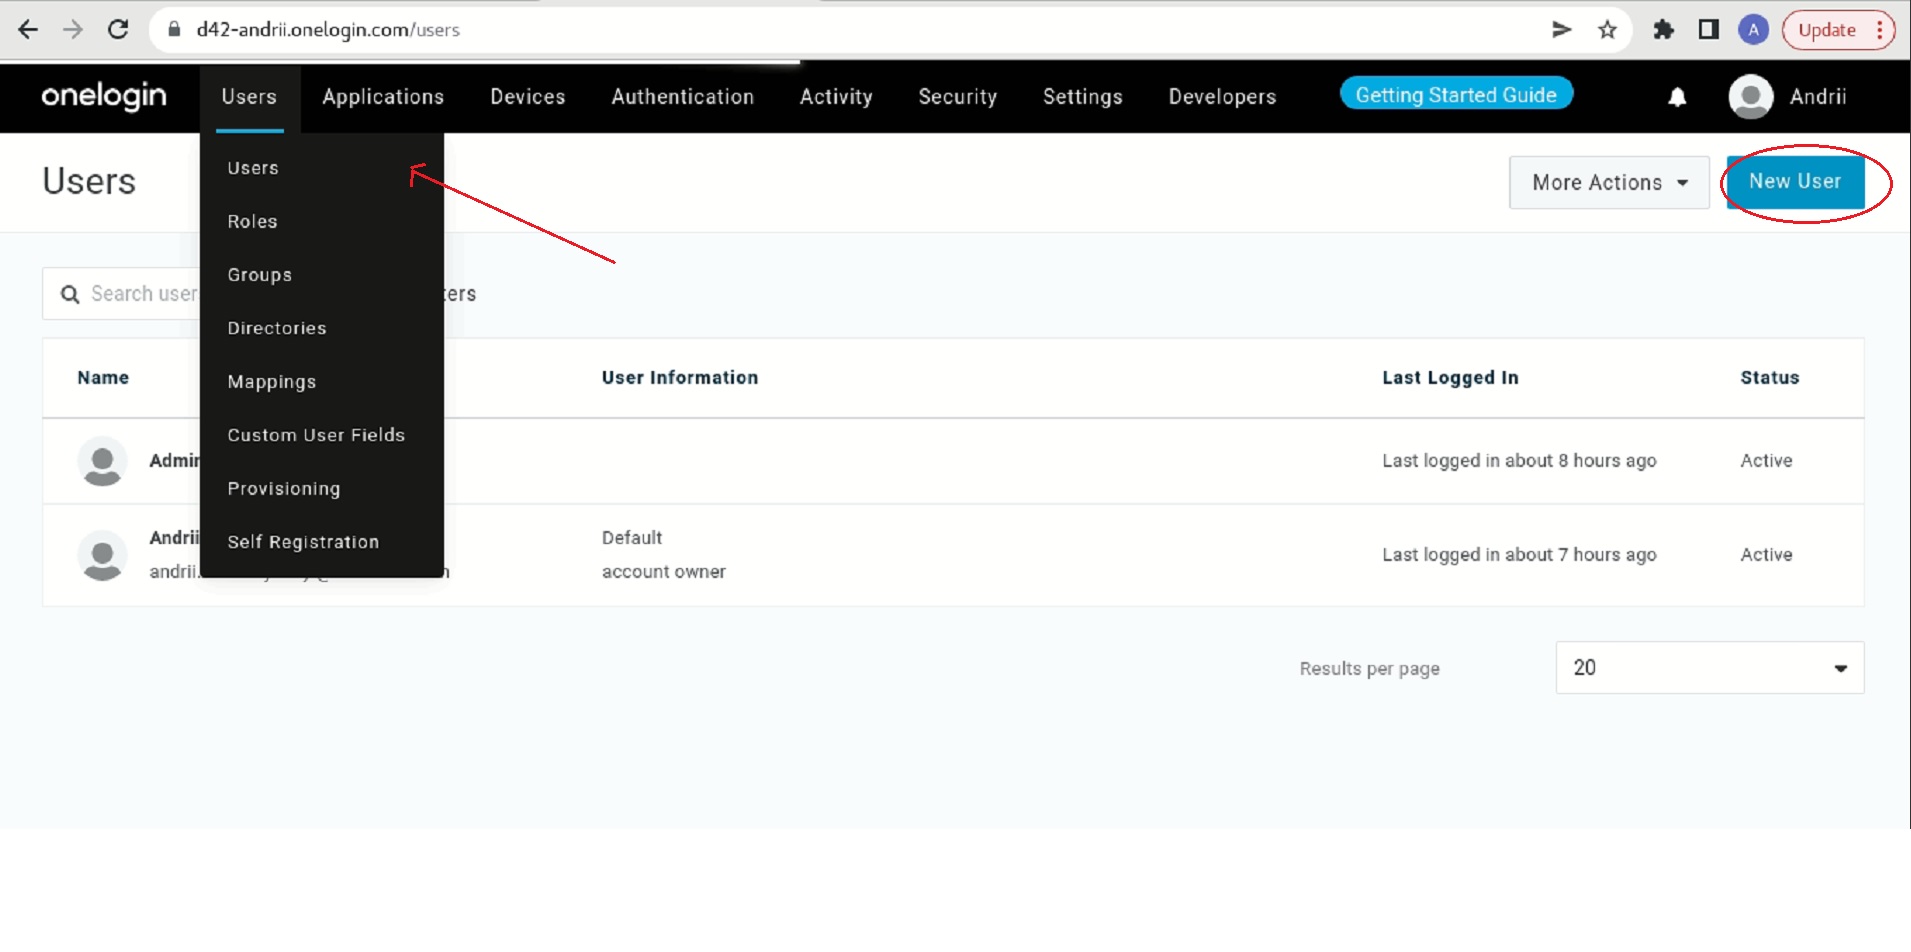
Fill in the user form. The username must match the username in Device42.
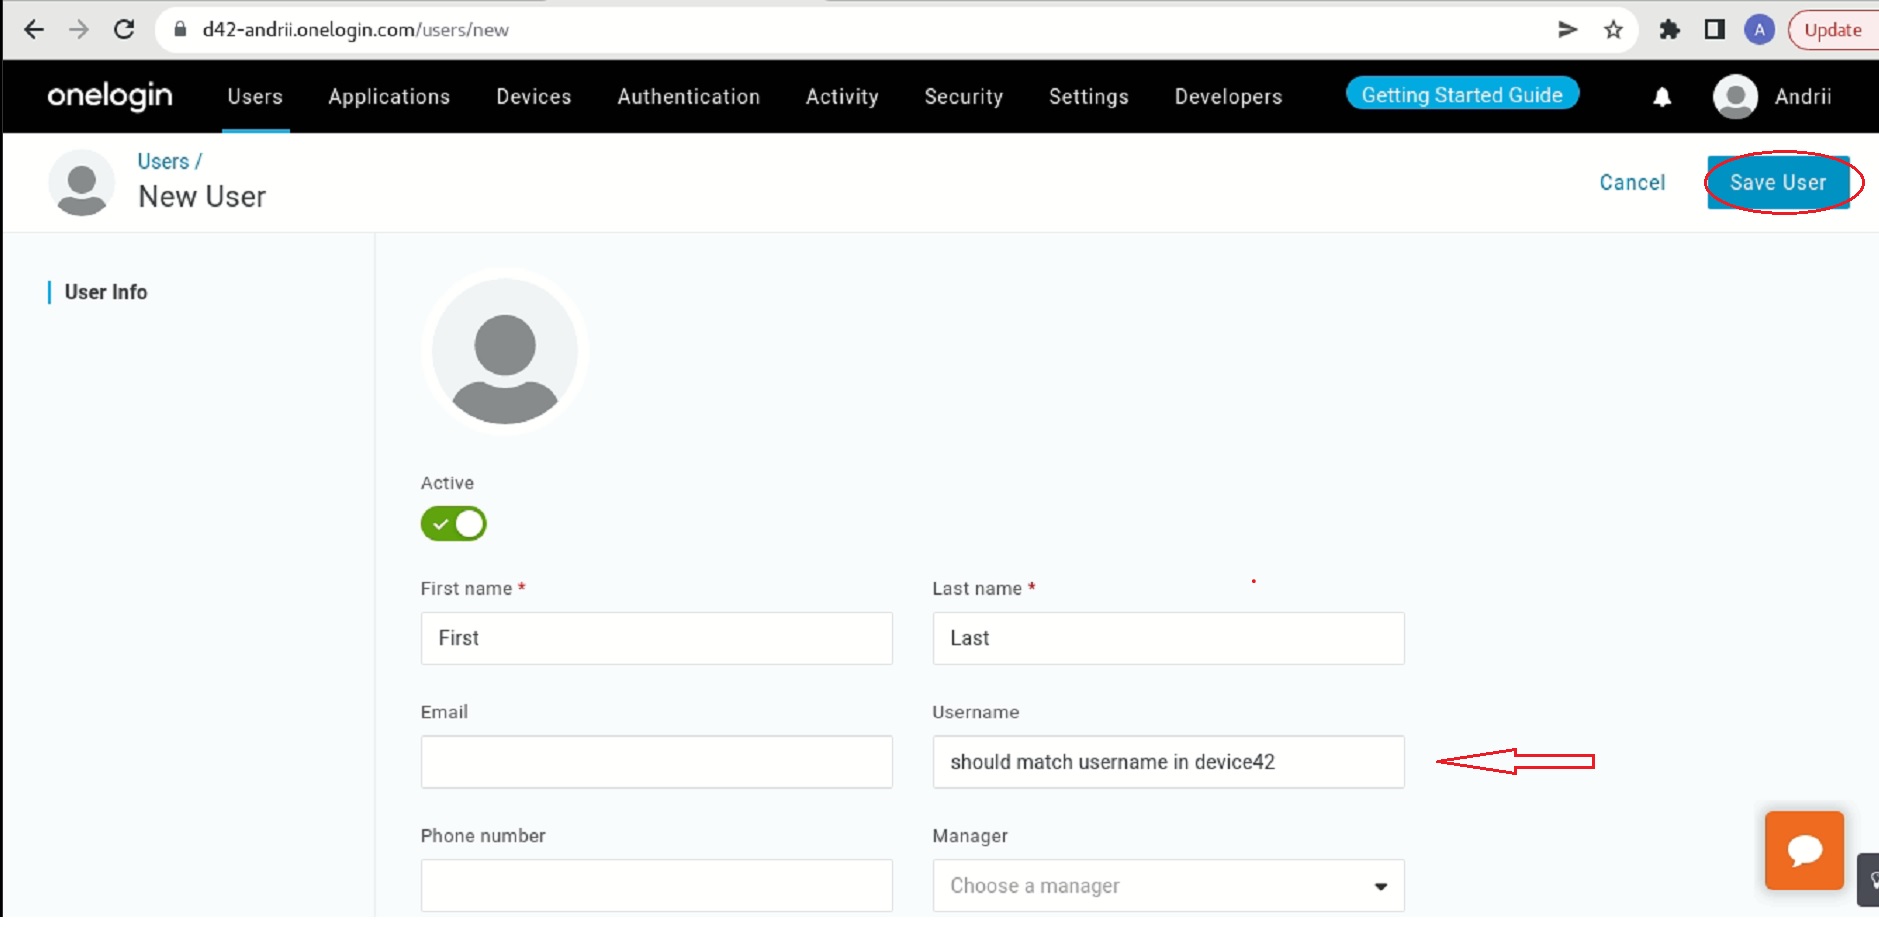
Click Save.
Add a User to the Application
-
Click the username.
-
Go to the Applications tab and add an application by clicking the plus icon.
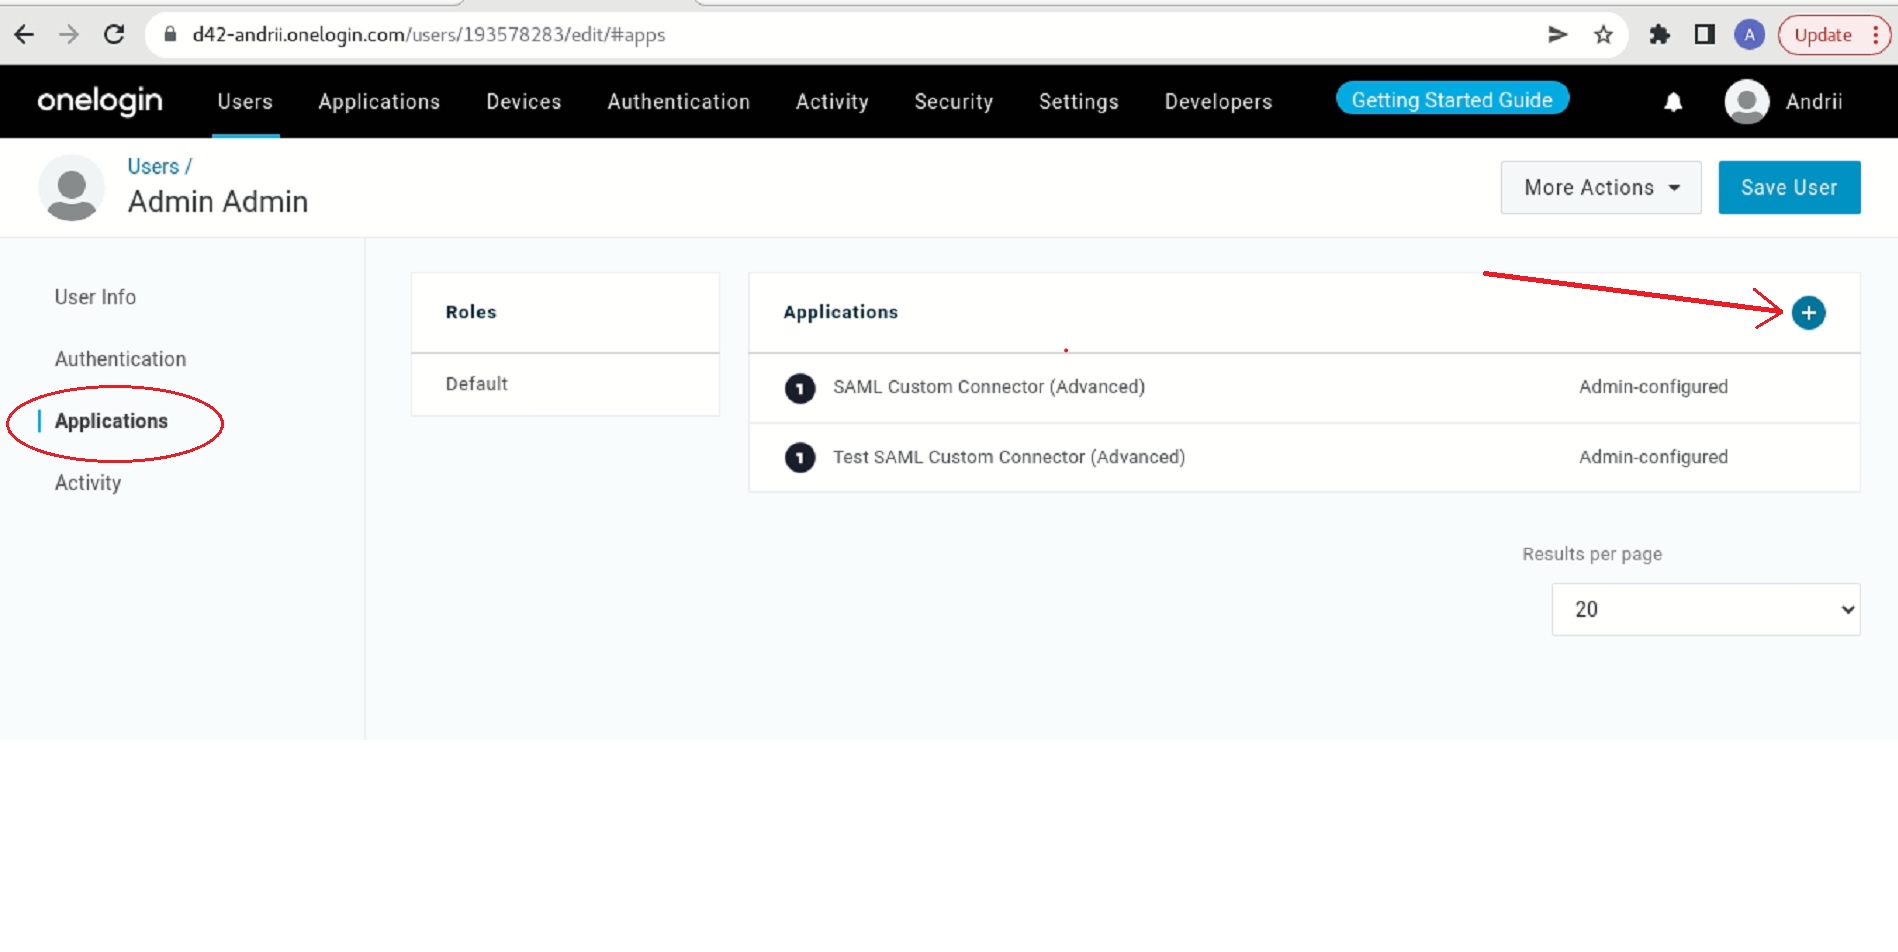
- Select the SAML Custom Application created above.
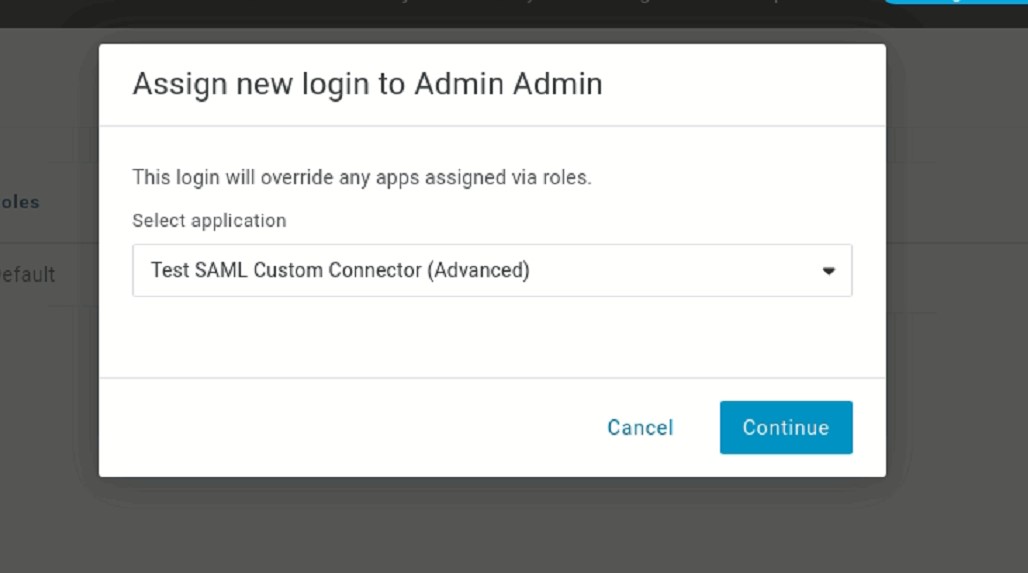
- Click Continue.
- Make sure the Allow the user to sign in checkbox is selected.
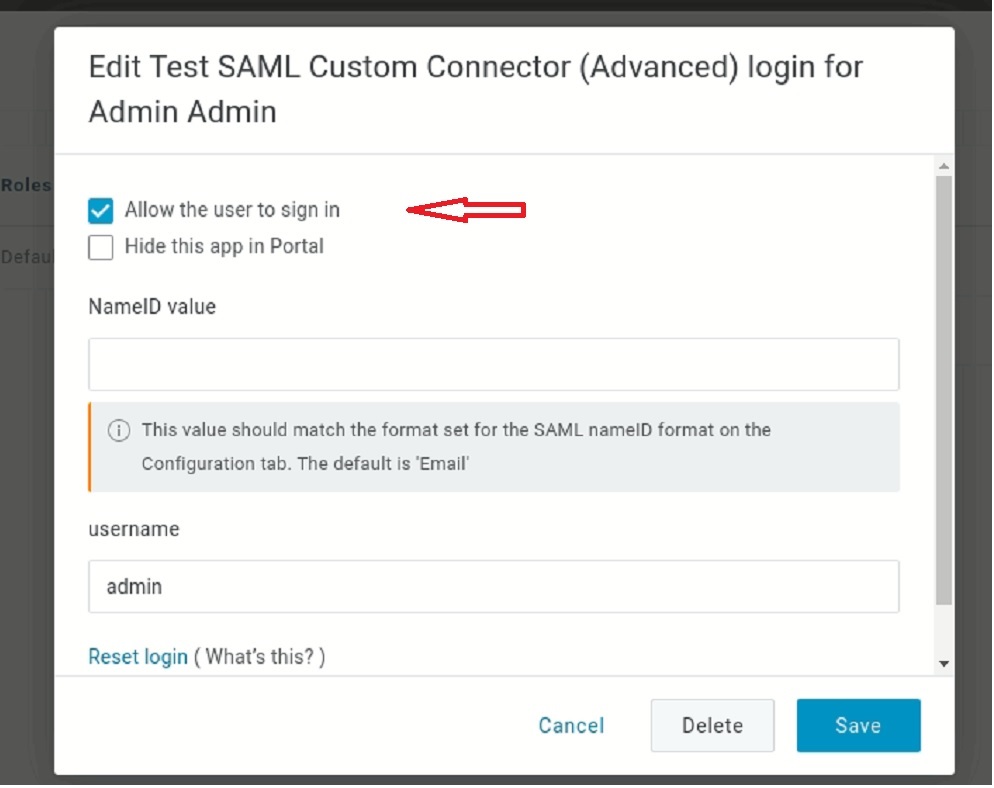
- Click Save.
The user can now log in to Device42 using their OneLogin account.
Configure the Device42 Appliance Manager
Log in to the Device42 Appliance Manager at https://<device42-address>:4343, go to SAML 2.0 Settings, and set the Metadata auto conf url you obtained from your identity provider. Set the Username field to match the value saved in your SAML configuration.
Once saved, SAML integration is complete.