PowerBI Integration
This page is for report authors and administrators who want to build Microsoft PowerBI reports on Device42 data. By the end, PowerBI connects to Device42 through the ODBC driver and you can pull Device42 data into your reports.
Device42 integrates with Microsoft PowerBI using the Device42 ODBC driver package, currently available for Microsoft Windows. With the PowerBI and ODBC integration, you can connect to Device42 and pull data through an ODBC (Open Database Connectivity) data source presented by the driver.
The current ODBC driver installs on Microsoft Windows. The instructions below explain how to use the ODBC connection through PowerBI.
You can also use the Device42 ODBC driver with an ODBC-compatible consumer other than PowerBI. See the ODBC driver documentation page to obtain the driver and for more information.
Prerequisites
Before connecting PowerBI to Device42, make sure you have:
- A Microsoft Windows machine, as the ODBC driver installs on Windows only
- Microsoft PowerBI installed on that machine
- The Device42 ODBC driver installed, and the requirements in the ODBC System Requirements section of the ODBC driver page met
- A current Device42 installation that is licensed, running, and reachable from the Windows machine
- The Device42 host name, the port the server uses, and a Device42 username and password
Download the Device42 PowerBI ODBC Driver
Download the Device42 ODBC driver from https://www.device42.com/integrations/powerbi/.
Connect PowerBI to the Device42 ODBC Data Source
To connect PowerBI to the Device42 ODBC datasource, follow the instructions below. This section assumes you have installed the Device42 ODBC driver and meet the requirements listed in the ODBC System Requirements section of the ODBC driver page.
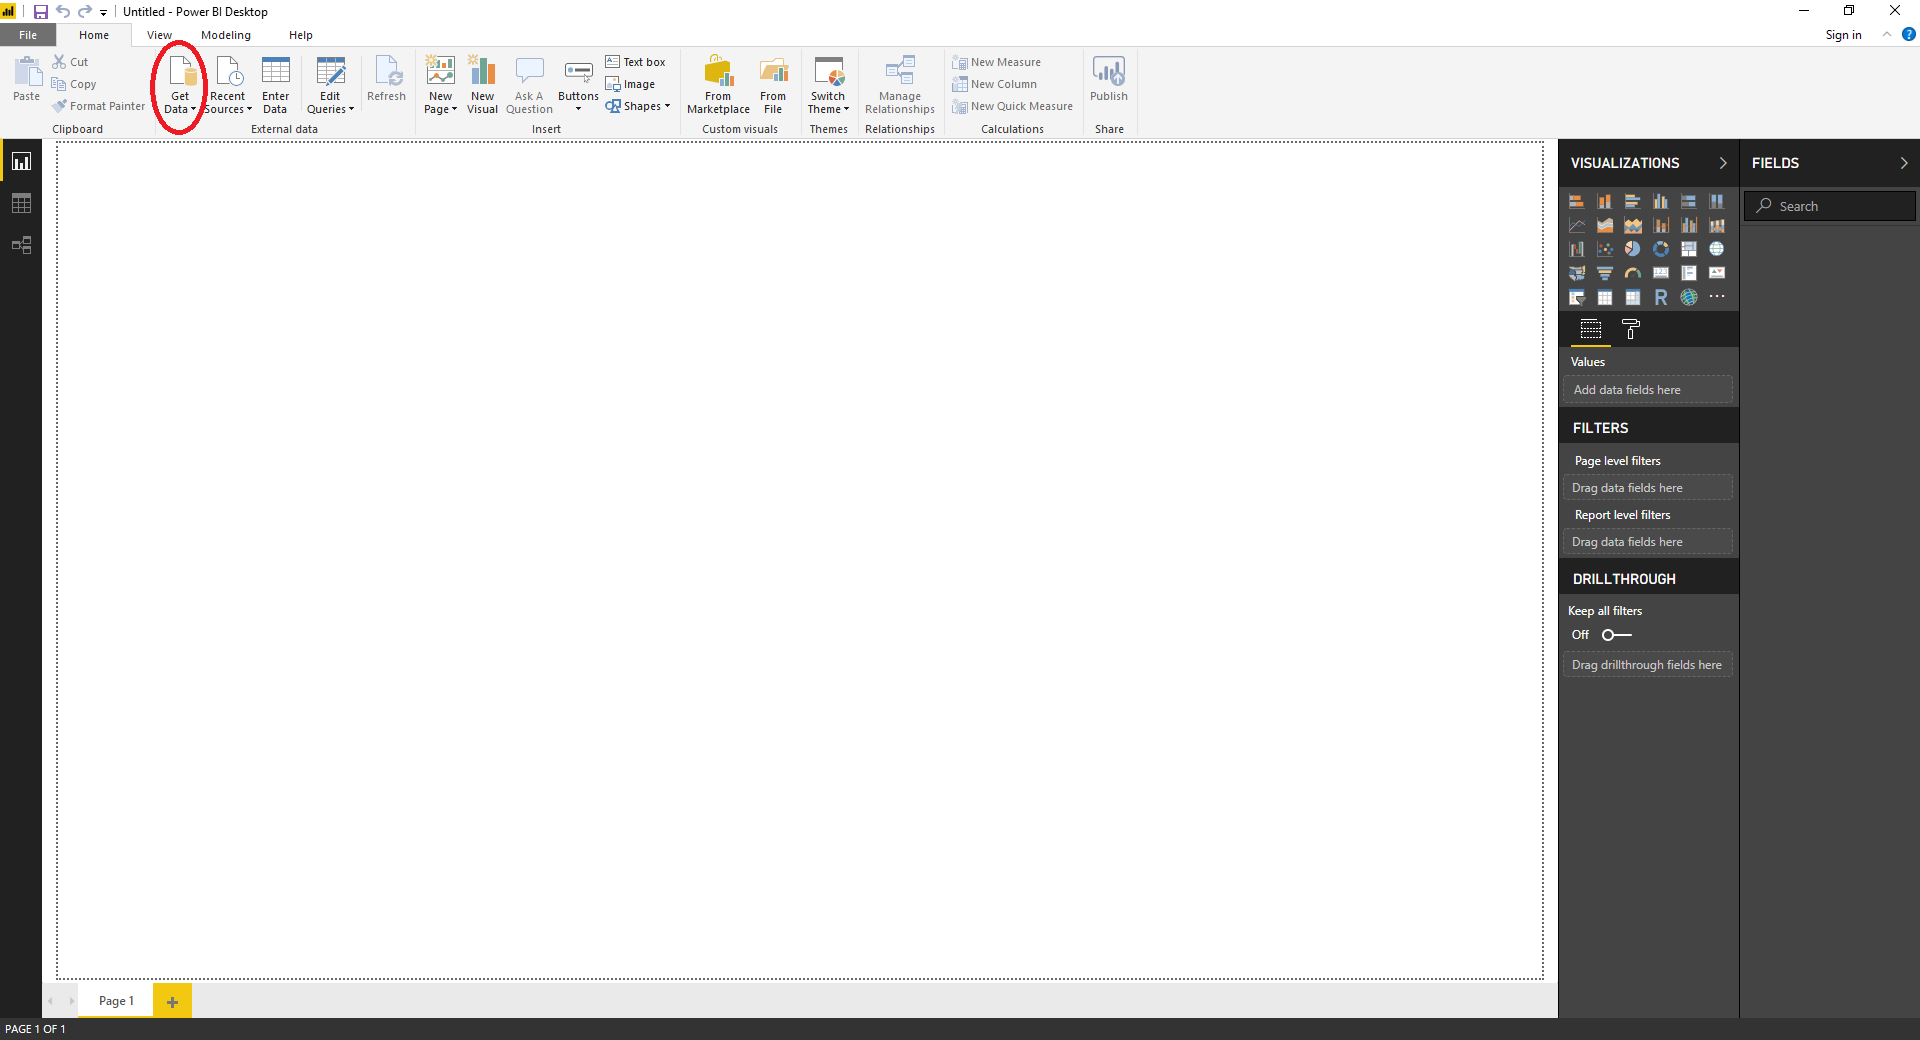
- Launch PowerBI and click the Get Data icon in the upper left corner:
- In the Search field, enter
ODBCto narrow down the listed data source options (1). Highlight ODBC (2), and click Connect (3):

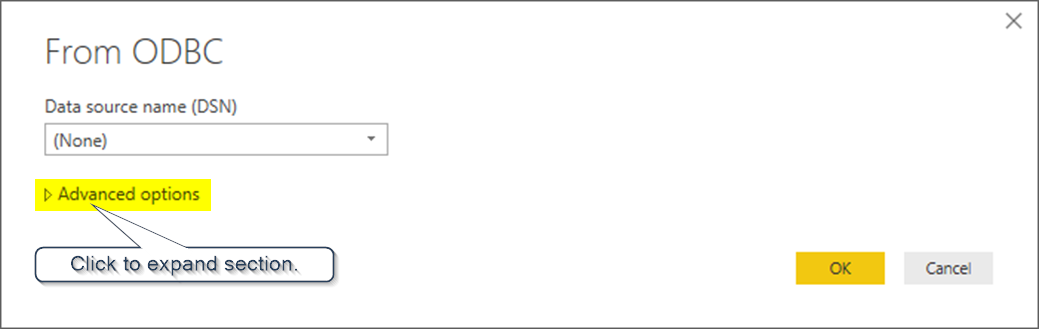
- To connect using a DSN, see the Create a DSN section below to learn how to create a DSN, which will then show in this list. Otherwise, supply a connection string manually by clicking to expand the Advanced Options section:
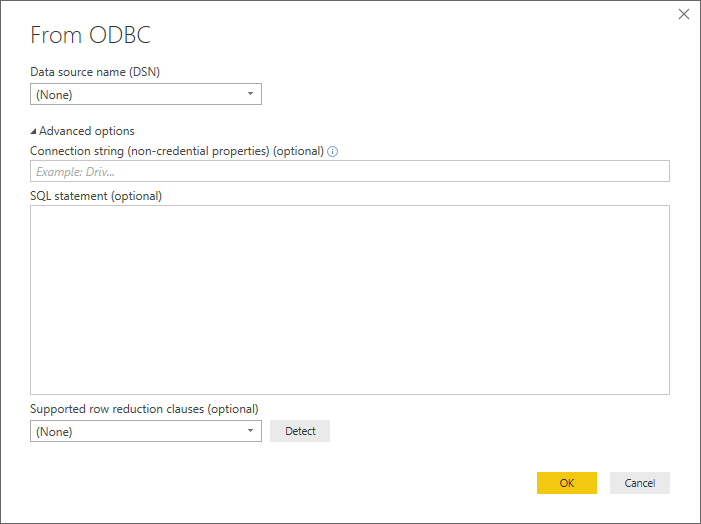
- In the connection string field, enter the following string:
DRIVER={Device42 ODBC Driver};SERVER=YOUR-D42-SERVER.COM;. Leave the SQL Statement (optional) section blank, and click OK:
- Enter the User Name and Password that were provided to you, then click Connect. Setup is complete.
Create a DSN
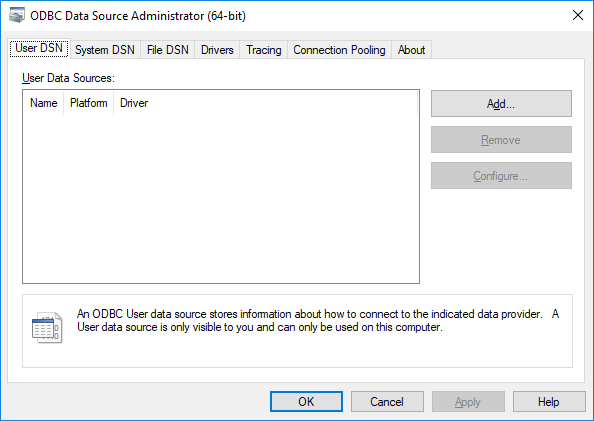
- To create or pre-define a DSN (Data Source Name), open the Windows ODBC Data Source Administrator from the Windows Start menu. On Windows 10, click Start > Windows Administrative Tools > ODBC Data Sources (64-bit). There is also a 32-bit version, which you can ignore. On Windows 7, click Start > All Programs > Administrative Tools > Data Sources (ODBC):
- Click Add to begin adding a new datasource. In the Create New Data Source window, choose Device42 ODBC Driver and click Finish:
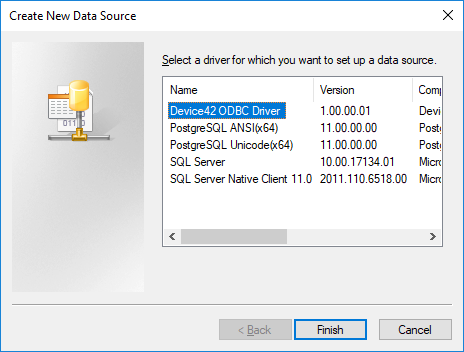
- On the Device42 ODBC Driver DSN Configuration screen, enter values as explained below:

- DSN Name: The name to identify this DSN.
- Server Host: The host name of the Device42 server.
- Port: The port number that the Device42 server is servicing requests on. The default value is the standard SSL port of 443. If you leave this field blank, it will also default to 443.
- Username: The username you use to login to Device42.
- Password: The password you use to login to Device42.
- Click Test to try connecting using the information you specified. You will receive a message if the connection could or could not be made. If the connection could not be made, verify that the information you entered is correct.
- Click Save to save the changes you made to the DSN. Your changes will only be saved if the information entered results in a successful connection. If the connection could not be made, verify that the information you entered is correct.
The Device42 ODBC DSN is now configured and available for use in PowerBI.
If you have questions about the Device42 ODBC driver that are not answered here, open a ticket at https://support.device42.com or email support@device42.com.