Azure Migrate
This page is for administrators who want to use Device42 as an assessment tool within Azure Migrate and export discovered business applications from Device42 to Azure for migration planning. By the end, your Device42 business application data appears in the Azure Migrate portal for assessment.
The Azure Migrate integration lets you assess and migrate servers to Azure using Device42 as the assessment tool. This page covers how to set up Device42 from the Azure Migrate portal, register an Azure Active Directory user, and export your business applications to Azure.
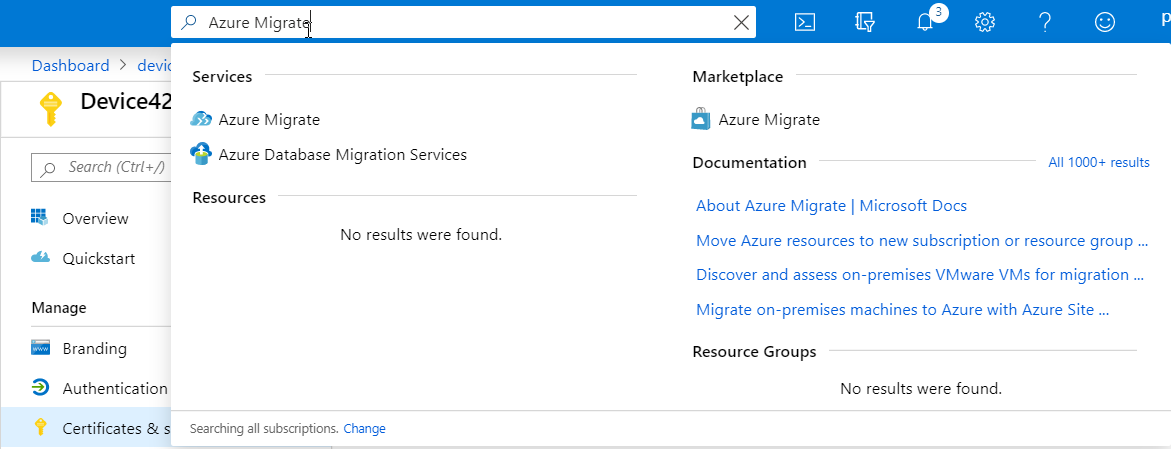
You can access Azure Migrate directly at portal.azure.com.
Prerequisites
To export data from Device42 to Azure Migrate, make sure you have:
- An Azure account with access to the Azure portal
- An Azure Migrate project (created in Set Up Device42 From the Azure Migrate Portal)
- An Azure Active Directory app registration with a client secret, assigned the Contributor role on the subscription
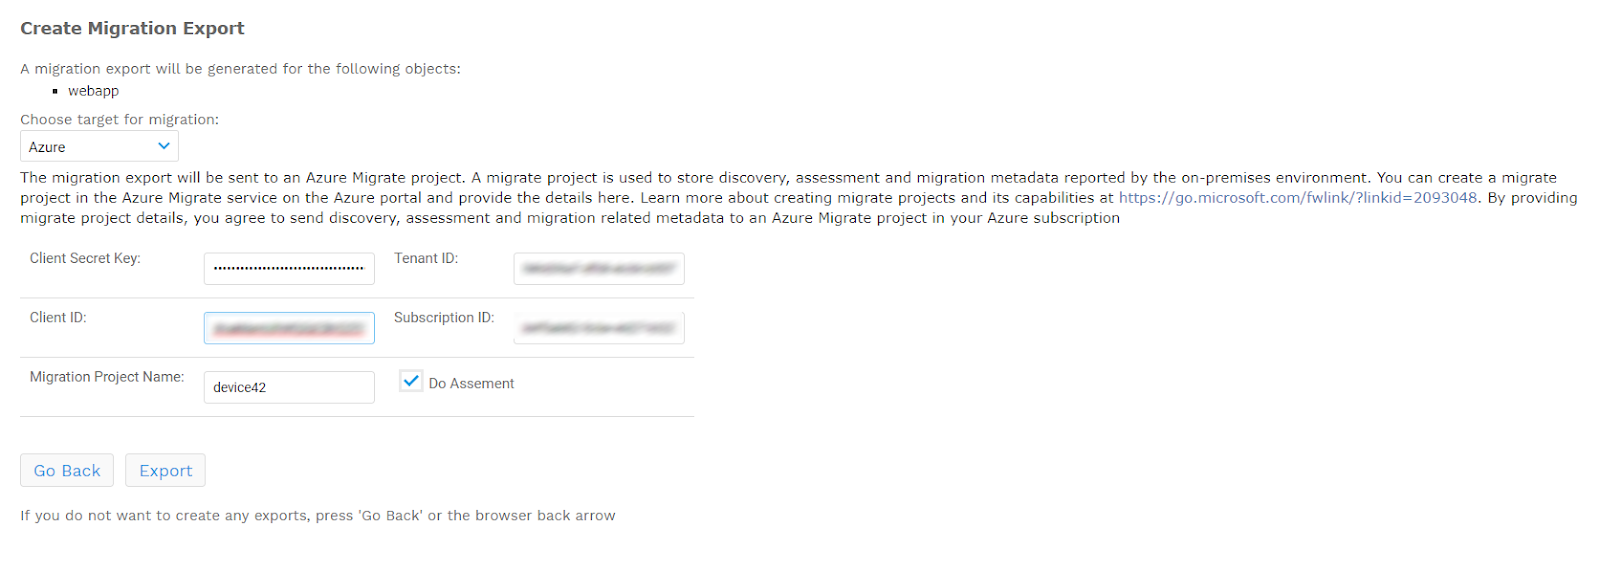
- The following details collected from Azure: Tenant ID, Subscription ID, Client ID, Client Secret, and the Migrate Project Name
- A running Device42 instance with business applications to export
Set Up Device42 From the Azure Migrate Portal
-
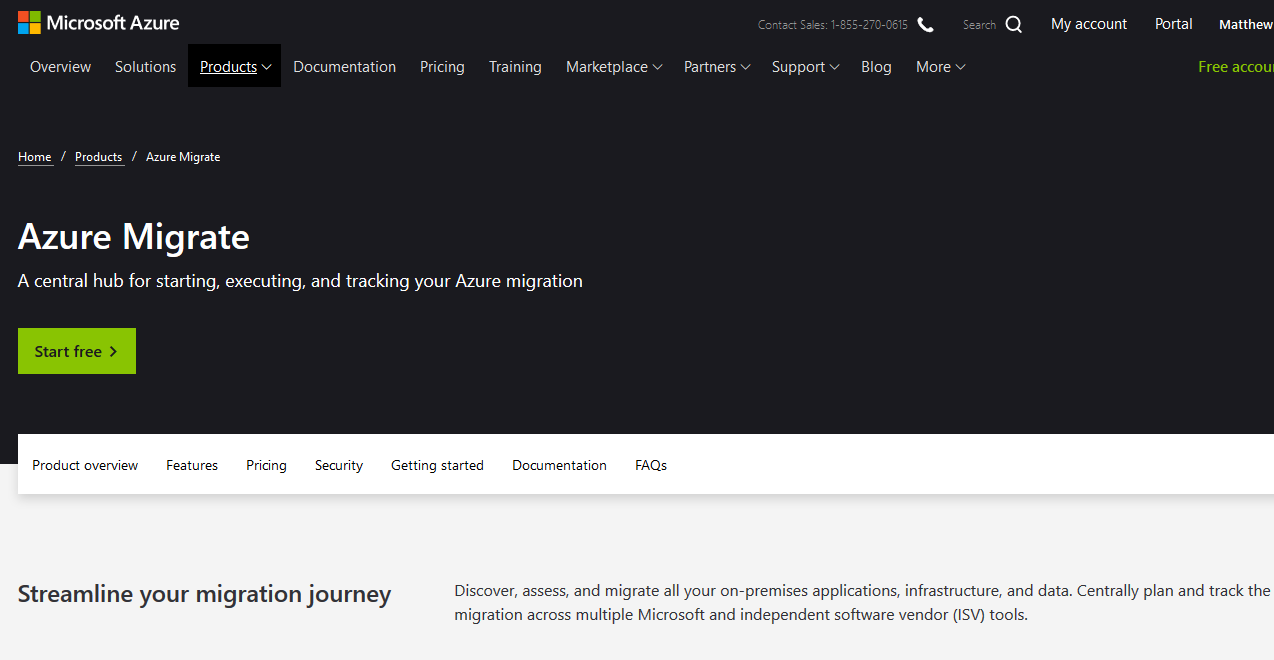
Begin by signing up for an Azure account if you don't already have one. You will have to provide a credit card to verify your identity and agree to the conditions to continue.
-
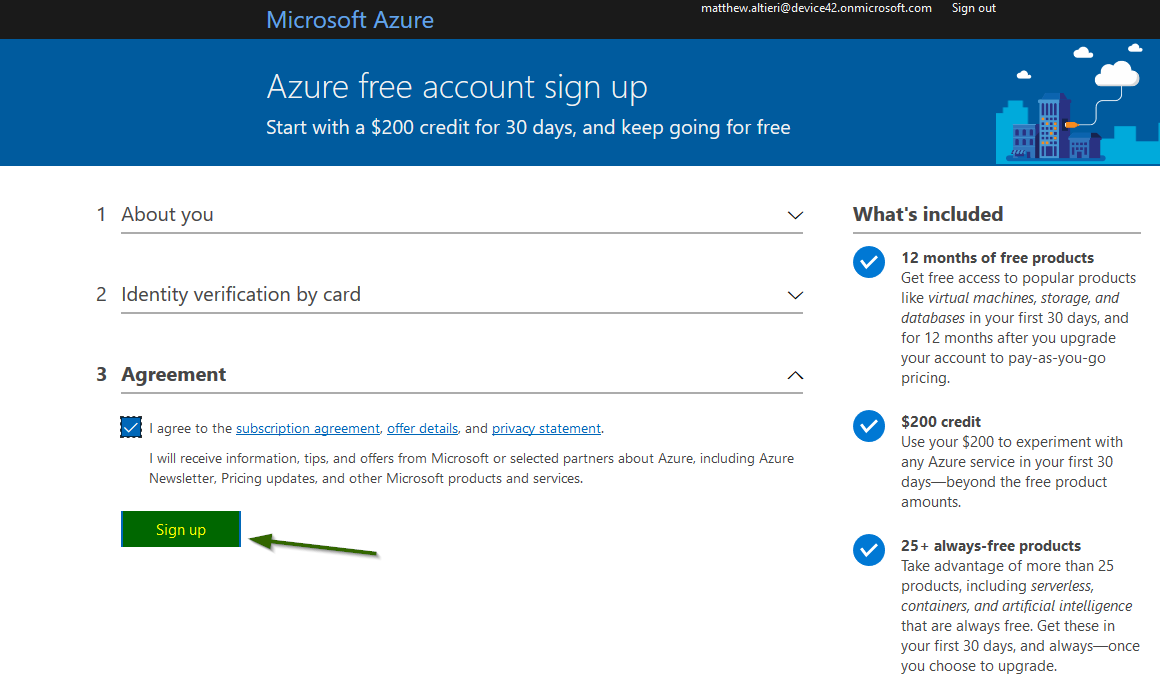
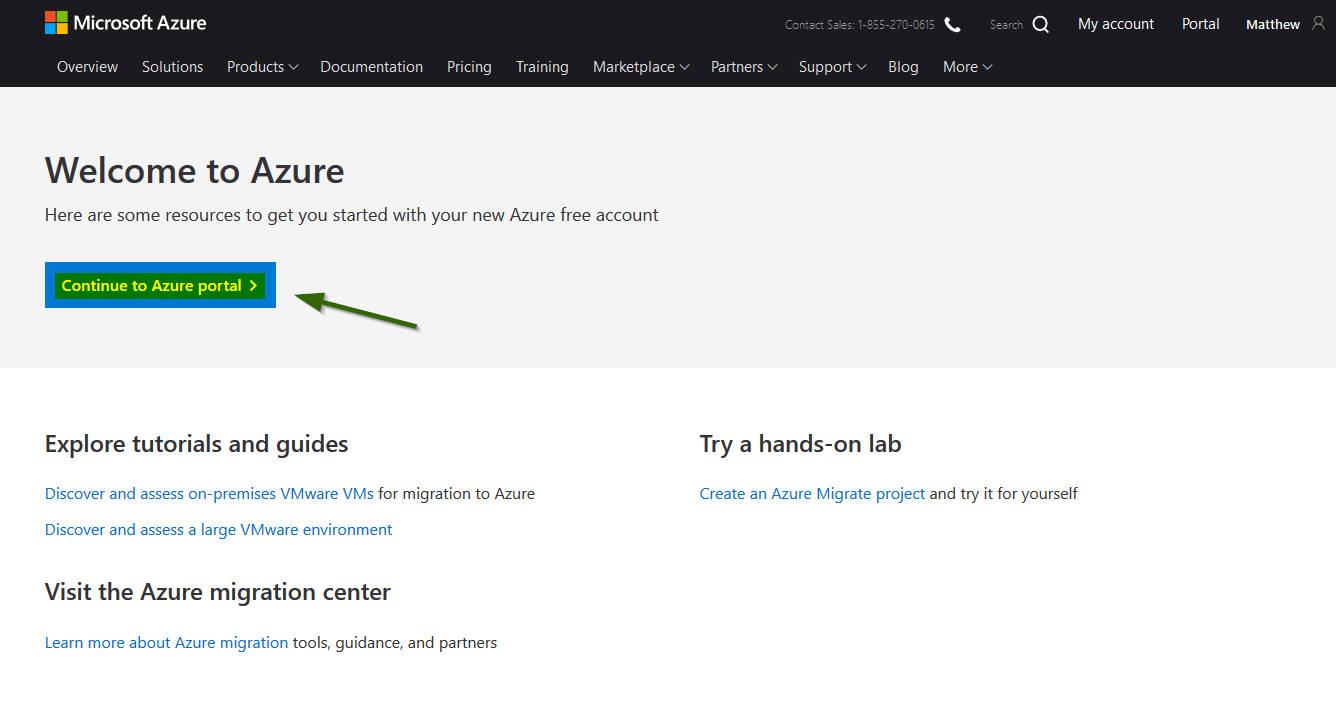
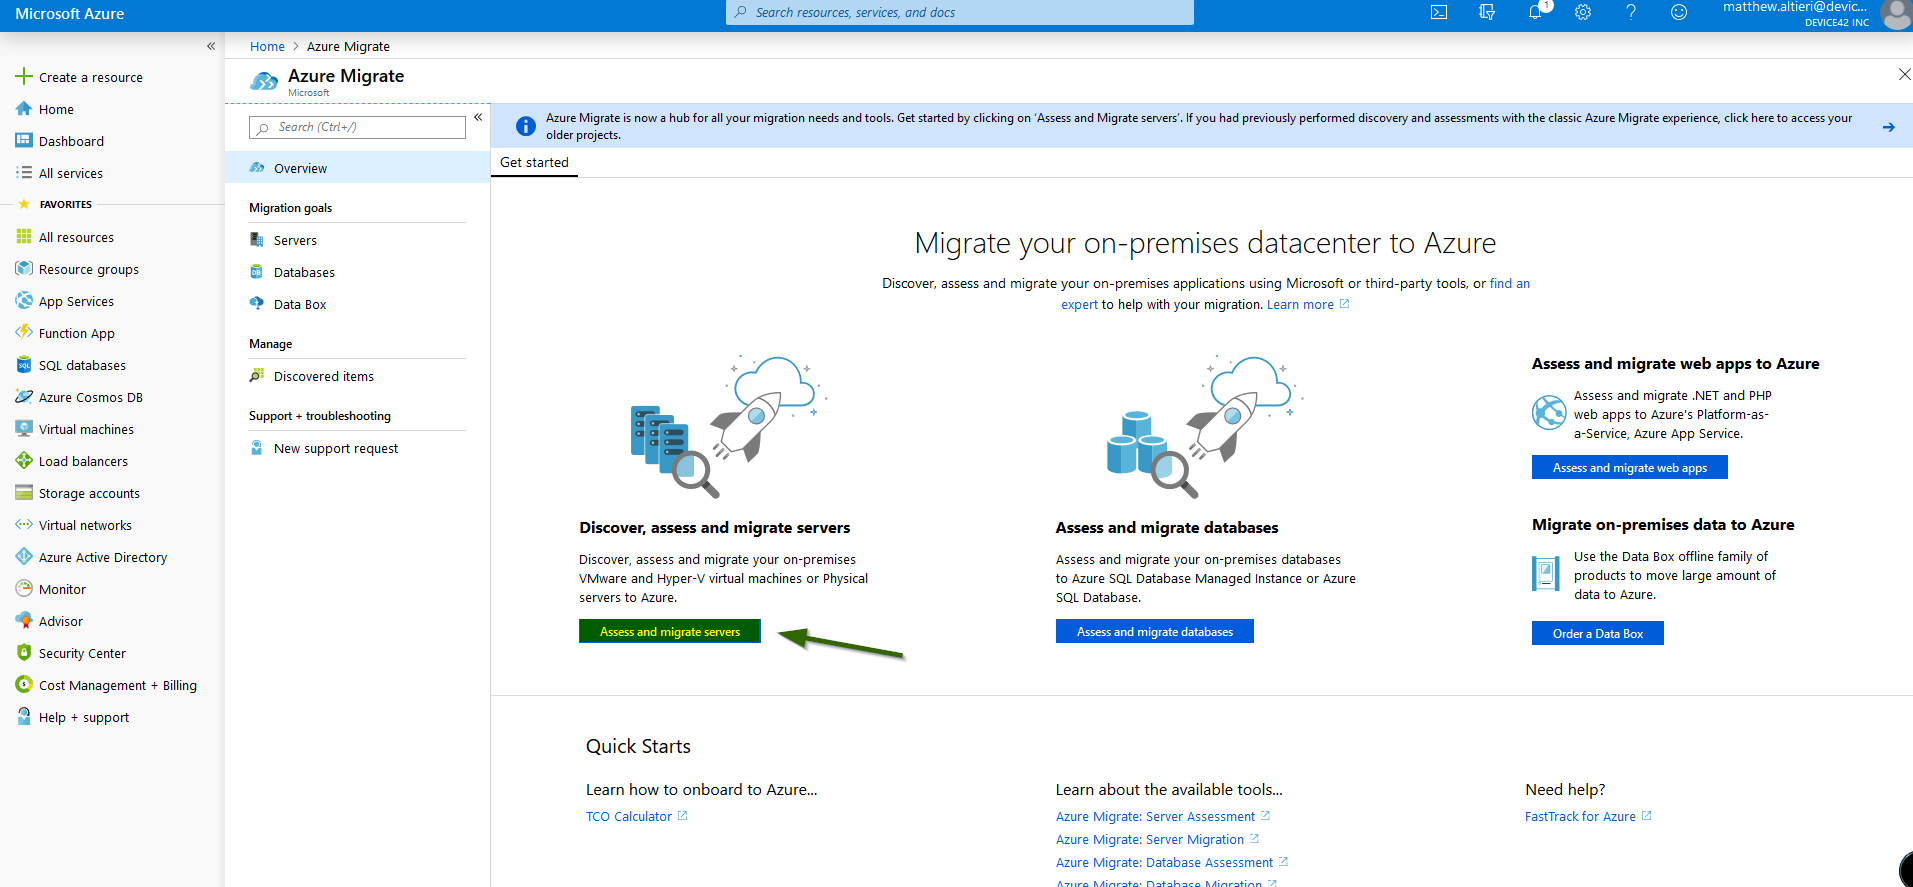
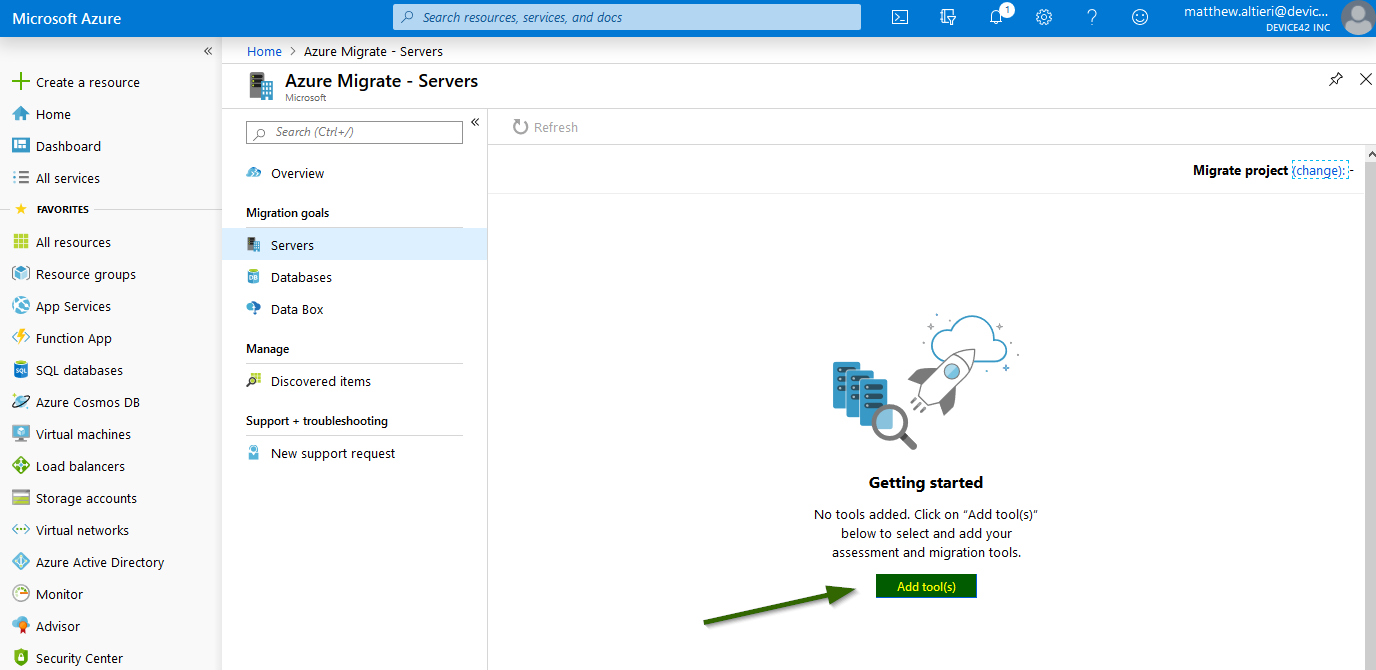
Click the button to continue to the Azure portal, and once there, choose Assess and Migrate Servers.
-
Click Add a Tool to begin adding migration tools.
-
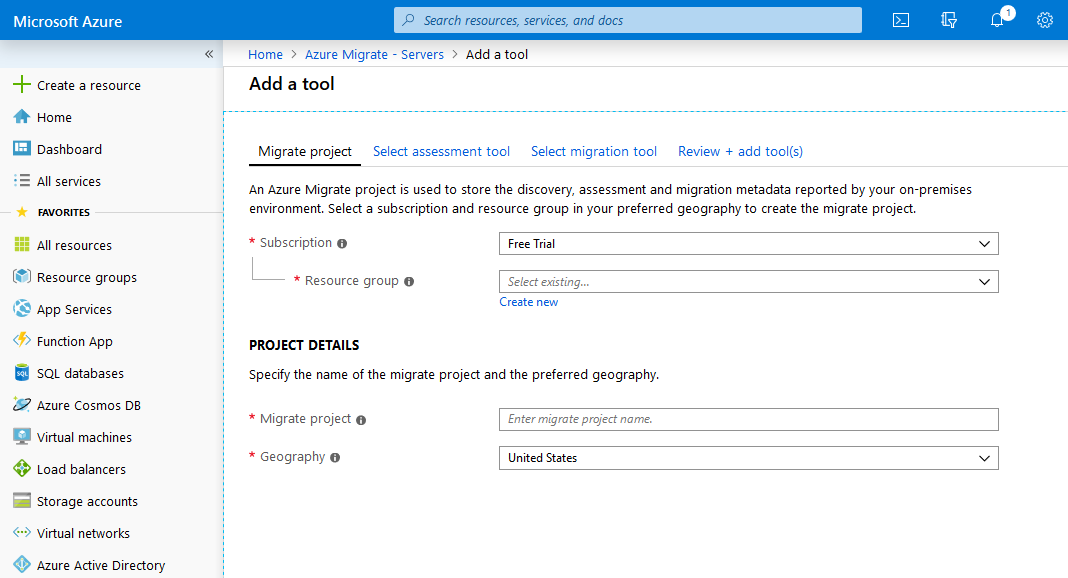
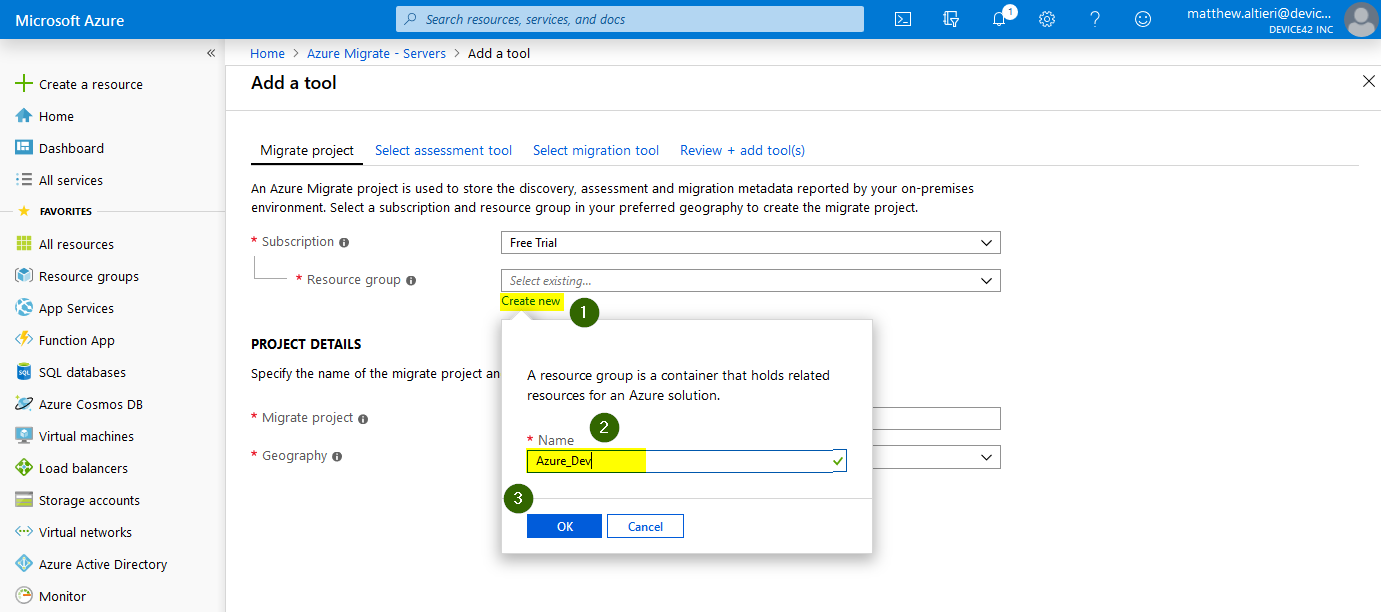
Choose an existing Resource Group, or click Create New to create a new one. The resource group name represents the group of machines you will be migrating and should be descriptive. Then click OK.
-
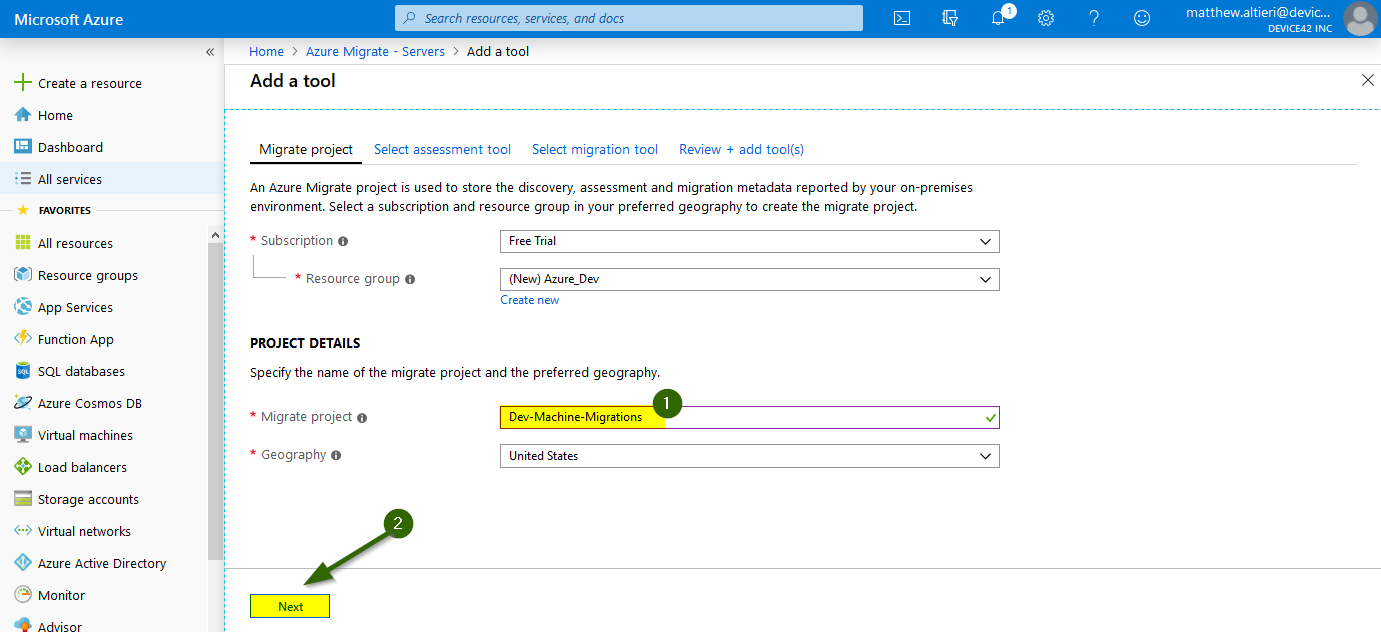
Give your migration project a name and click Next to continue.
-
Select Device42 as your Azure Migration assessment tool by clicking on it, then click Next.
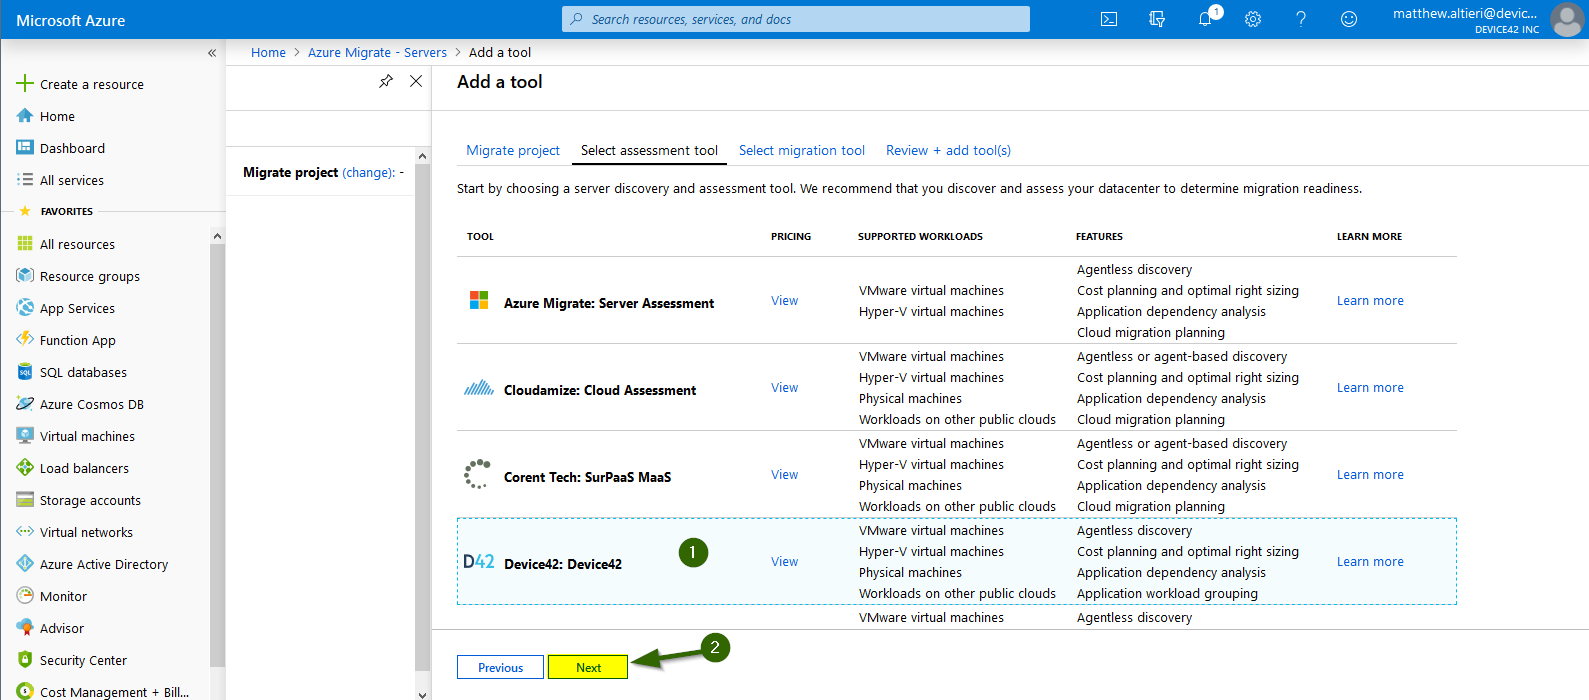
-
You can add a migration tool at this point if you know which one you want to use. Otherwise, leave Skip adding a migration tool for now checked and click Next.
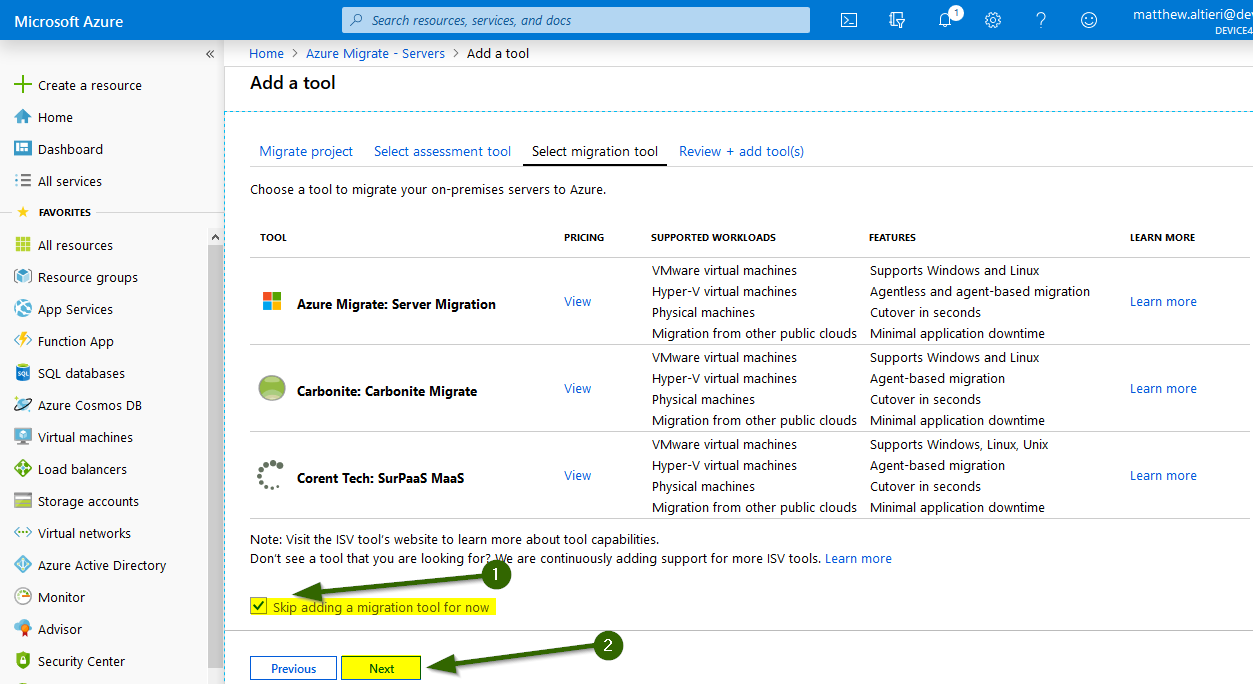
-
Review your tool choices and click Add Tool(s) to continue.
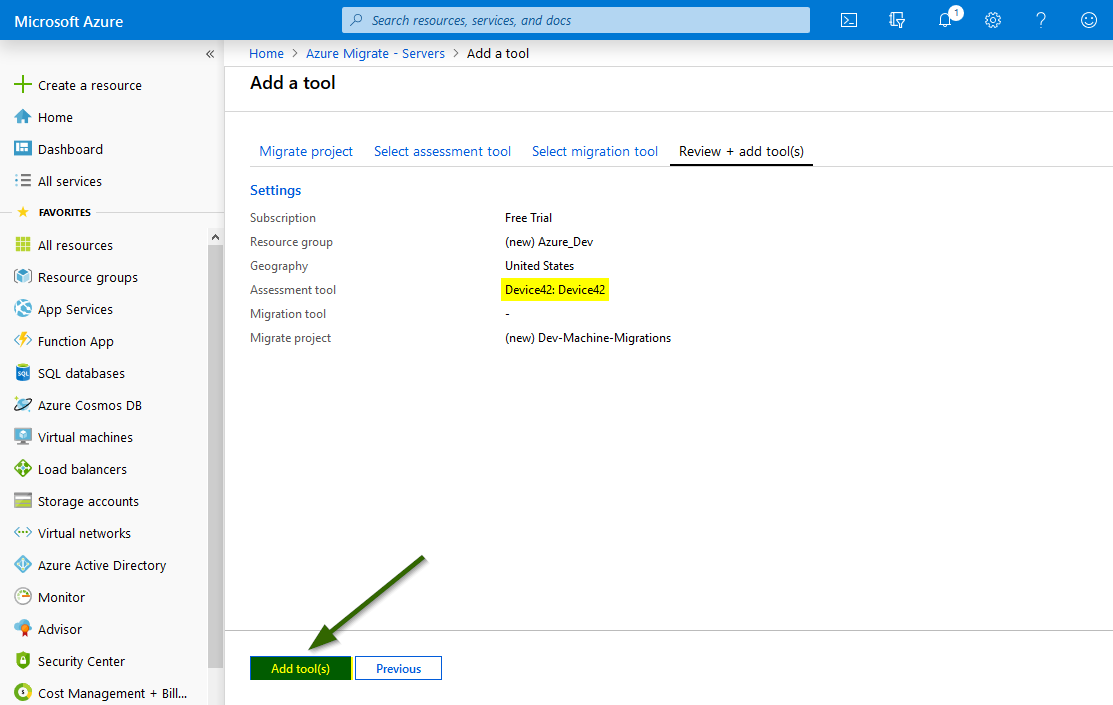
You will see confirmation that the deployment has been initialized.
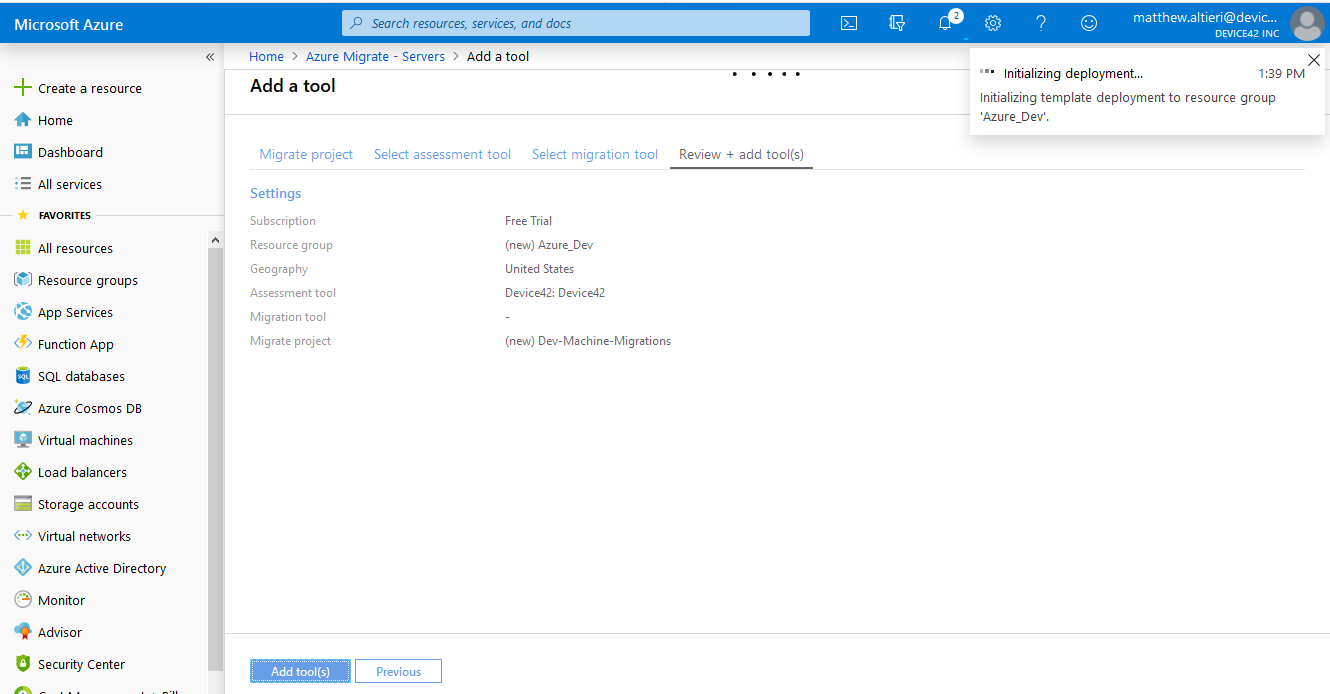
-
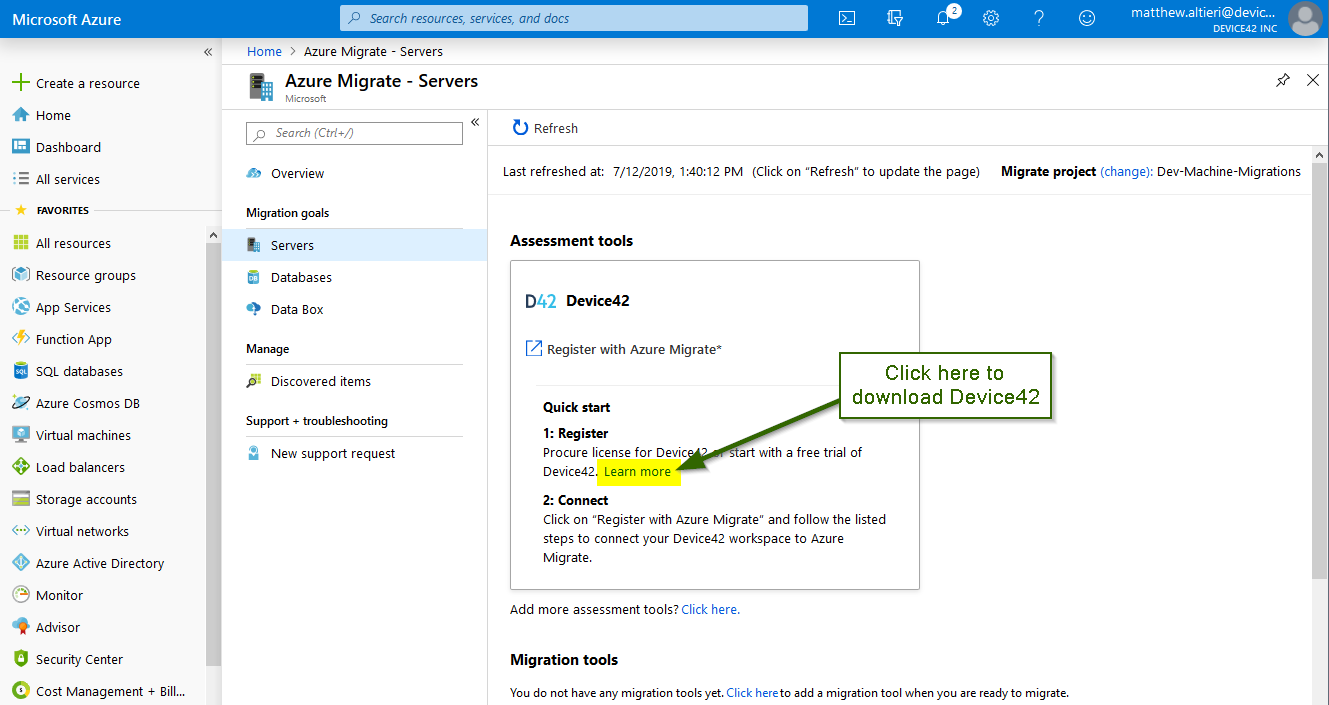
Click Learn More to go to the Device42 information page.
-
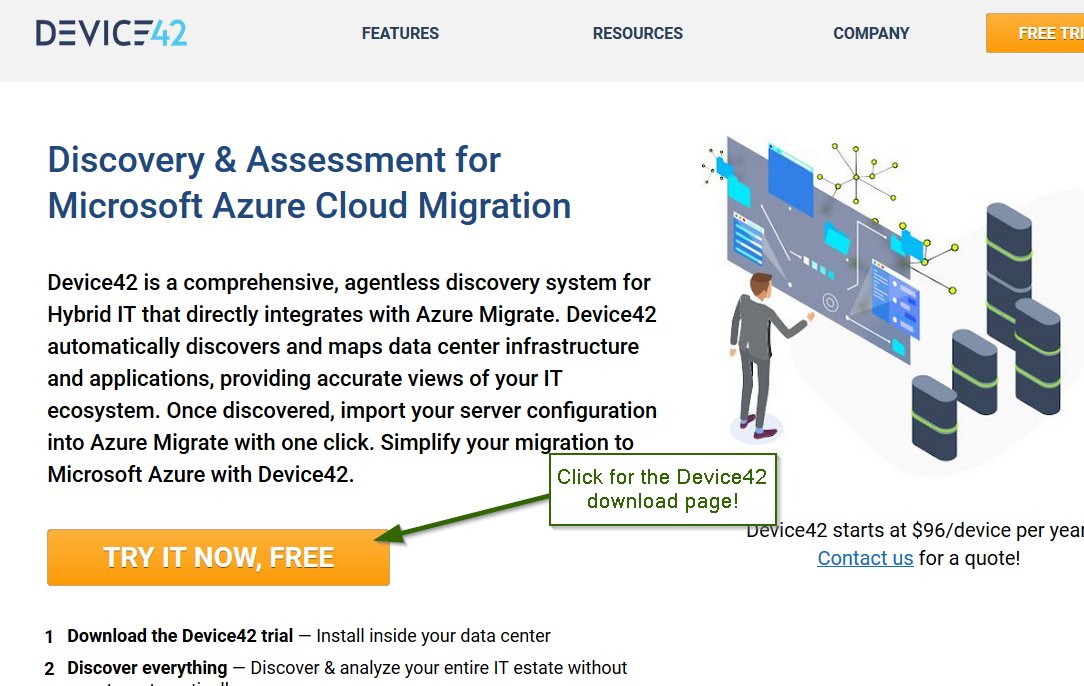
From the Device42 information page, click the orange Try It Now, Free button to go to the Device42 download page.
-
Fill out the form and click Start Your Free Trial to download Device42. Your download link will be emailed to you.
Once Device42 is installed, start discovering your environment:
- For installation help, see the Getting Started with Installation section of the documentation.
- To begin discovering your environment, see Getting Started with Discovery.
- To export discovered data back to Microsoft Azure, see Building Business Services in Device42.
Export Your Business Apps to Azure for Migration
Complete the following steps to register an Azure Active Directory user, collect the required credentials, and export your business applications from Device42.
Register an Azure Active Directory User
-
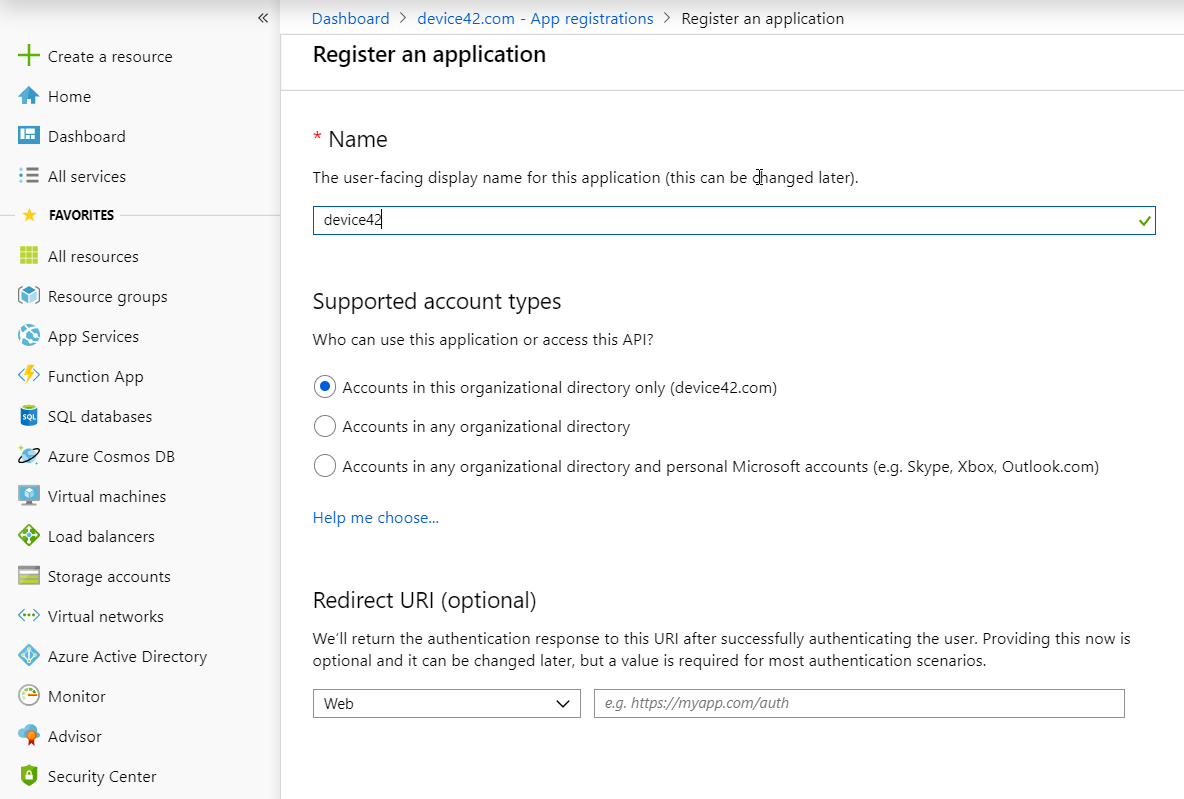
Log in to the Azure portal and create an App Registration in Azure Active Directory. You will need this user to authenticate to Azure when uploading your export.
-
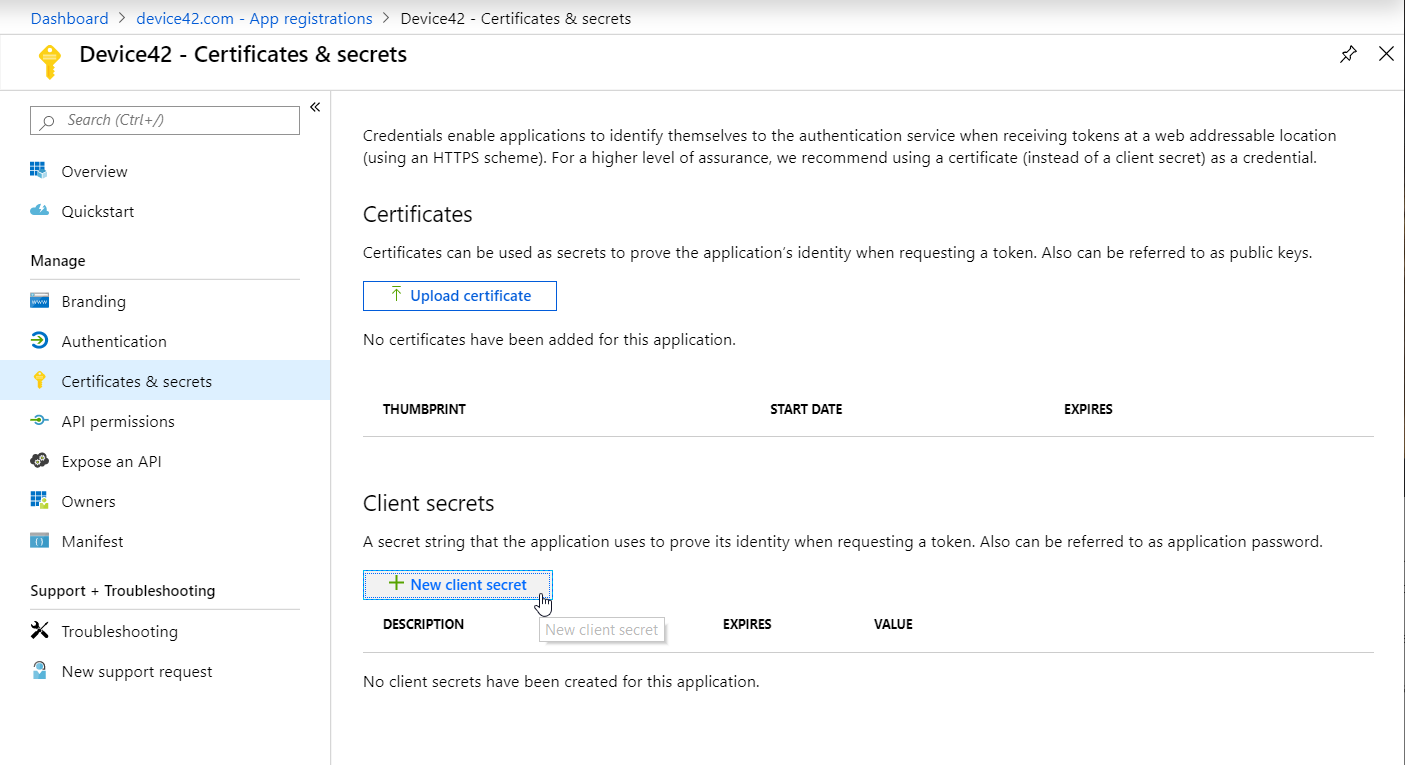
Create a client secret and save the value for Device42.
-
Create a new migration project if you haven't already (see the prior section on this page).
-
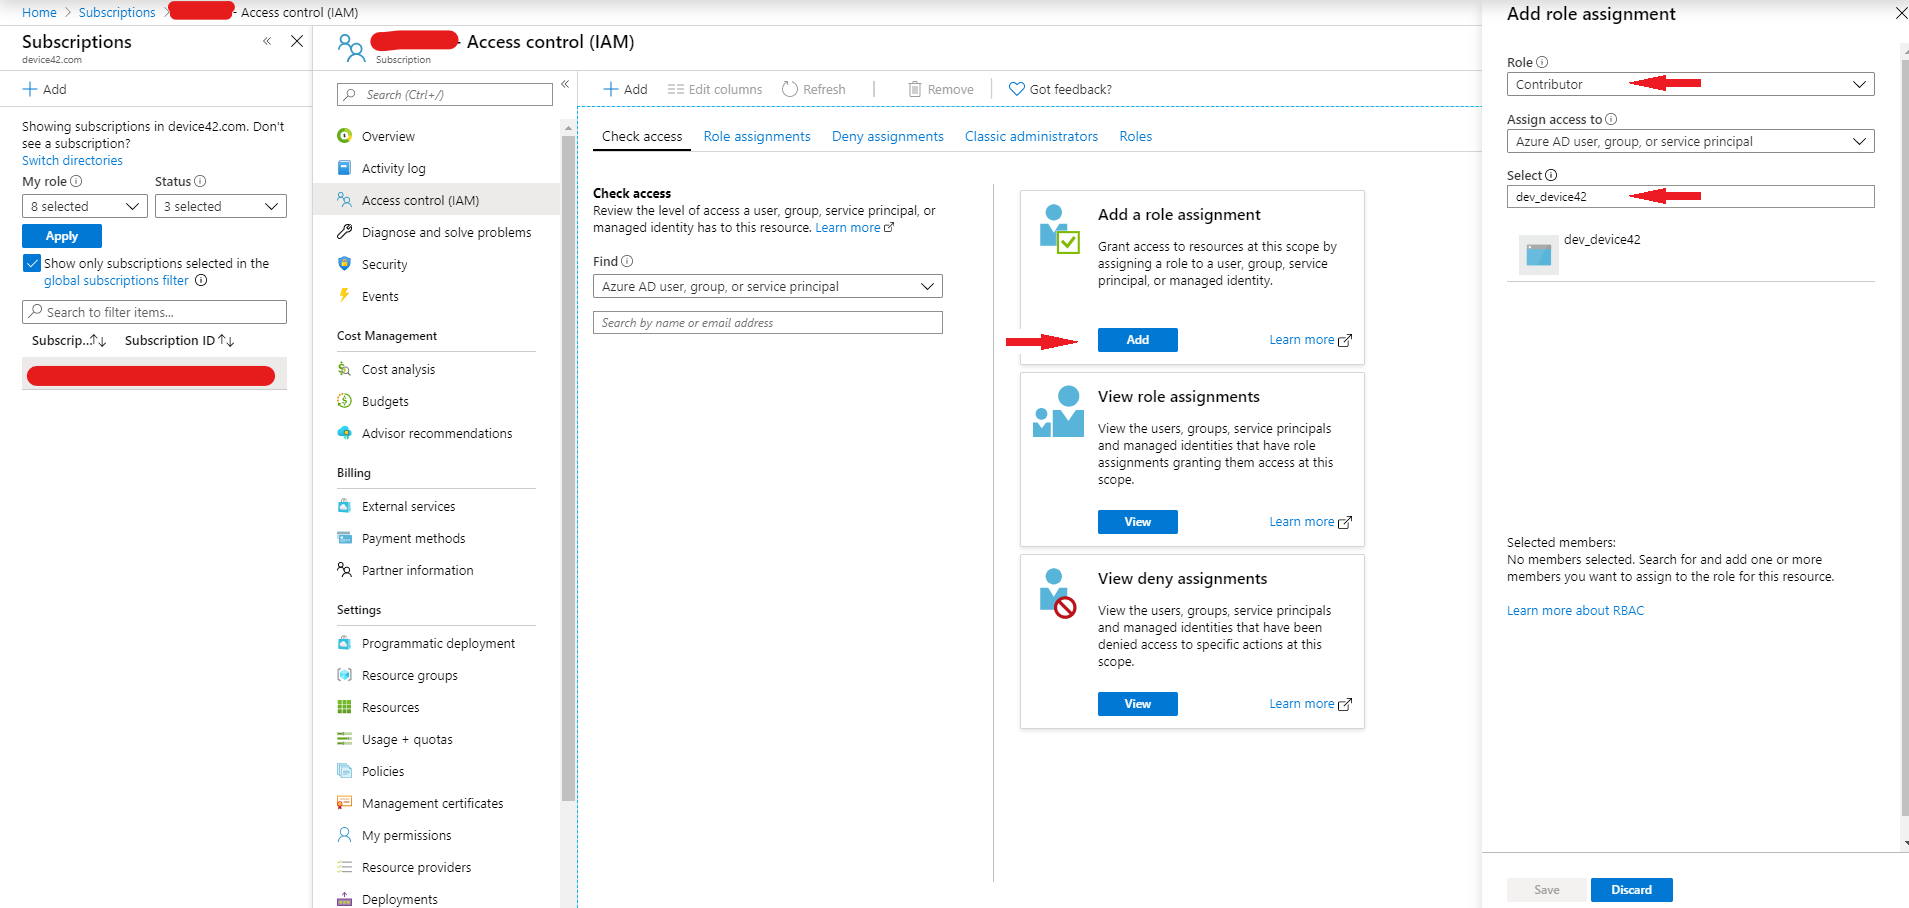
Under Subscriptions > Subscription > Access Control (IAM), click Add under Add a Role Assignment.
-
Select the Contributor role and type the name of the app registration in the Select text box.
-
Select the app registration and click Save. This grants the correct permissions to export data from Device42 to Azure.
Collect Required Information From Azure
Collect the following information from Azure before exporting:
-
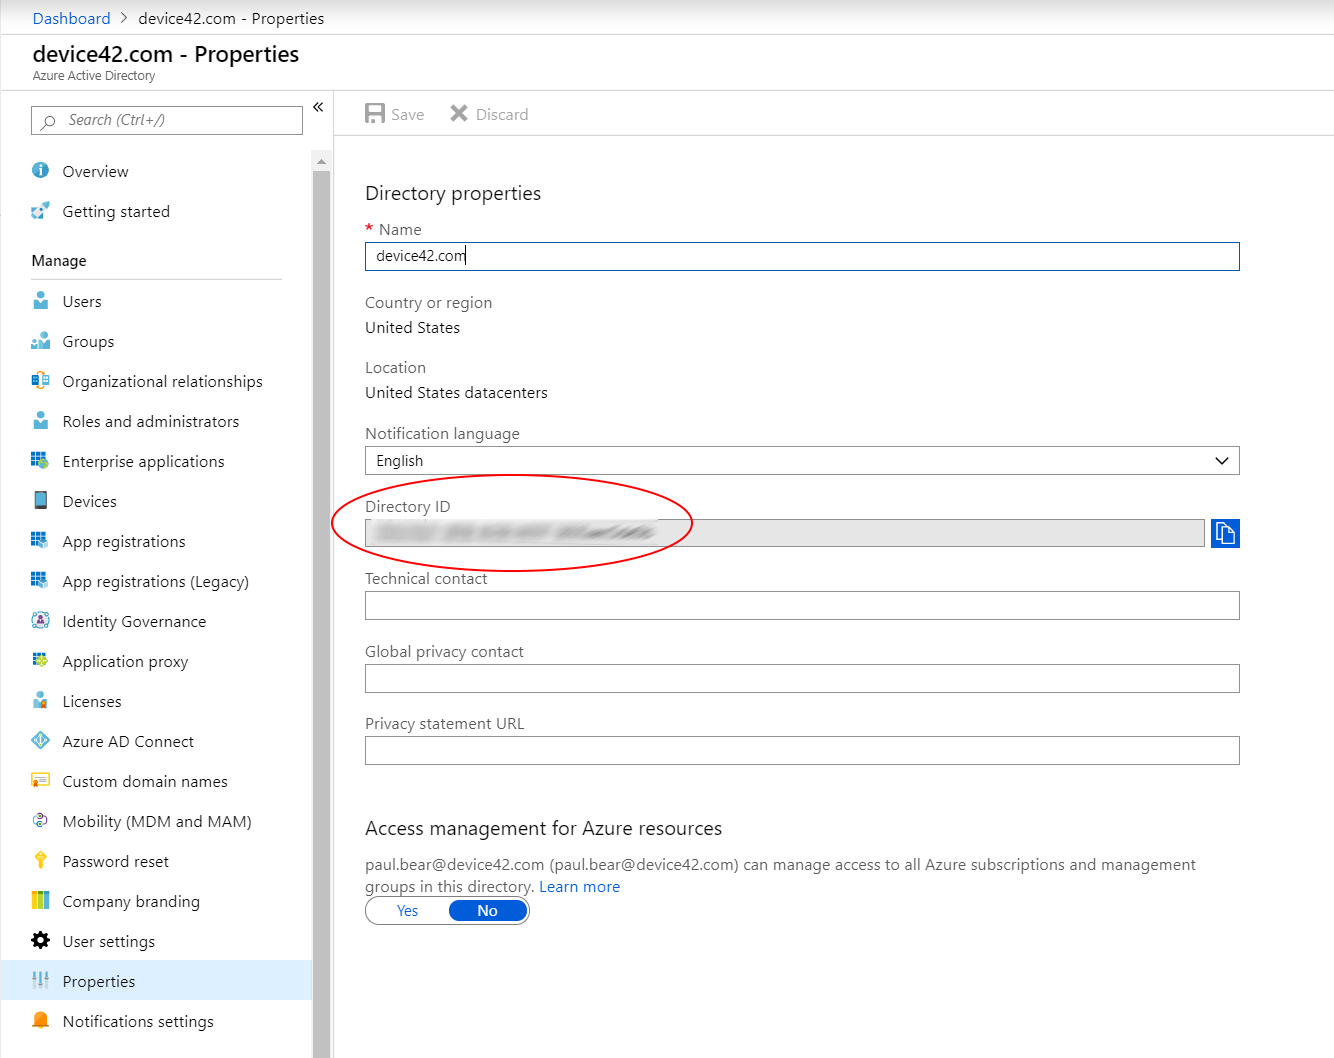
Tenant ID: Azure Active Directory > Properties
-
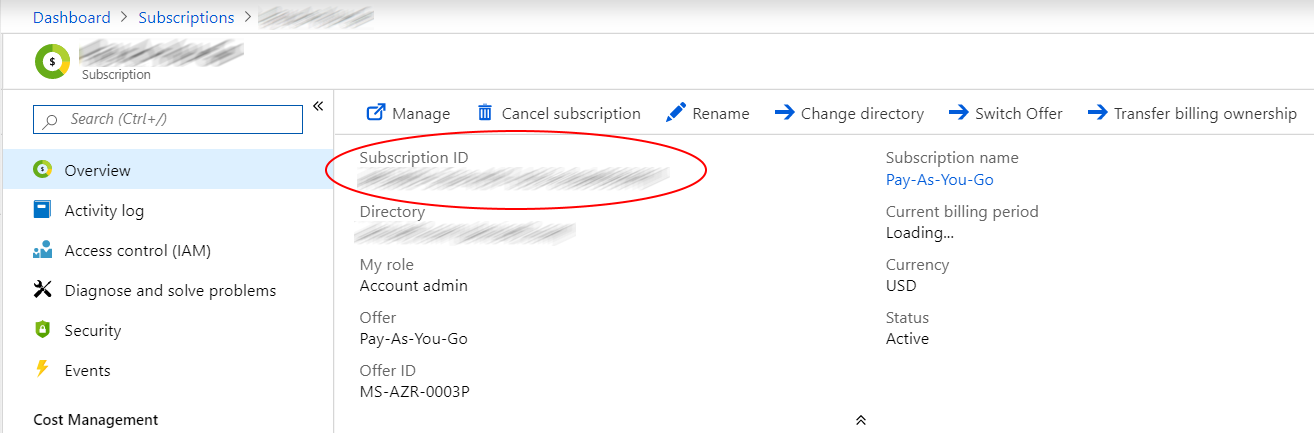
Subscription ID: Subscriptions
-
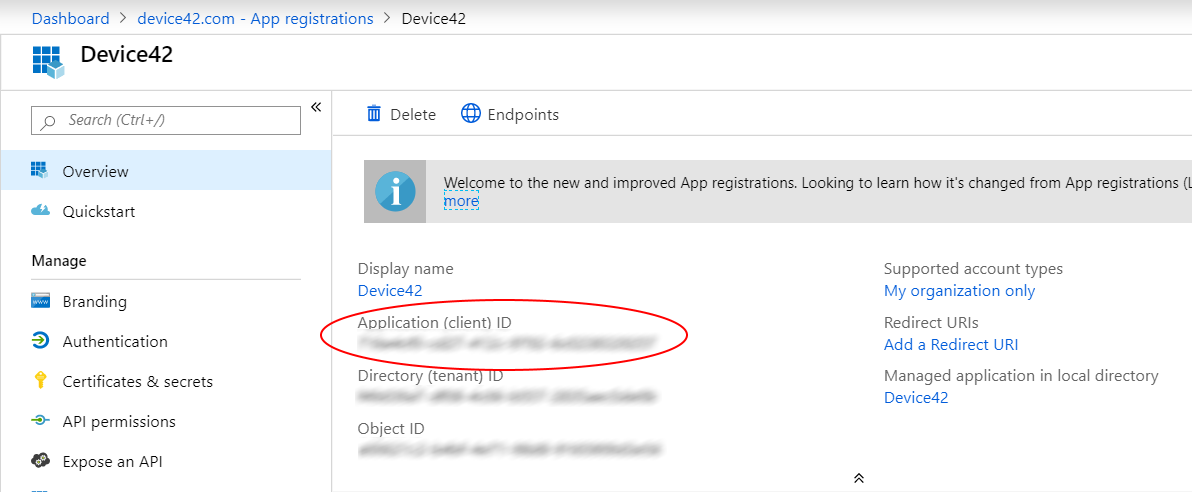
Client ID: Azure Active Directory > App Registrations
-
Client Secret: Saved from app registration creation.
-
Migrate Project Name: The name you chose when creating the project.
Export Your Business Applications From Device42
-
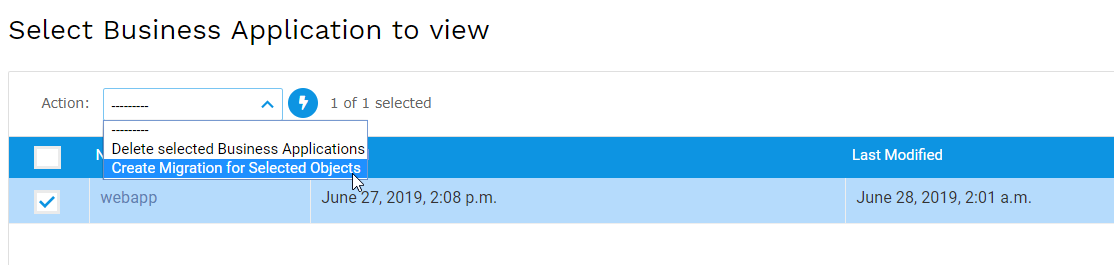
Log in to Device42 and go to Business Apps. Select one or more business apps to export by checking the checkboxes next to them, then choose Create Migration for Selected Objects.
-
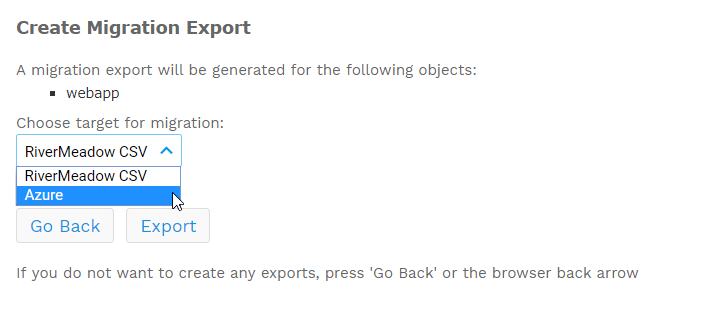
Select Azure as your target from the dropdown.
-
Enter the migration project information collected in the previous step.
-
Click Export. Go back to the Azure Migrate Hub and click Refresh. Your exported data should now be visible in Azure.
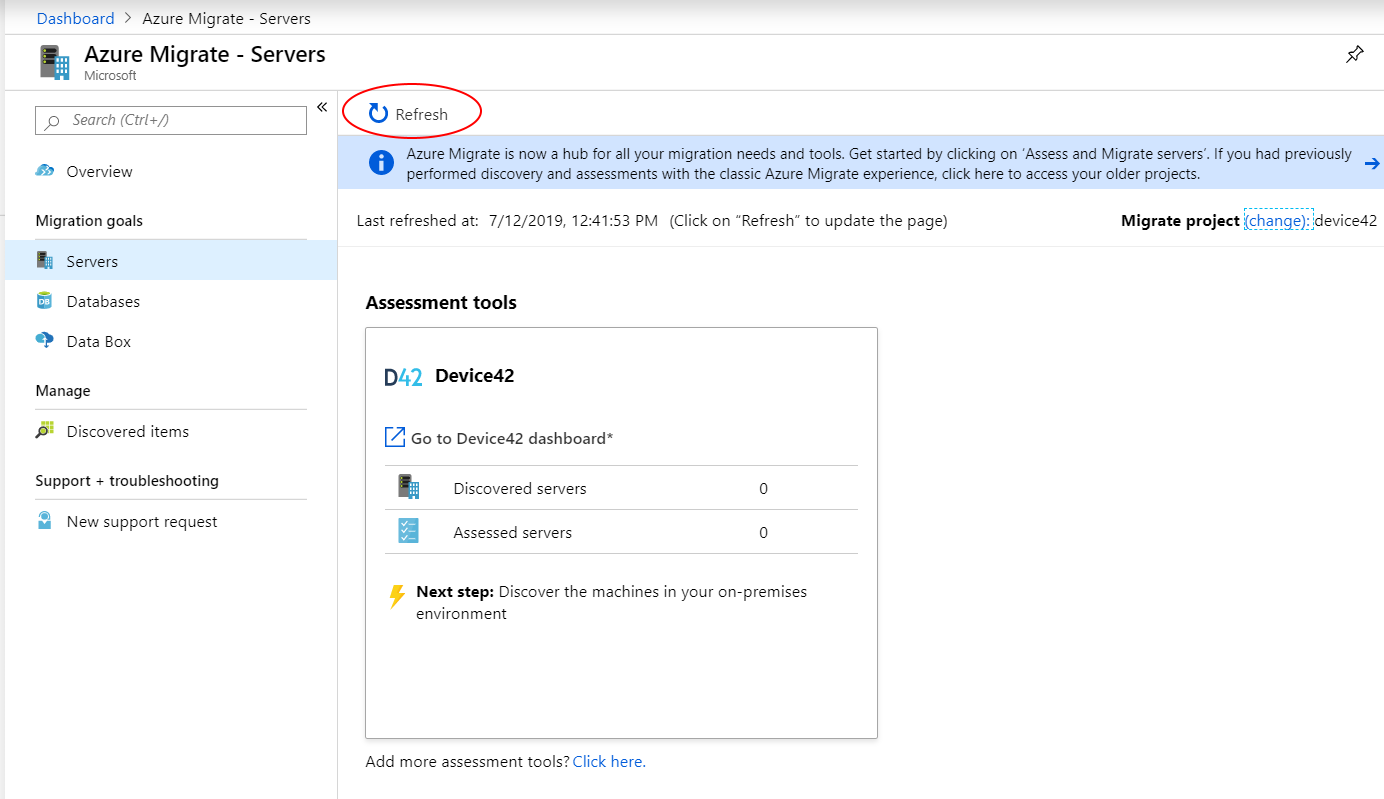
Review Your Device42 Exports in Azure Migrate
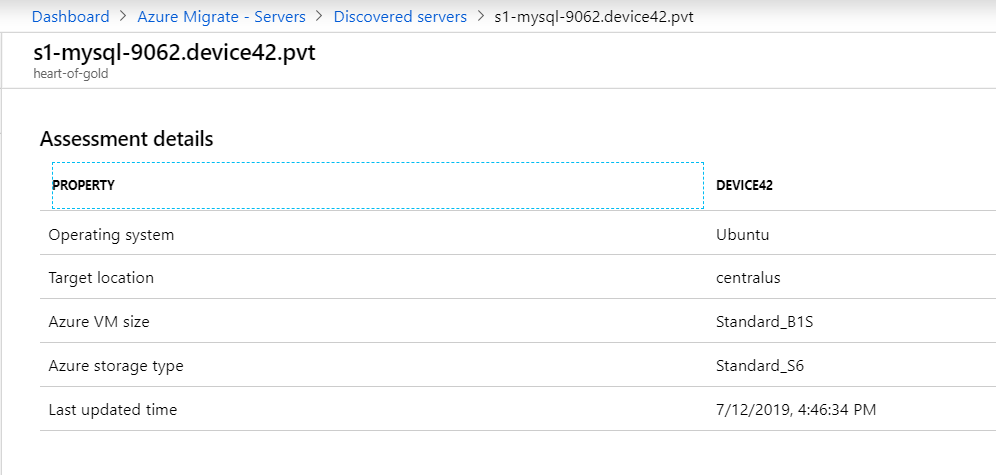
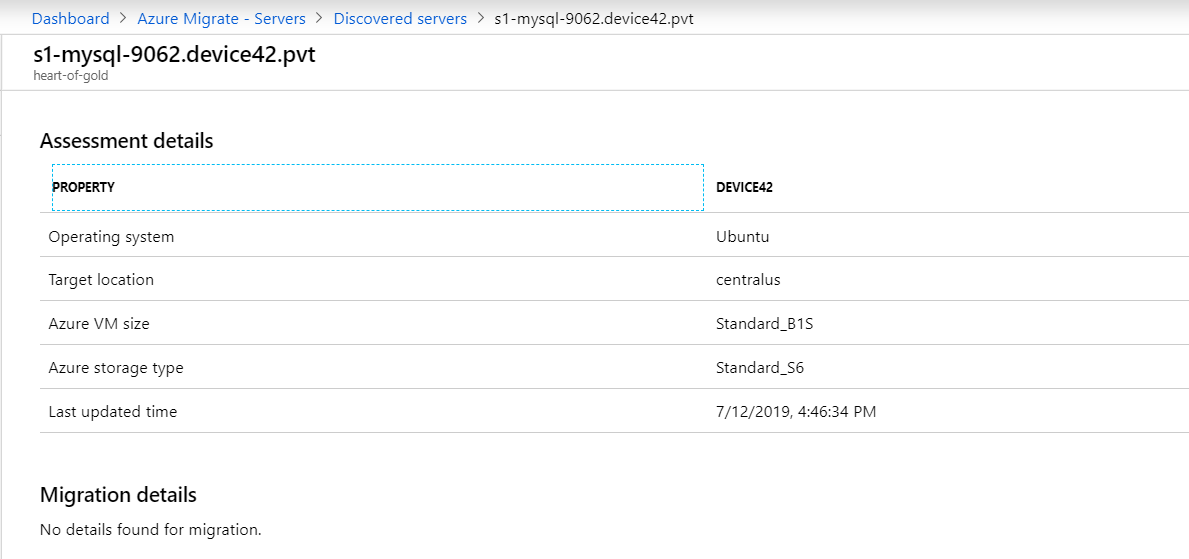
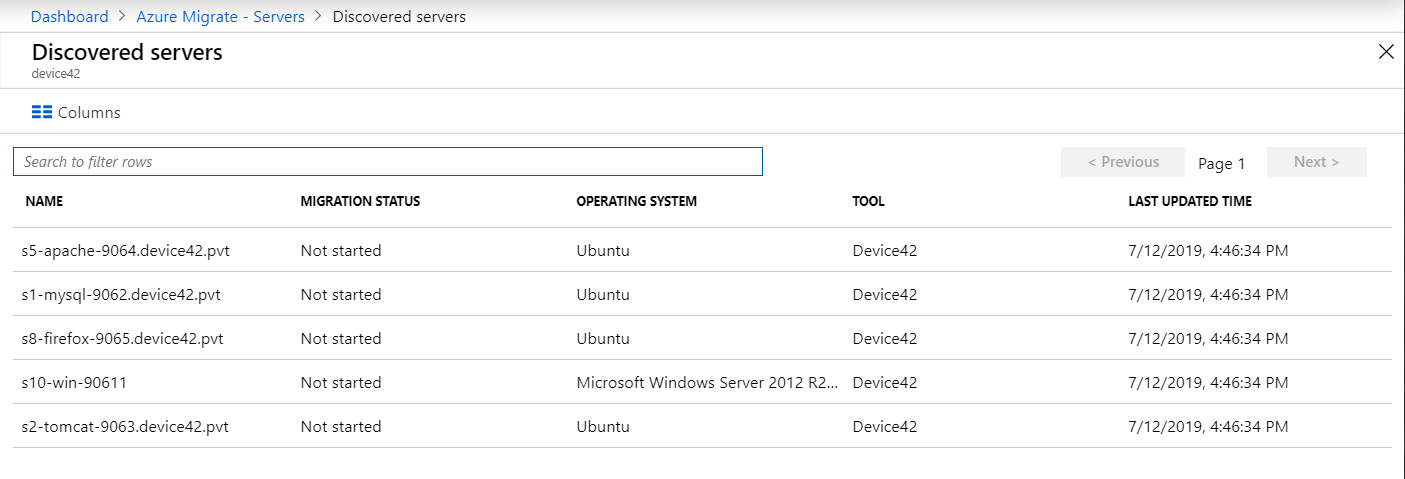
After exporting your business applications to the Azure Migrate portal, log back in (or refresh if already logged in). You should see your data displayed similarly to the following examples.
Contact support@device42.com if you need help with any steps on this page.