ServiceNow Integration
The Device42 ServiceNow connector syncs your IT data from Device42 to your ServiceNow CMDB. Synchronization can be manual or automated on a schedule you set. The plugin supports the three most recent releases of ServiceNow.

Prerequisites
Before installing the plugin, complete the following:
- In Device42, configure your Cloud Connector and add ServiceNow as an External Integration. See Main Appliance Configuration below for details.
- From your ServiceNow instance, install the Configuration Management For Scoped Apps (CMDB) plugin as a dependency.
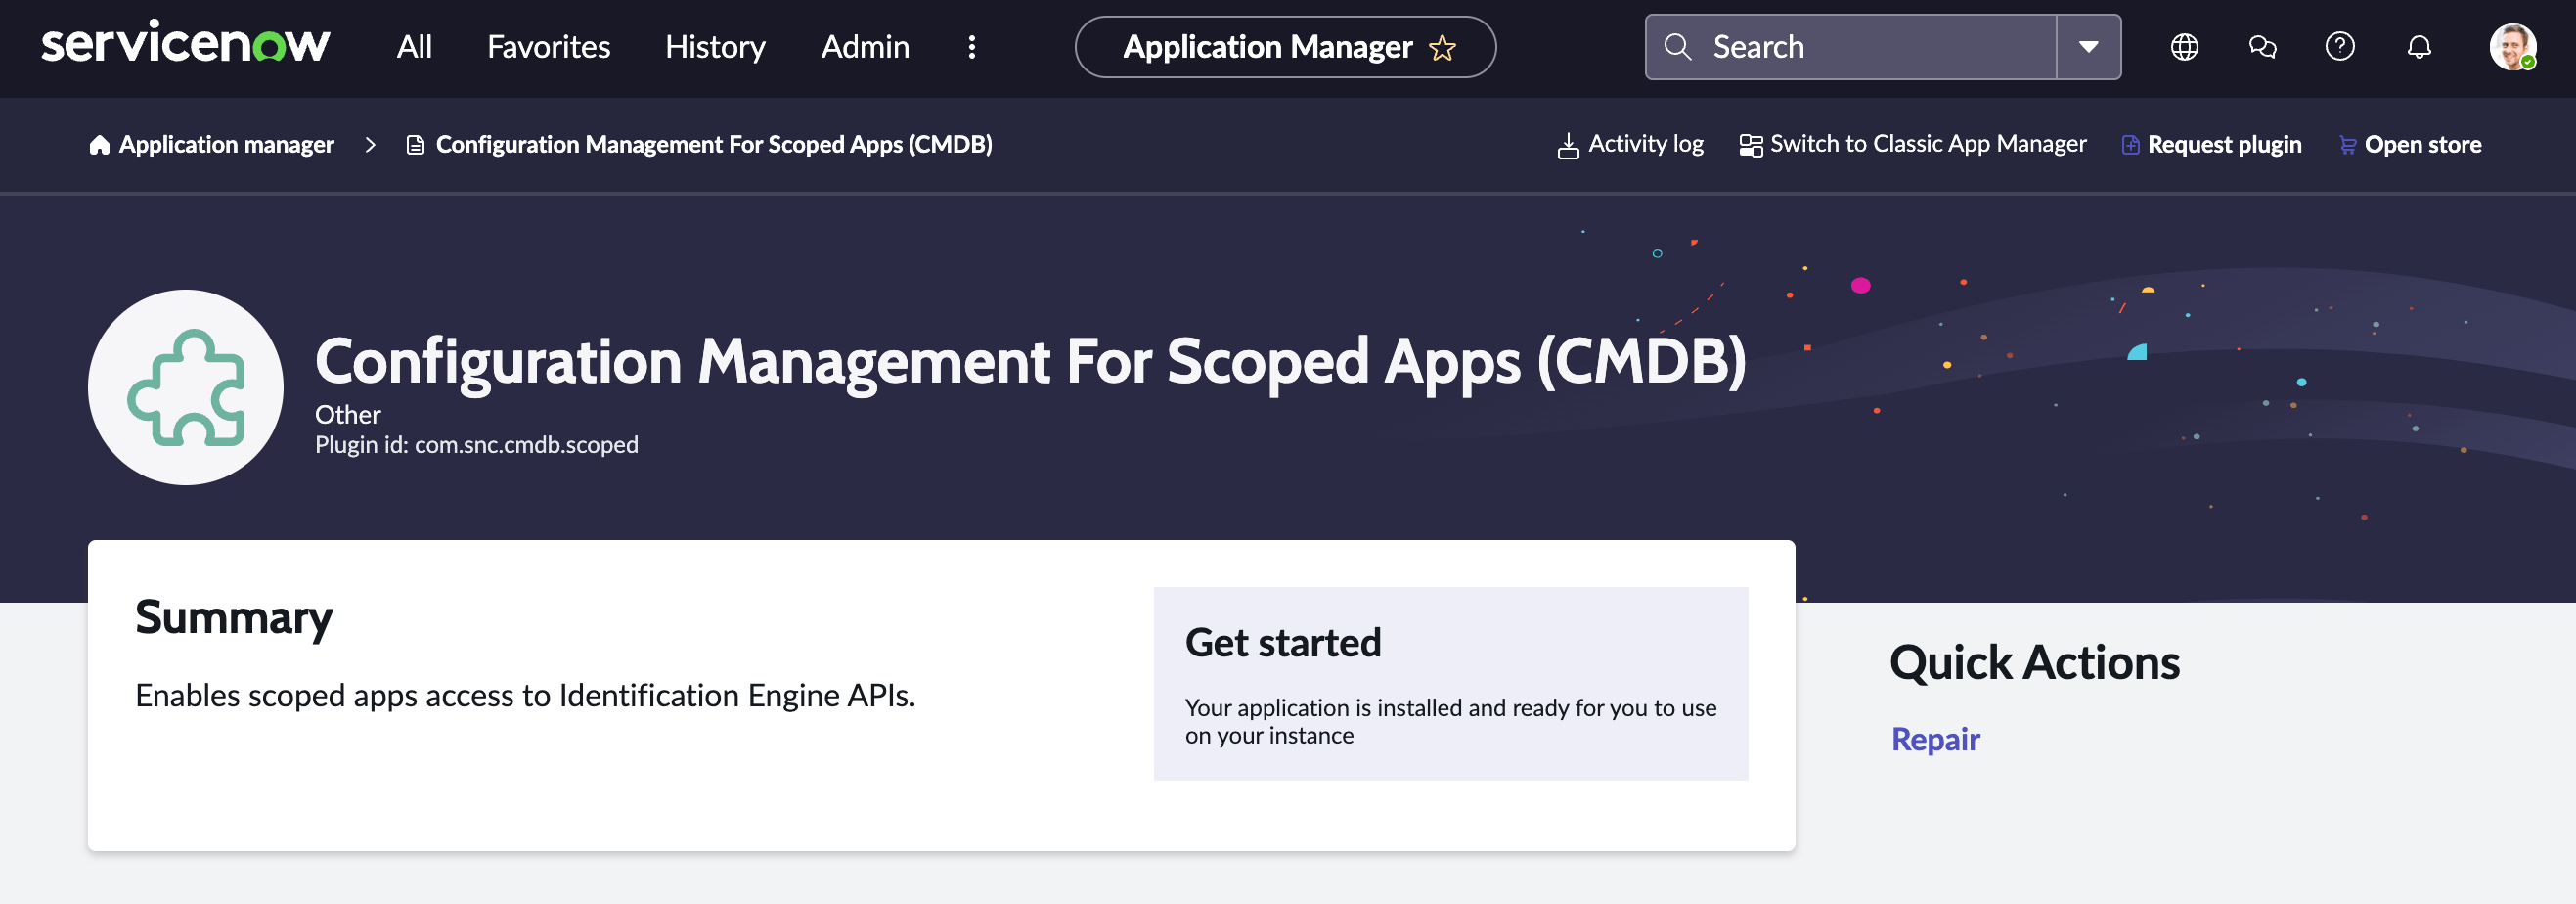
Install the Plugin
-
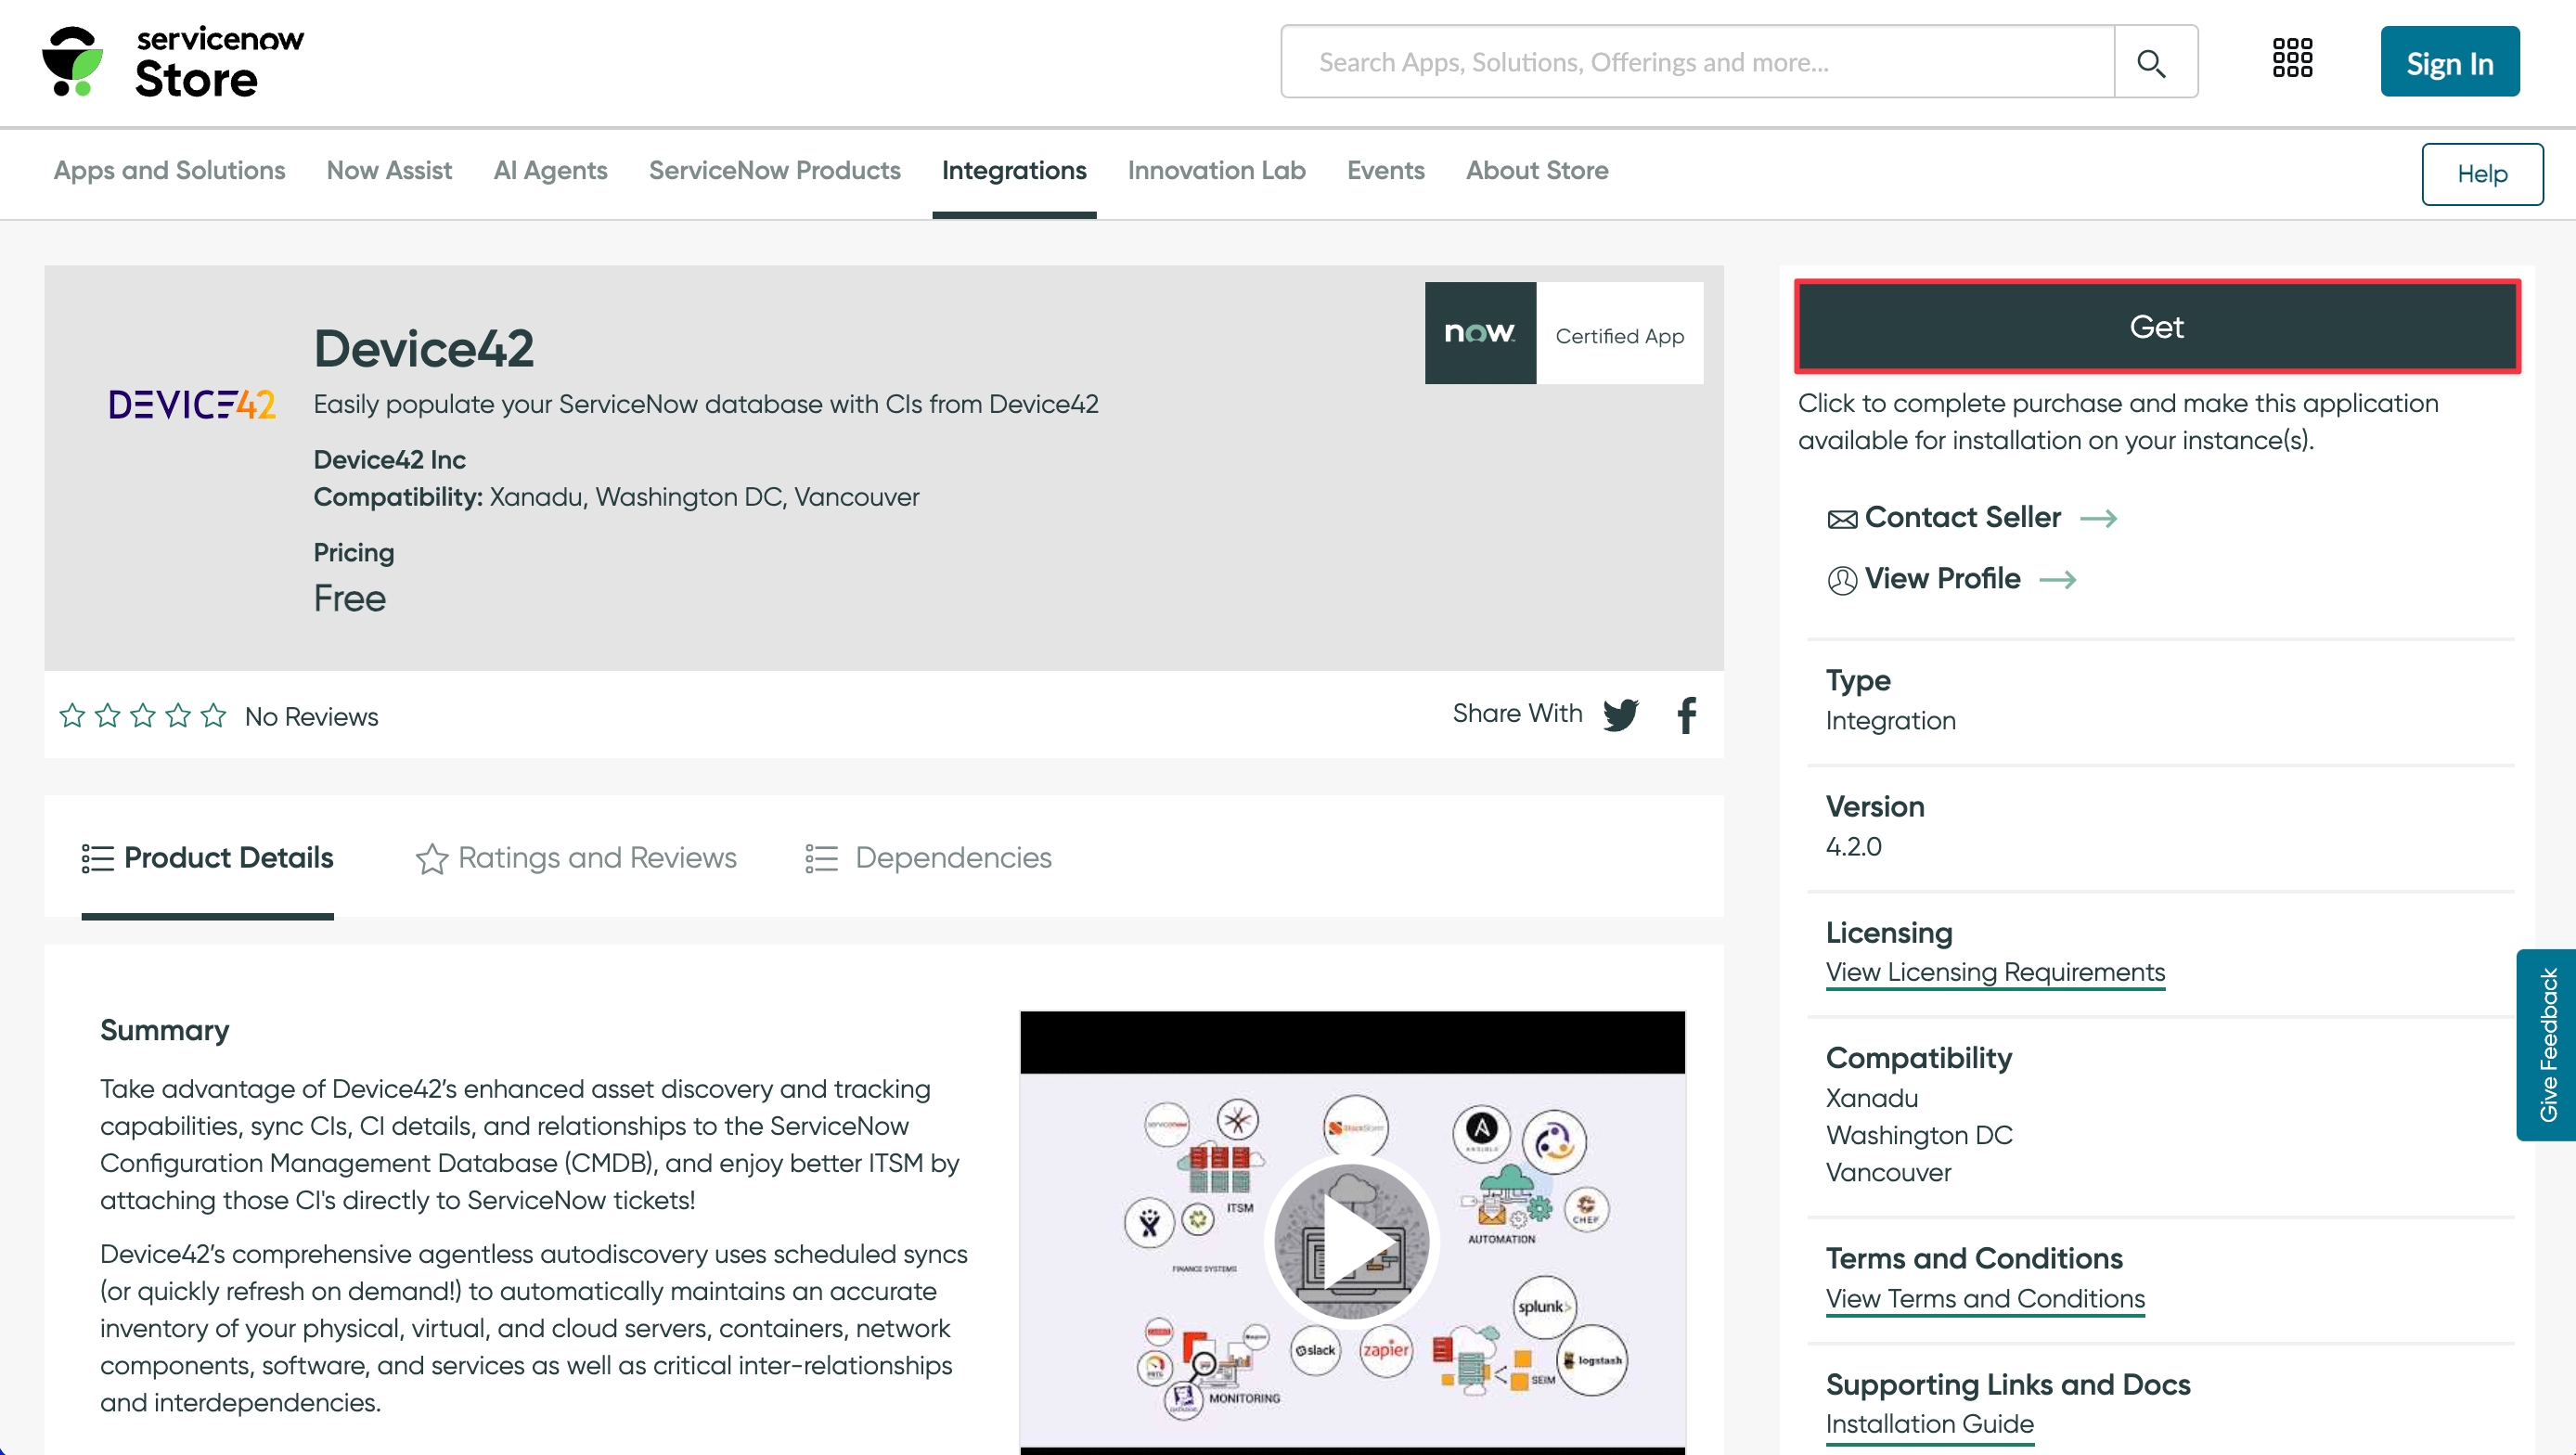
Find and install the Device42 plugin from either the ServiceNow Store or via the Plugin section of your ServiceNow instance:
Visit the ServiceNow Store and click Get to install the plugin on your ServiceNow instance.
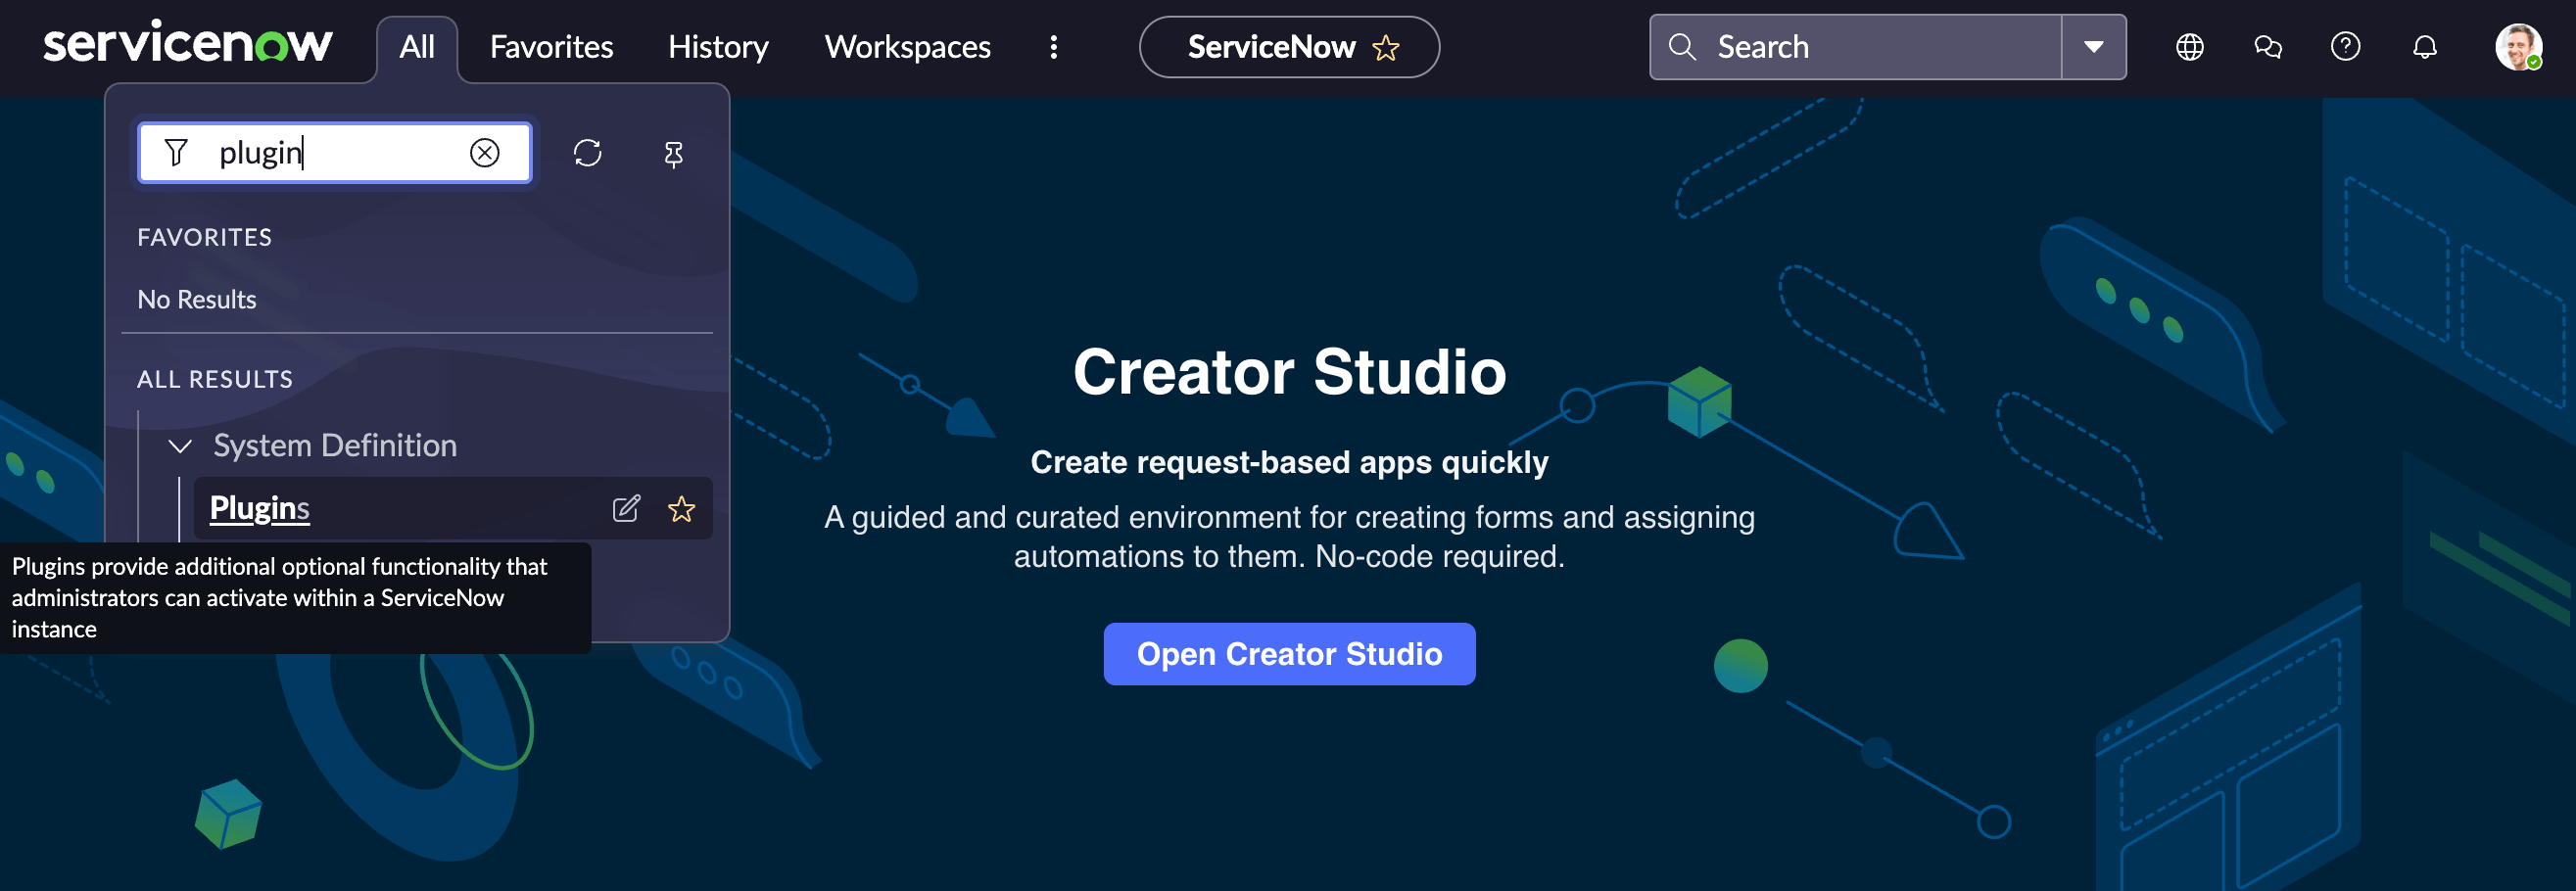
Alternatively, from your ServiceNow instance, search for "plugin" under All to navigate to the plugins page, then search for "Device42".
-
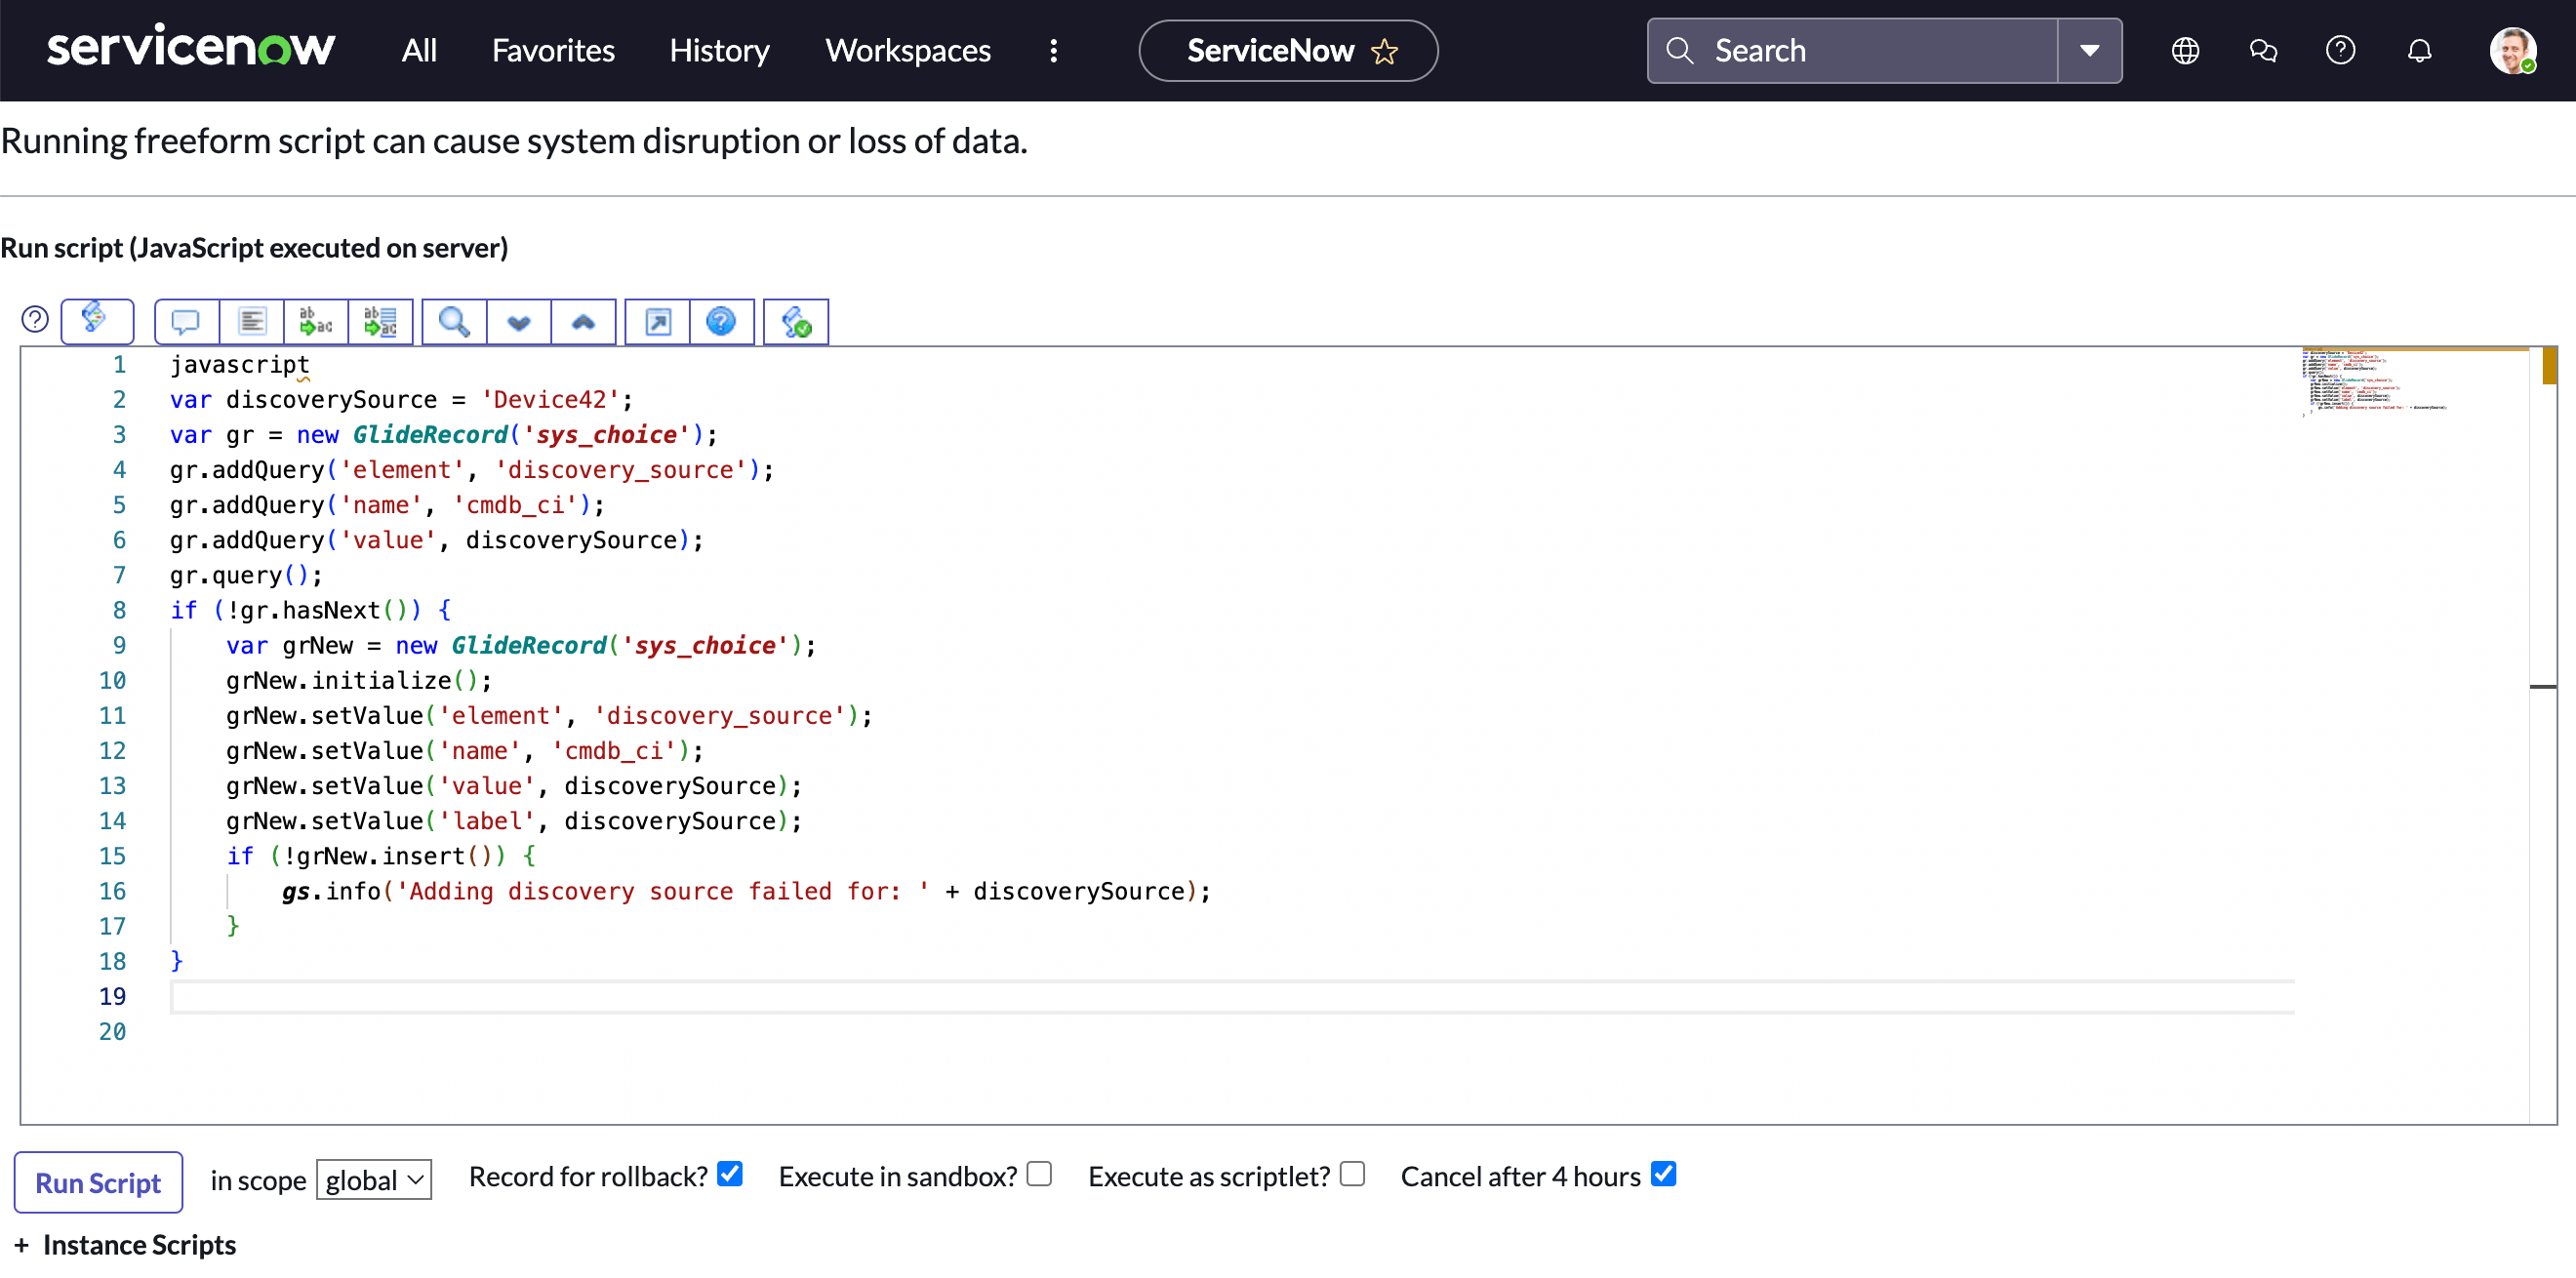
To verify that the discovery source "Device42" was created, navigate to System Definition > Scripts – Background (search for it under All) and paste in the following script. Leave in scope set to global.
Click to expand the code block
var discoverySource = 'Device42';
var gr = new GlideRecord('sys_choice');
gr.addQuery('element', 'discovery_source');
gr.addQuery('name', 'cmdb_ci');
gr.addQuery('value', discoverySource);
gr.query();

if (gr.hasNext()) {
	gs.info('Device42 found');
} else {
	gs.info('Device42 not find');
}
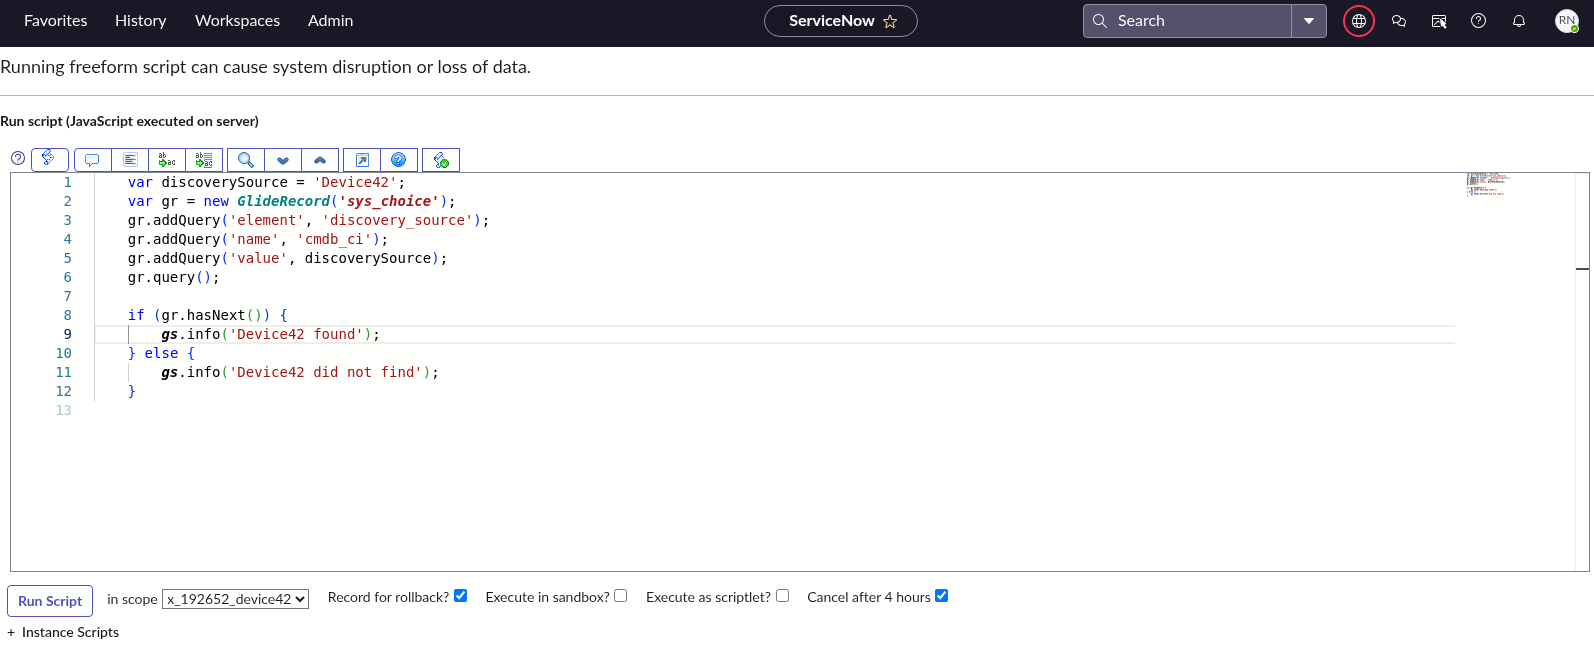
- If "Device42" is not found, add it to the data source choice list. Navigate to System Definition > Scripts – Background and paste in the following script. Leave in scope set to global.
Click to expand the code block
var discoverySource = 'Device42';
var gr = new GlideRecord('sys_choice');
gr.addQuery('element', 'discovery_source');
gr.addQuery('name', 'cmdb_ci');
gr.addQuery('value', discoverySource);
gr.query();
if (!gr.hasNext()) {
    var grNew = new GlideRecord('sys_choice');
    grNew.initialize();
    grNew.setValue('element', 'discovery_source');
    grNew.setValue('name', 'cmdb_ci');
    grNew.setValue('value', discoverySource);
    grNew.setValue('label', discoverySource);
    if (!grNew.insert()) {
        gs.info('Adding discovery source failed for: ' + discoverySource);
    }
}
Manage ServiceNow Data Sources
Each ServiceNow data source points to one data source endpoint. You need to create a separate data source for each endpoint. If you want to add multiple endpoints, you must create a separate data source for each one.
From ServiceNow, the URI endpoints look something like this:
-
Cloud Connector Configuration:
sn/route_doql_csv/{DOQL Name} -
Direct Connection Configuration (3.0.0 and later only):
/services/data/v1.0/query/?saved_query_name={DOQL Name}&delimiter=,&header=yes&output_type=csv
The general request flow is described in the sections below.
Cloud Connector Configuration
- When a request is made to the Cloud Connector, it finds the appropriate account by matching verification tokens. That account's
appliance_guidandam_guidare then used by the WebSocket server to route the request to the appropriate client. - The verification token is validated on the Device42 instance to ensure that the Cloud Connector has appropriate access to the requested resources. If the integration is configured for direct connections only, the request is rejected. Otherwise, the request is processed.
- The Cloud Connector runs the appropriate DOQL query against the proper Device42 instance on behalf of the requesting ServiceNow instance and returns the results to ServiceNow for processing by the data source transformation maps.
Direct Connection Configuration
- When a request is made directly to the Device42 appliance, Device42 searches for a configured integration with a matching verification token and verifies that the integration can make a direct connection. If verification fails, the request is rejected. Otherwise, the request is processed.
- The Device42 instance runs the appropriate DOQL query and returns the results to ServiceNow for processing by the data source transformation maps.
Custom Device42 DOQL Data Sources
Using Device42's Device42 Object Query Language (DOQL), you can fully customize the data sent to ServiceNow.
In Device42, navigate to Tools > Integrations > Saved DOQL Queries to add a new saved DOQL query, then add a new ServiceNow data source that points to that query.
In ServiceNow, you can create and modify existing data sources and set their file paths by updating the string below to reference the name of your saved DOQL query.
Increase Field Length
The file path field for a data source is limited to 100 characters by default. If you cannot enter your entire file path, you can work around the character limit in two ways:
- Assign your custom query to a system property and reference it in the field with
${name_of_your_system_property}. - Increase the character limit by navigating to System Definition > Tables > sys_data_source > File Path and updating the maximum character length.
System Property Method
| Connection Type | Name | Type | Value |
|---|---|---|---|
| Cloud Connection | name_of_your_system_property | String | YOUR_DOQL_NAME |
| Direct Connection | name_of_your_system_property | String | saved_query_name=YOUR_DOQL_NAME&delimiter=,&header=yes&output_type=csv |
Do not include the ? symbol in your system property, as ServiceNow will percent-encode it when retrieving the value. Include the ? in the file path field itself:
/services/data/v1.0/query/?${name_of_your_system_property}
Cloud Connection
- File Path:
sn/route_doql_csv/YOUR_DOQL_NAME - Username: Any value is accepted, but this field is required.
- Password:
${x_192652_device42.instance_key}
All records will appear to be ignored, as the Identification and Reconciliation Engine (IRE) handles deduplication.
Direct Connection
- File Path:
/services/data/v1.0/query/?saved_query_name=YOUR_DOQL_NAME&delimiter=,&header=yes&output_type=csv - Username: Any value is accepted, but this field is required.
- Password:
${x_192652_device42.instance_key}
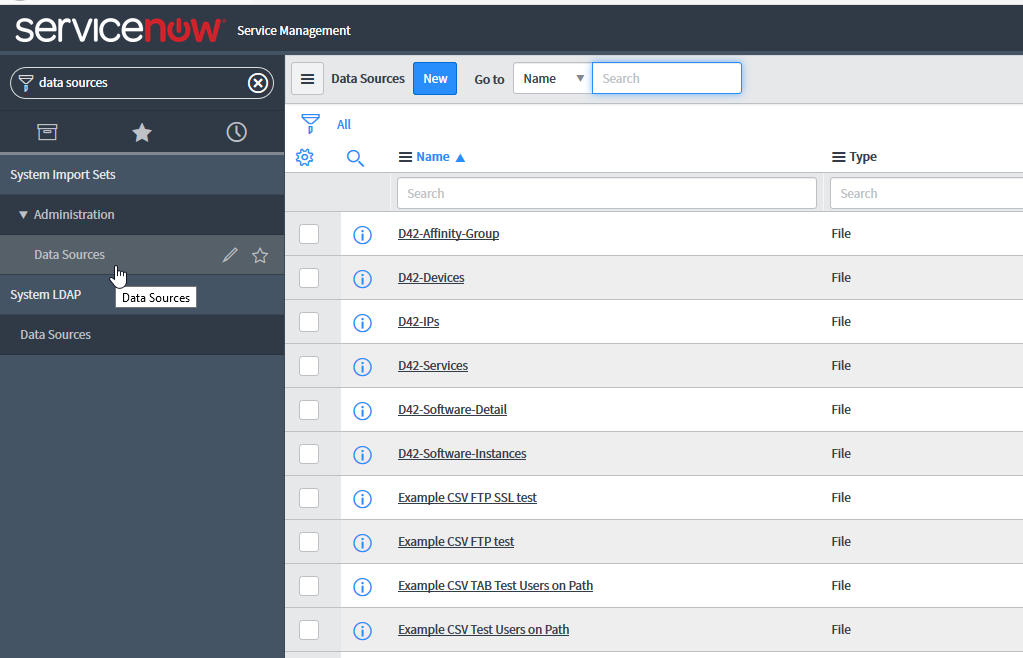
To add a custom DOQL data source, navigate to System Import Sets > Administration > Data Sources in ServiceNow:
Add your new data source:
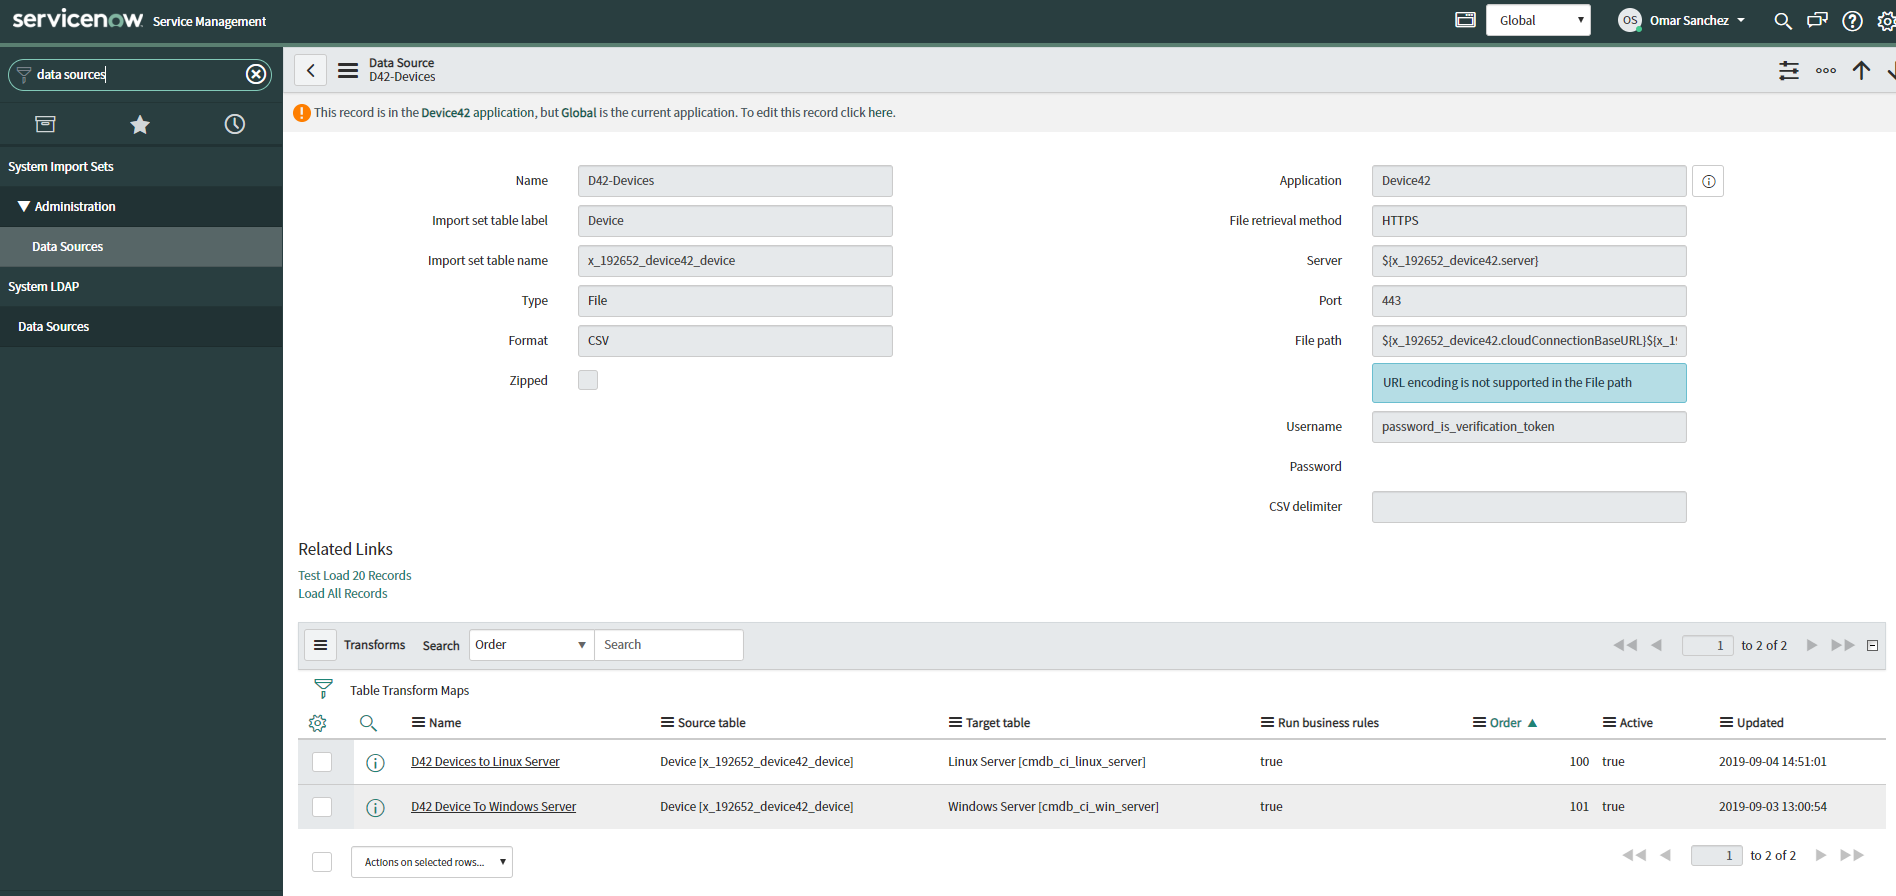
| Field | Description |
|---|---|
| Name | The name of your data source. This can be any value you choose. |
| Import set table | The table to import data into. |
| Type | Default: File |
| Format | Default: CSV |
| Server | Default: ${x_192652_device42.server} |
| Port | Default: 443 |
| File Path | Cloud Connector: sn/route_doql_csv/YOUR_DOQL_QUERY_NAME Direct Connect: /services/data/v1.0/query/?saved_query_name=YOUR_DOQL_QUERY_NAME |
| Username | A username is required to send credentials with requests. This can be any value, for example, servicenow_data_source. |
| Password | The verification token of the integration you set up in Device42. |
The is_default option, which flags Windows and *nix interfaces (most netports) as default, has been added to the view_netport_v1 view.
ServiceNow now has access to your new data source. For assistance, email support@device42.com.
The Cloud Connector
The ServiceNow integration uses the Device42 Cloud Connector to facilitate communication between your ServiceNow Cloud instance and your Device42 instance without requiring that Device42 be exposed to the internet. The Cloud Connector uses a WebSocket connection initiated by the Device42 appliance.
For details on the Cloud Connector communication and security architecture, see the Cloud Connector documentation.
A direct connection option is also available for users who prefer to keep their integrations within their private networks.
Integration Setup and Configuration Overview
Download the Device42 ServiceNow connector from the ServiceNow Marketplace.
Install and Configure the Integration
If you have the latest version of the ServiceNow integration plugin, follow the additional steps below to configure the plugin and use ServiceNow's Identification and Reconciliation Engine (IRE).
Install the required dependency on ServiceNow (New York only; Orlando and later have this dependency pre-installed):
- Navigate to System Definition > Plugins.
- Search for Configuration Management For Scoped Apps (CMDB).
- Click Install and allow the dependency to install.
Add Device42 as a data source choice list record (New York and Orlando and later):
- Navigate to System Definition > Scripts – Background.
- Ensure the script is set to run in the global scope.
- Paste the following script into the text box and click Run Script.
Run the Script
Click to expand the code block
var discoverySource = 'Device42';
var gr = new GlideRecord('sys_choice');
gr.addQuery('element', 'discovery_source');
gr.addQuery('name', 'cmdb_ci');
gr.addQuery('value', discoverySource);
gr.query();
if (!gr.hasNext()) {
    var grNew = new GlideRecord('sys_choice');
    grNew.initialize();
    grNew.setValue('element', 'discovery_source');
    grNew.setValue('name', 'cmdb_ci');
    grNew.setValue('value', discoverySource);
    grNew.setValue('label', discoverySource);
    if (!grNew.insert()) {
        gs.info('Adding discovery source failed for: ' + discoverySource);
    }
}
After completing these steps, continue with the rest of the configuration.
Main Appliance Configuration
-
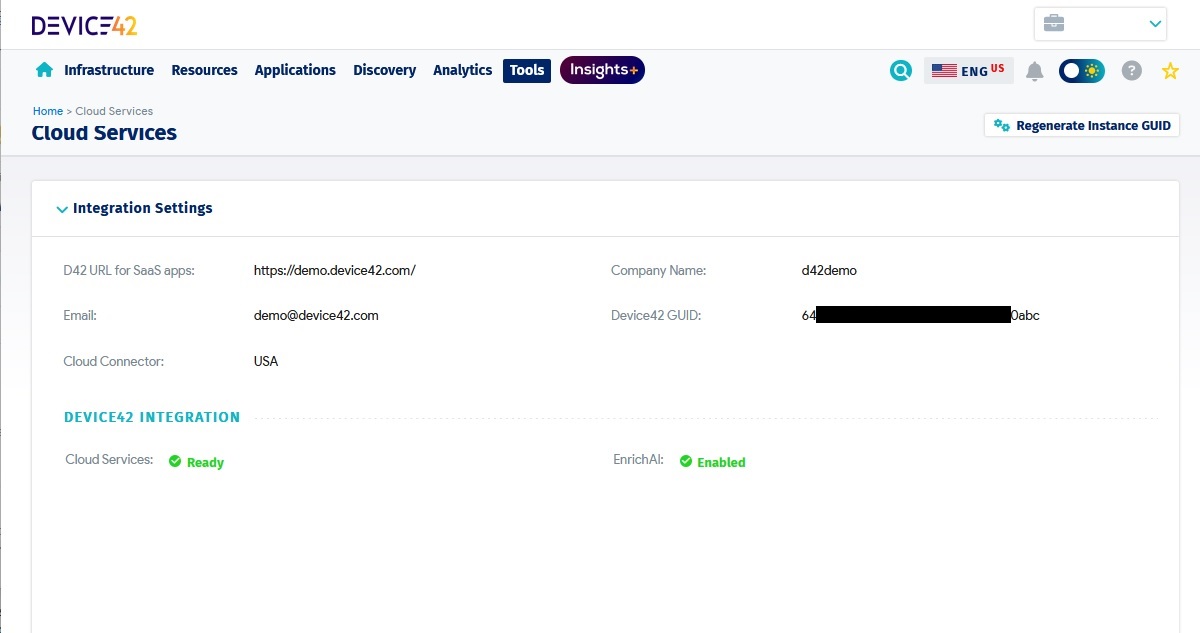
Ensure that the External Integration Settings section of your Cloud Services Configuration is correctly set. In Device42, go to Tools > Cloud Services and enter your Device42 instance URL or IP address in the D42 URL for SaaS apps field (for example,
https://myd42url.com). Fill in your company name and email address. If you are not based in the USA, you can optionally switch to the Europe-based Cloud Connector in the same section: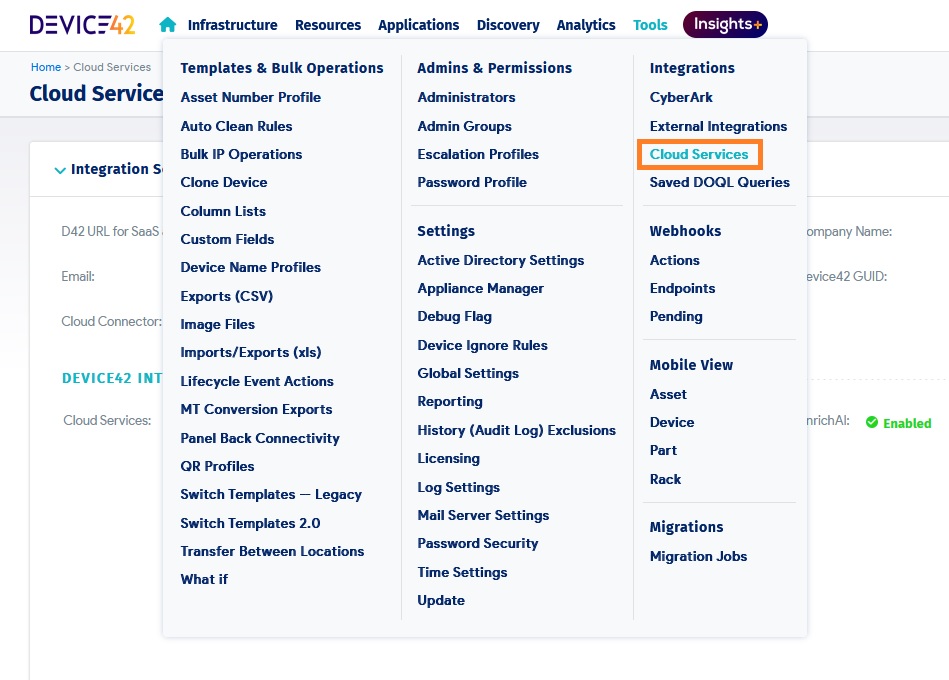
-
Log in to Device42 and go to Tools > Integrations > External Integrations.
-
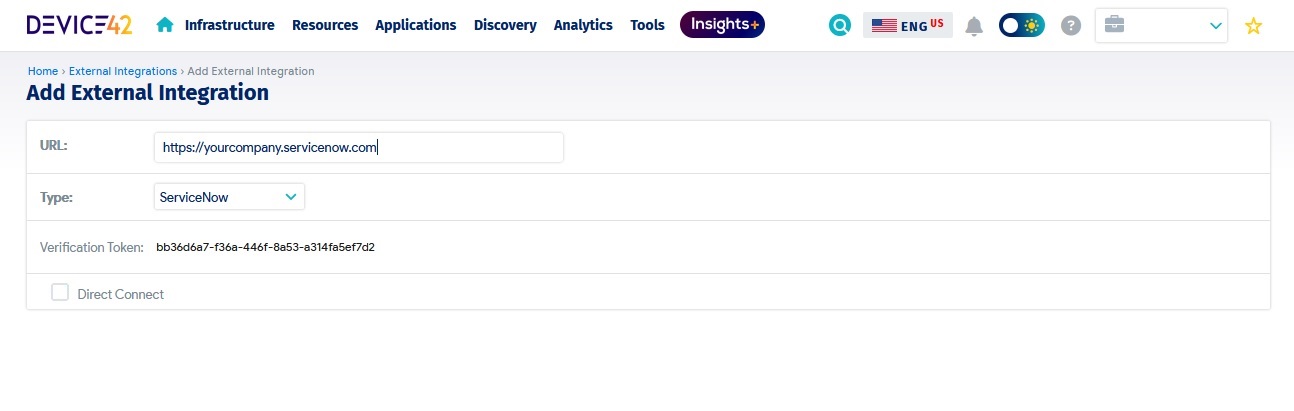
Create a new External Integration, selecting ServiceNow from the Type dropdown and setting the URL to your ServiceNow URL.
-
Direct Connection: If you have the latest version of Device42, the ServiceNow external integration page includes a Direct Connect option. Check this option to configure a direct connection. This setting cannot be changed after saving — you will need to delete and set up a new configuration if you want to change it — so confirm your settings before creating the integration.
-
Cloud Connection: Ensure that the Direct Connect option is unchecked.
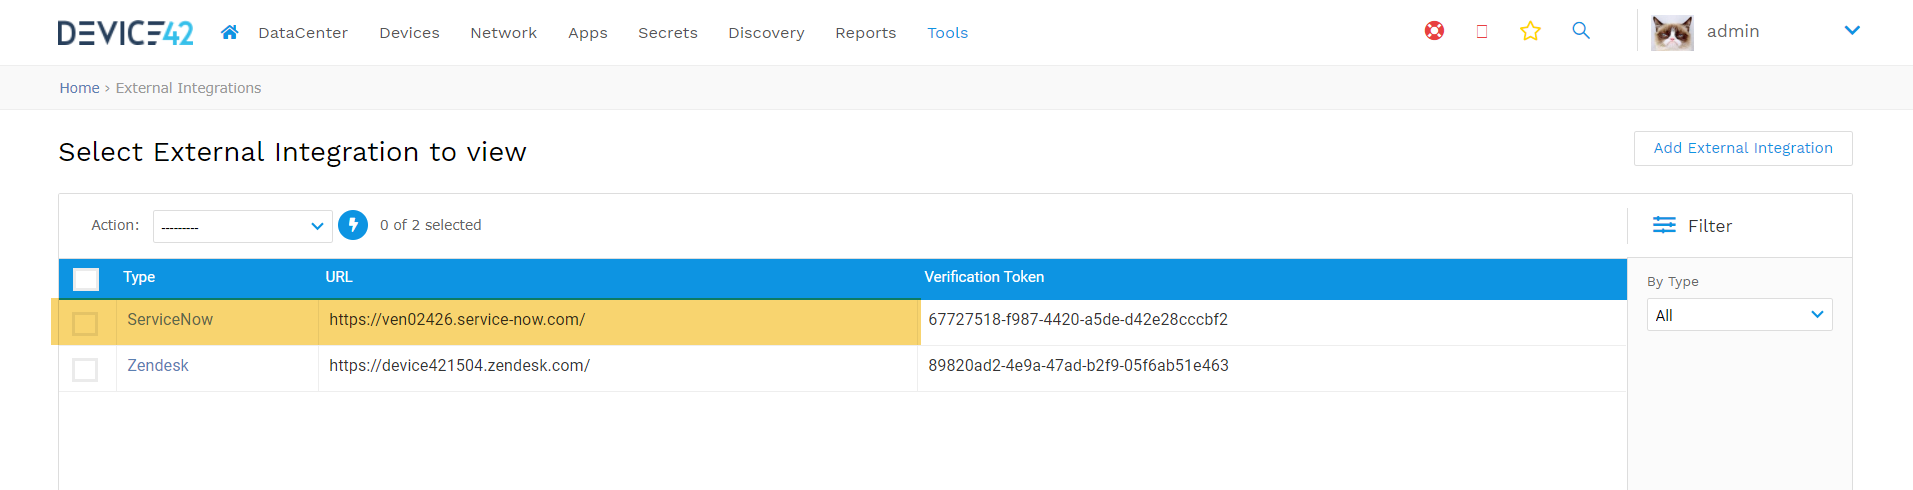
Note the Verification Token — you will need to enter it in ServiceNow:
-
-
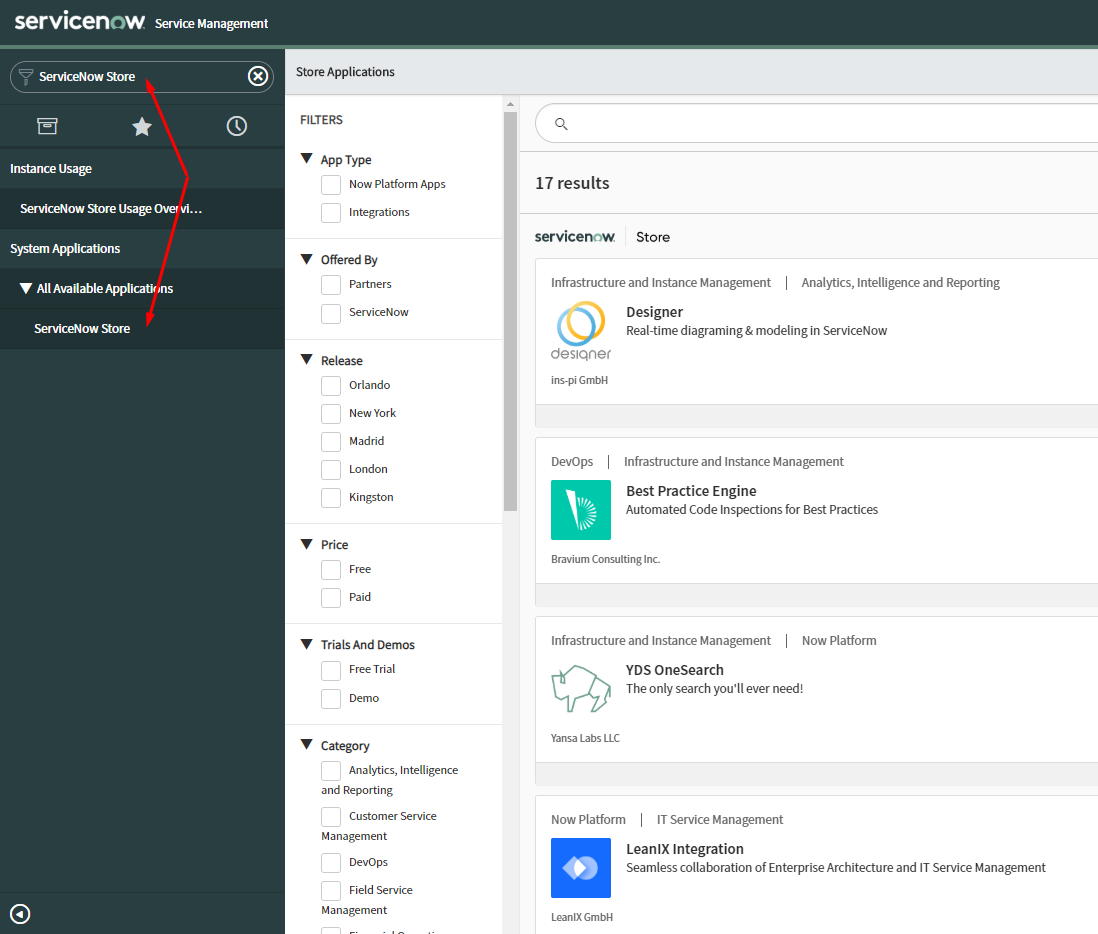
Log in to your ServiceNow instance and install the Device42 integration from the ServiceNow Store.
-
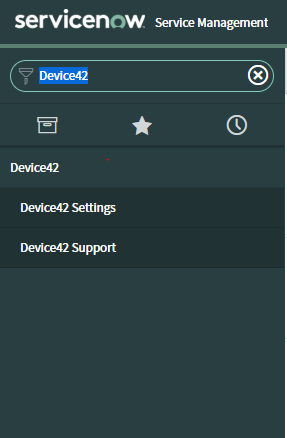
Once installed, search for and select Device42 Settings.
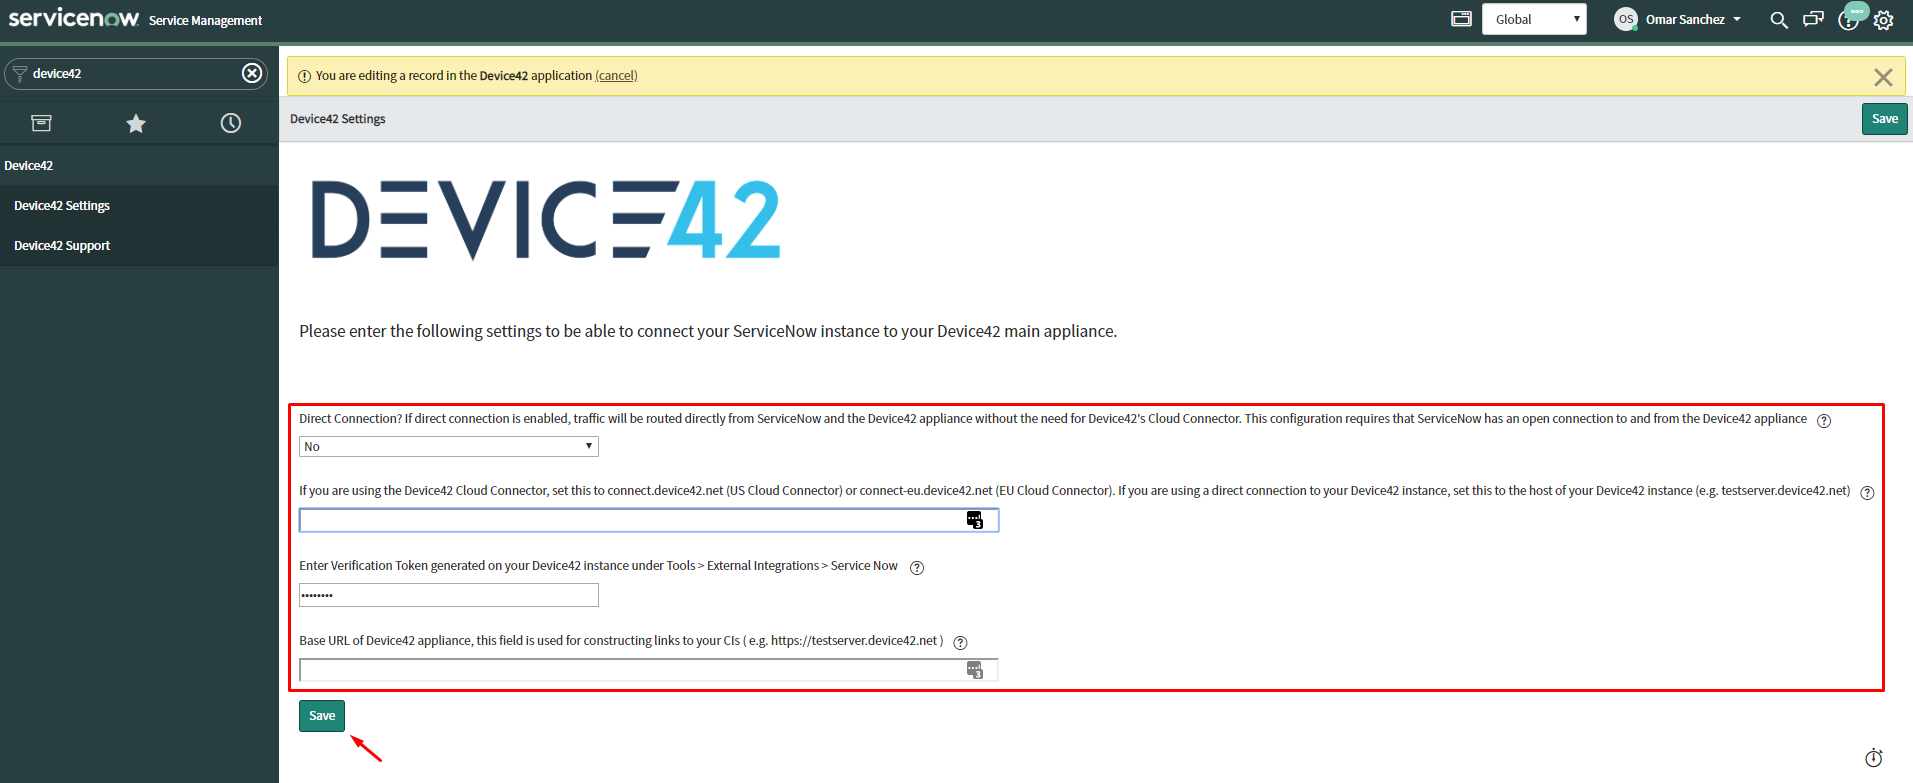
- Enable editing by clicking at the top of the settings page.
- Fill in the URL for the Device42 Cloud Connector (
connect.device42.net). - Paste the Device42 Verification Token from step 3.
- Enter your Device42 URL and click Save.
Configure a Scheduled Sync
Configure the data sync schedules as appropriate for your environment. Search ServiceNow for System Import Sets to find the schedules page:
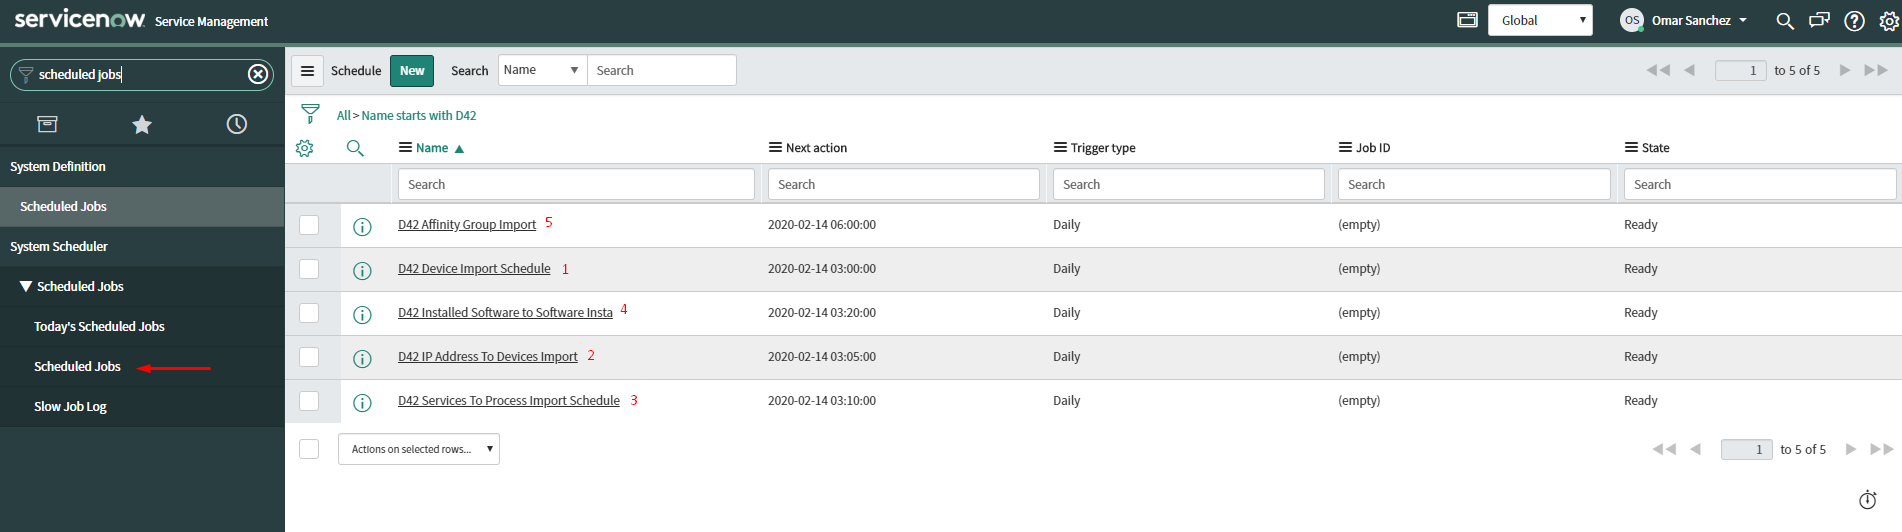
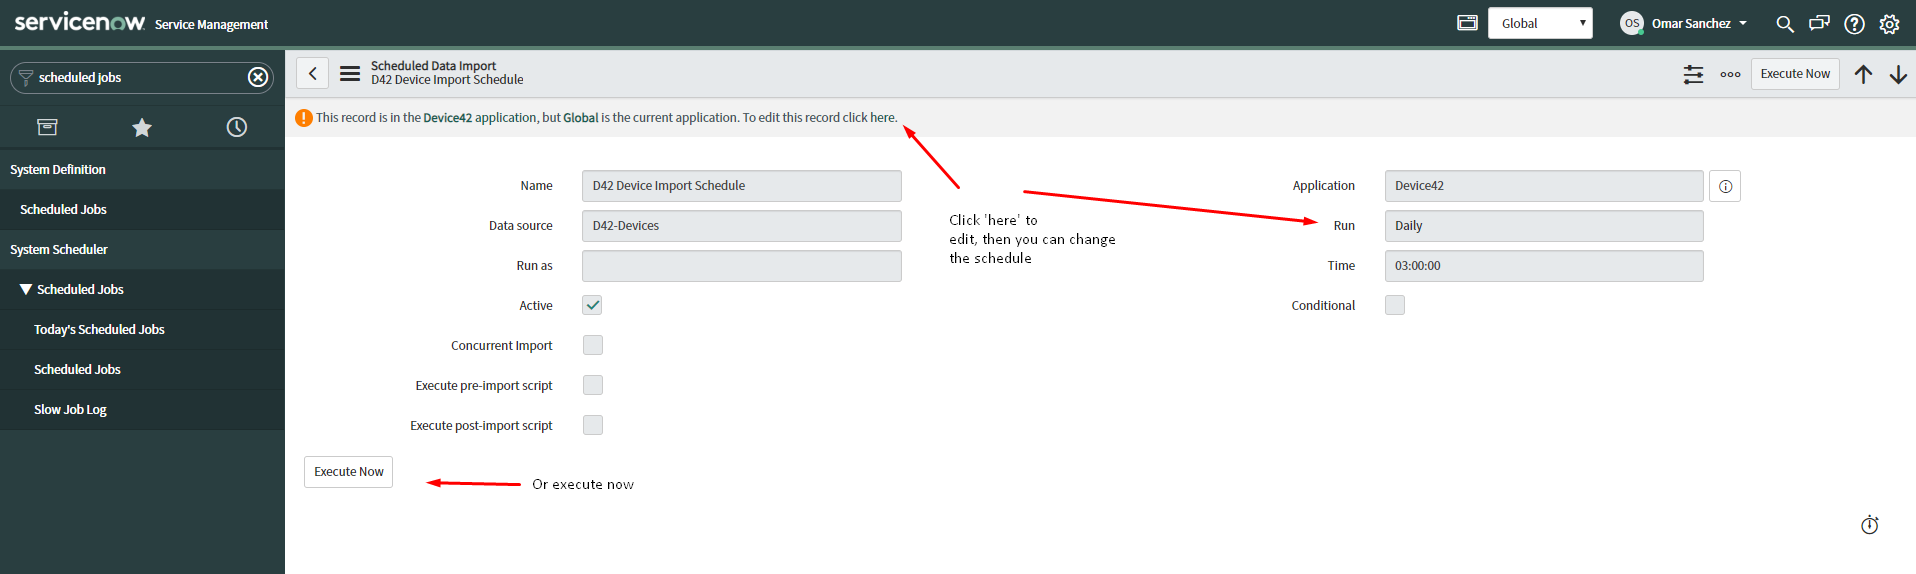
The Device scheduled job runs at a default time, which can be modified. Each scheduled job automatically triggers the next one in sequence until all jobs have run. The order is:
- Device
- IP
- Software
- Service
- Affinity Group
- Application Component
- Business Application
- Database
- Database Instance
- Database to Instance
- Website
Click the Device scheduled job to change the period and time, then click Execute Now.
The scheduled imports first run the respective data source to collect and store data in the import set tables. After the data is imported, a transform script maps it into ServiceNow's internal tables using the IRE module. For more information, see ServiceNow's CMDB Identification and Reconciliation documentation.
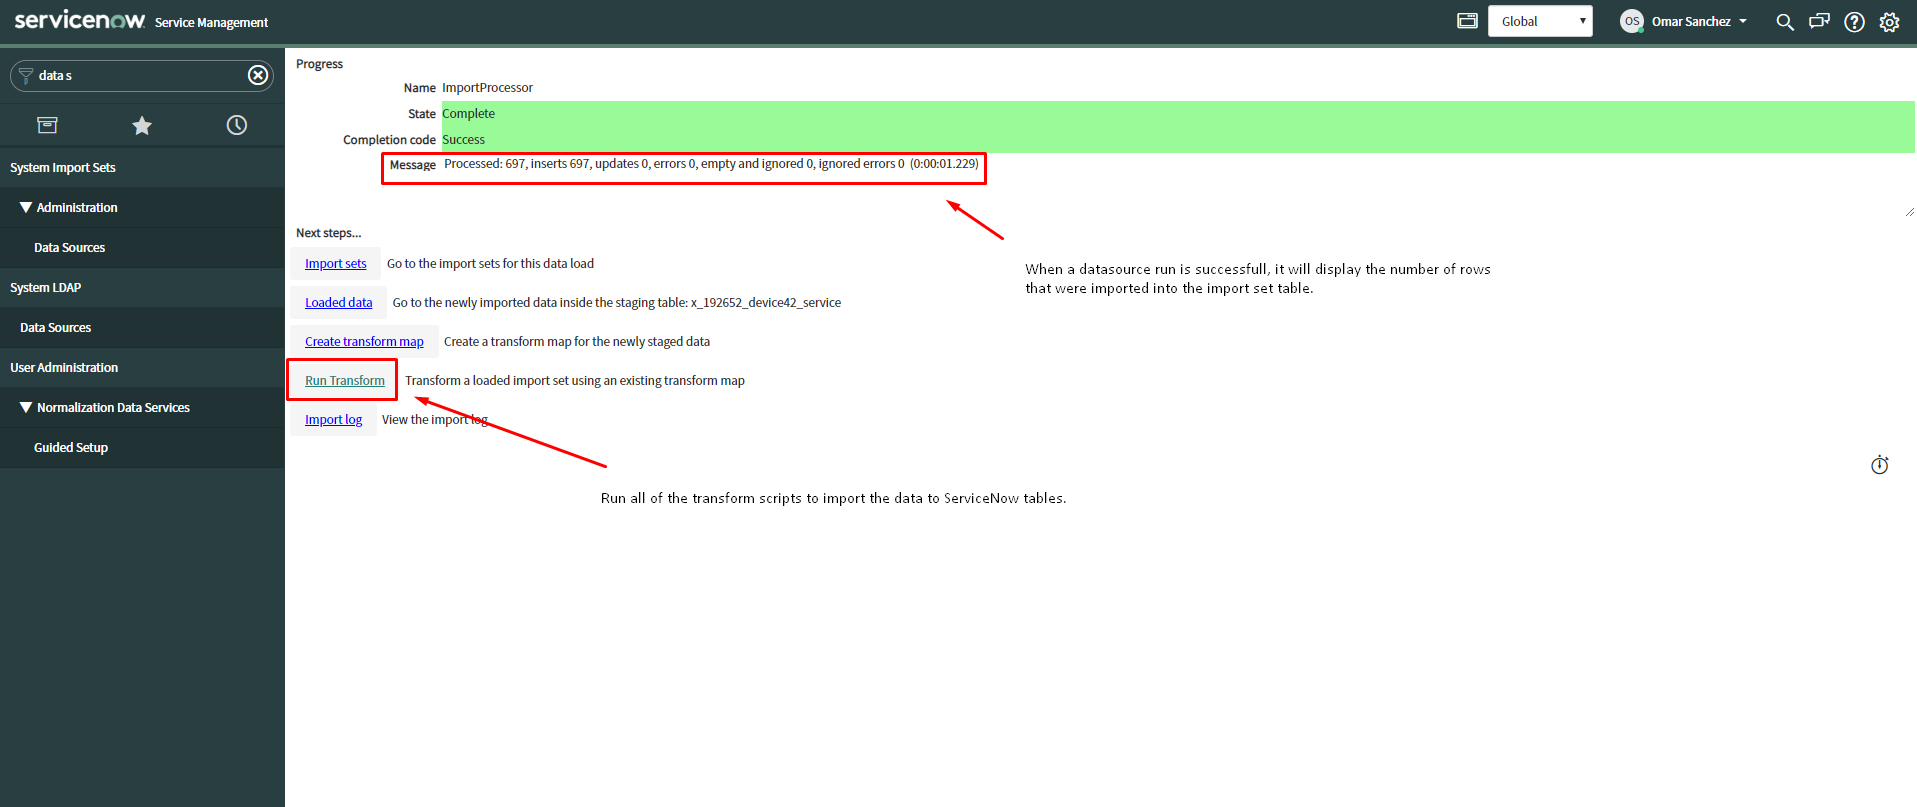
To view imported devices or debug issues, navigate to System Import Sets > Import Log.
Required ServiceNow User Roles for Non-Admins
To allow non-admin users to edit Data Sources and Transform Maps, assign the following roles:
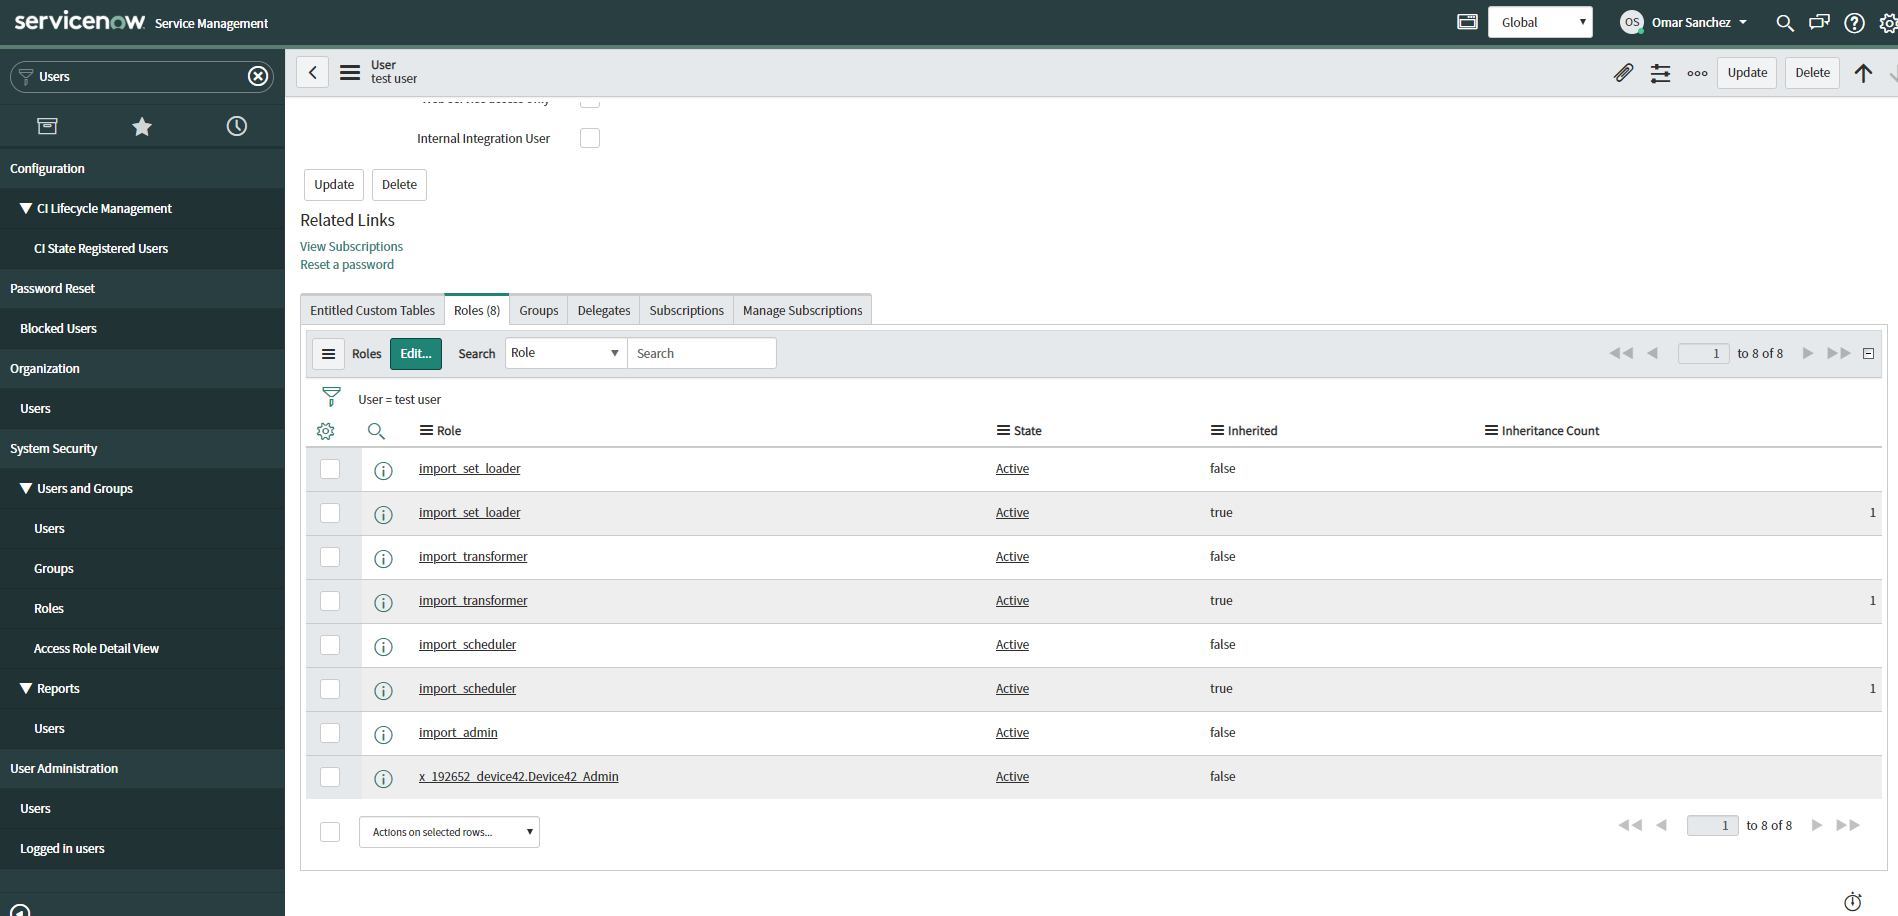
import_set_loaderimport_transformerimport_schedulerimport_adminx_192652_device42.Device42_Admin
These roles are not required for the integration to run out of the box, but are needed if users want to make changes to the CI transform maps or data sources.
For an overview of the Device42 ServiceNow connector with screenshots, see the ServiceNow integration page.
For questions not covered here, contact support@device42.com.
Increase the Field Size for Imported Device42 Data
If data from Device42 is being truncated, follow these steps in ServiceNow to increase the column length limit.
Changes to the sys_properties table affect all applications and will cause field lengths for all import sets to automatically increase if imported data exceeds the default character limit.
To have the import set table column size adjust automatically based on the size of incoming data:
- Search for "tables" and click System Definition > Tables.
- Find the
sys_propertiestable and click on it. - Scroll to Related Links and click Show List.
- Add a new system property with the following values:
- Name:
com.glide.loader.verify_target_field_size - Application:
Global - Type:
true | false - Value:
true - Read Roles: Appropriate roles (for example,
admin) - Write Roles: Appropriate roles (for example,
admin)
- Name:
- Click Submit.
- Run the D42 Device Import Schedule scheduled job to sync device data from Device42 to ServiceNow.
The data should now appear in ServiceNow without truncation.
Update the Integration
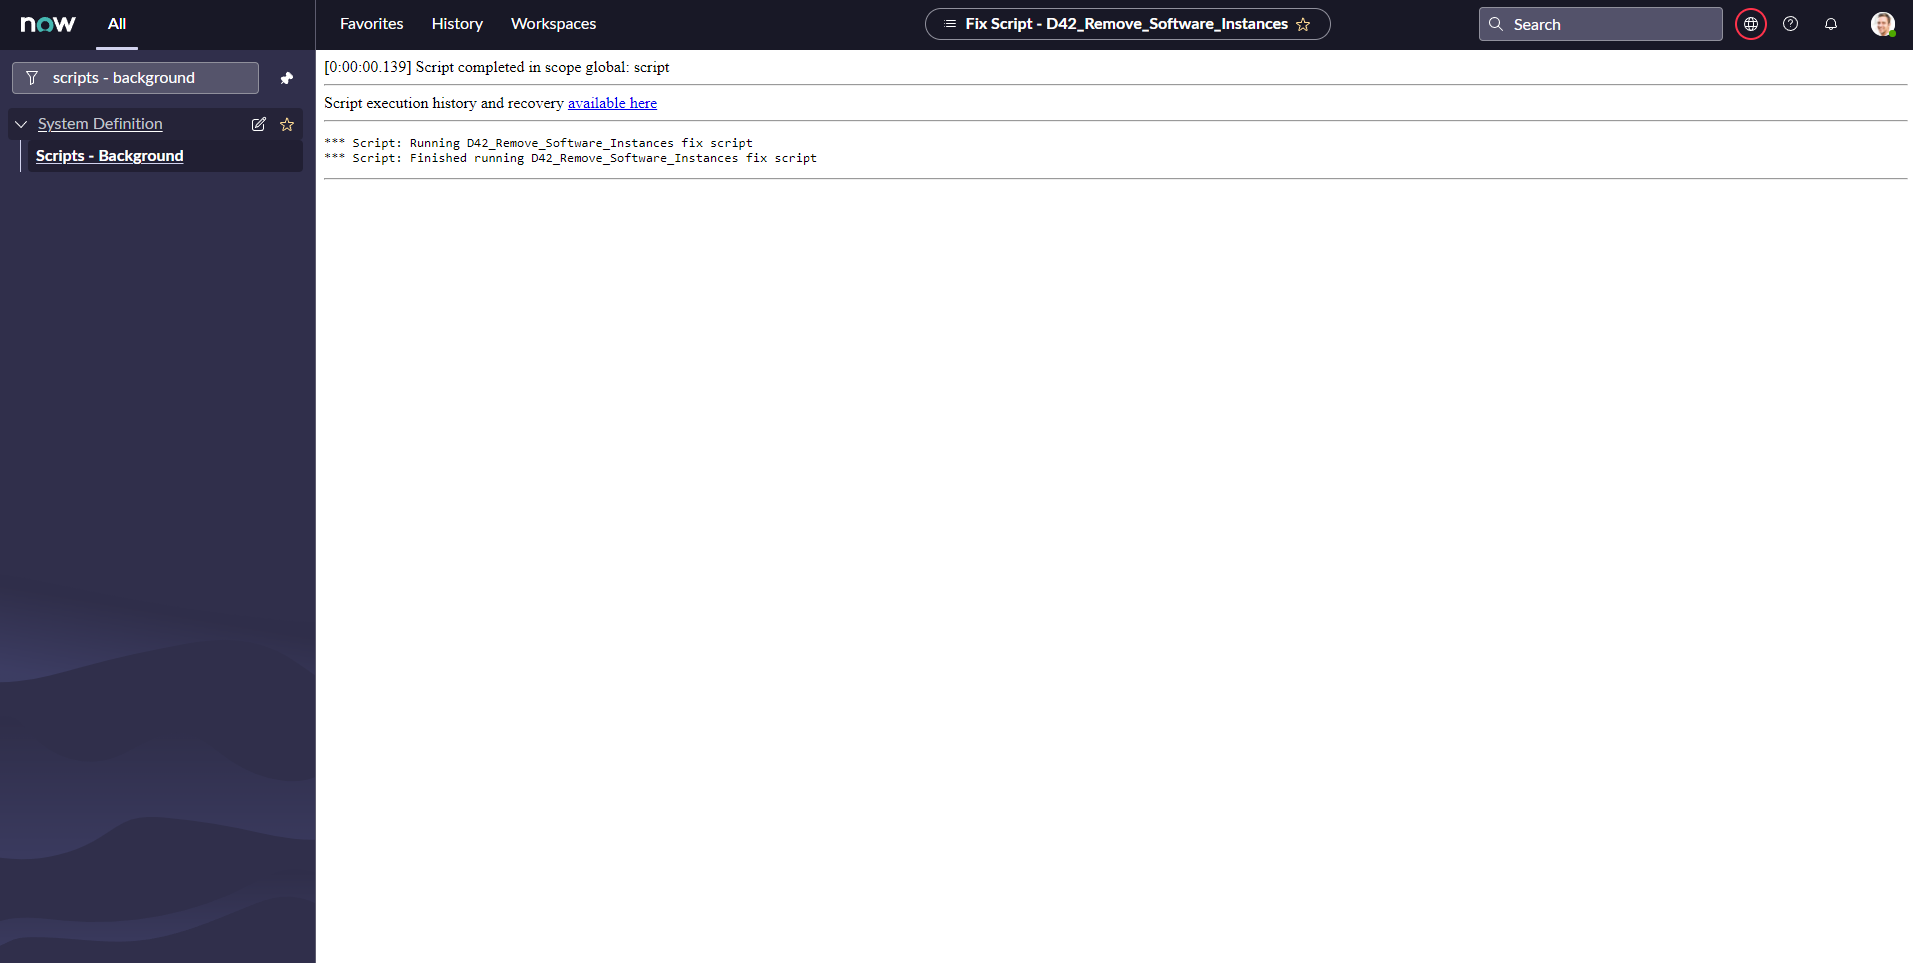
If you updated the ServiceNow app from version 4.0.0 or earlier, run a script to delete old software instance records that are no longer needed. The cmdb_software_instance records to delete have names in the format software_name_instance.
-
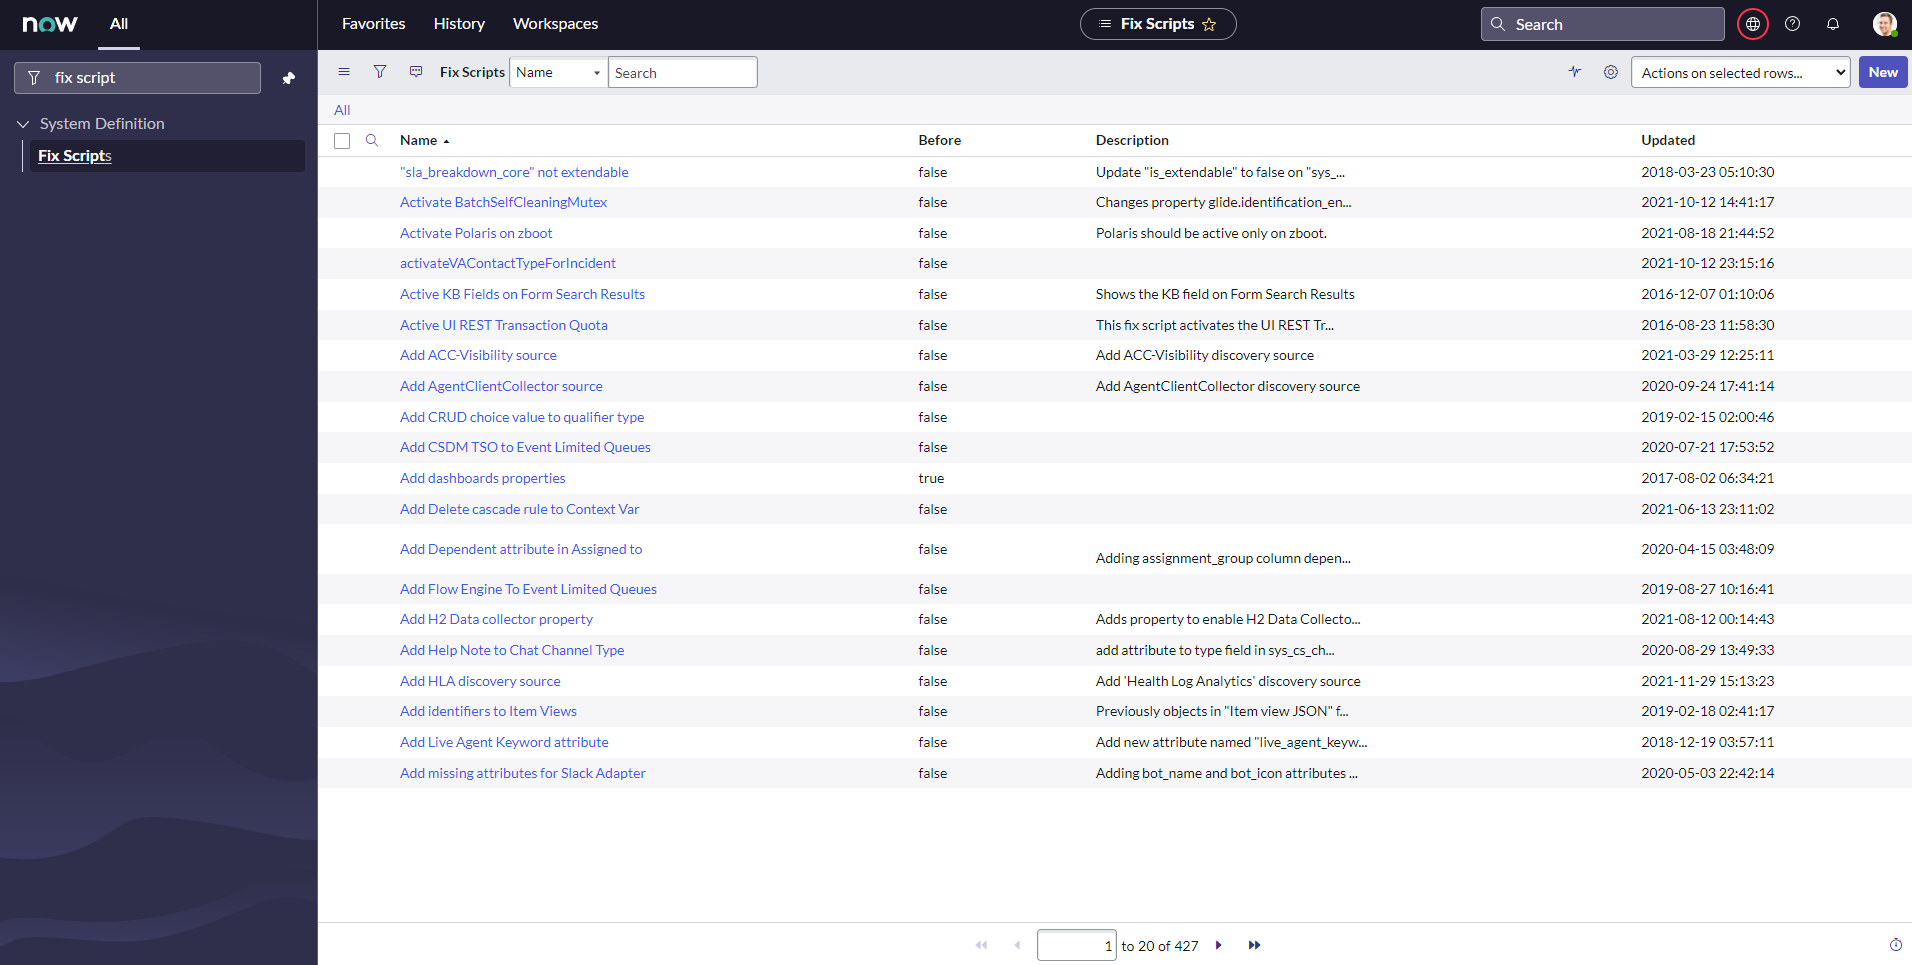
Go to System Definition > Fix Scripts.
-
Search for the fix script named
D42_Remove_Software_Instances.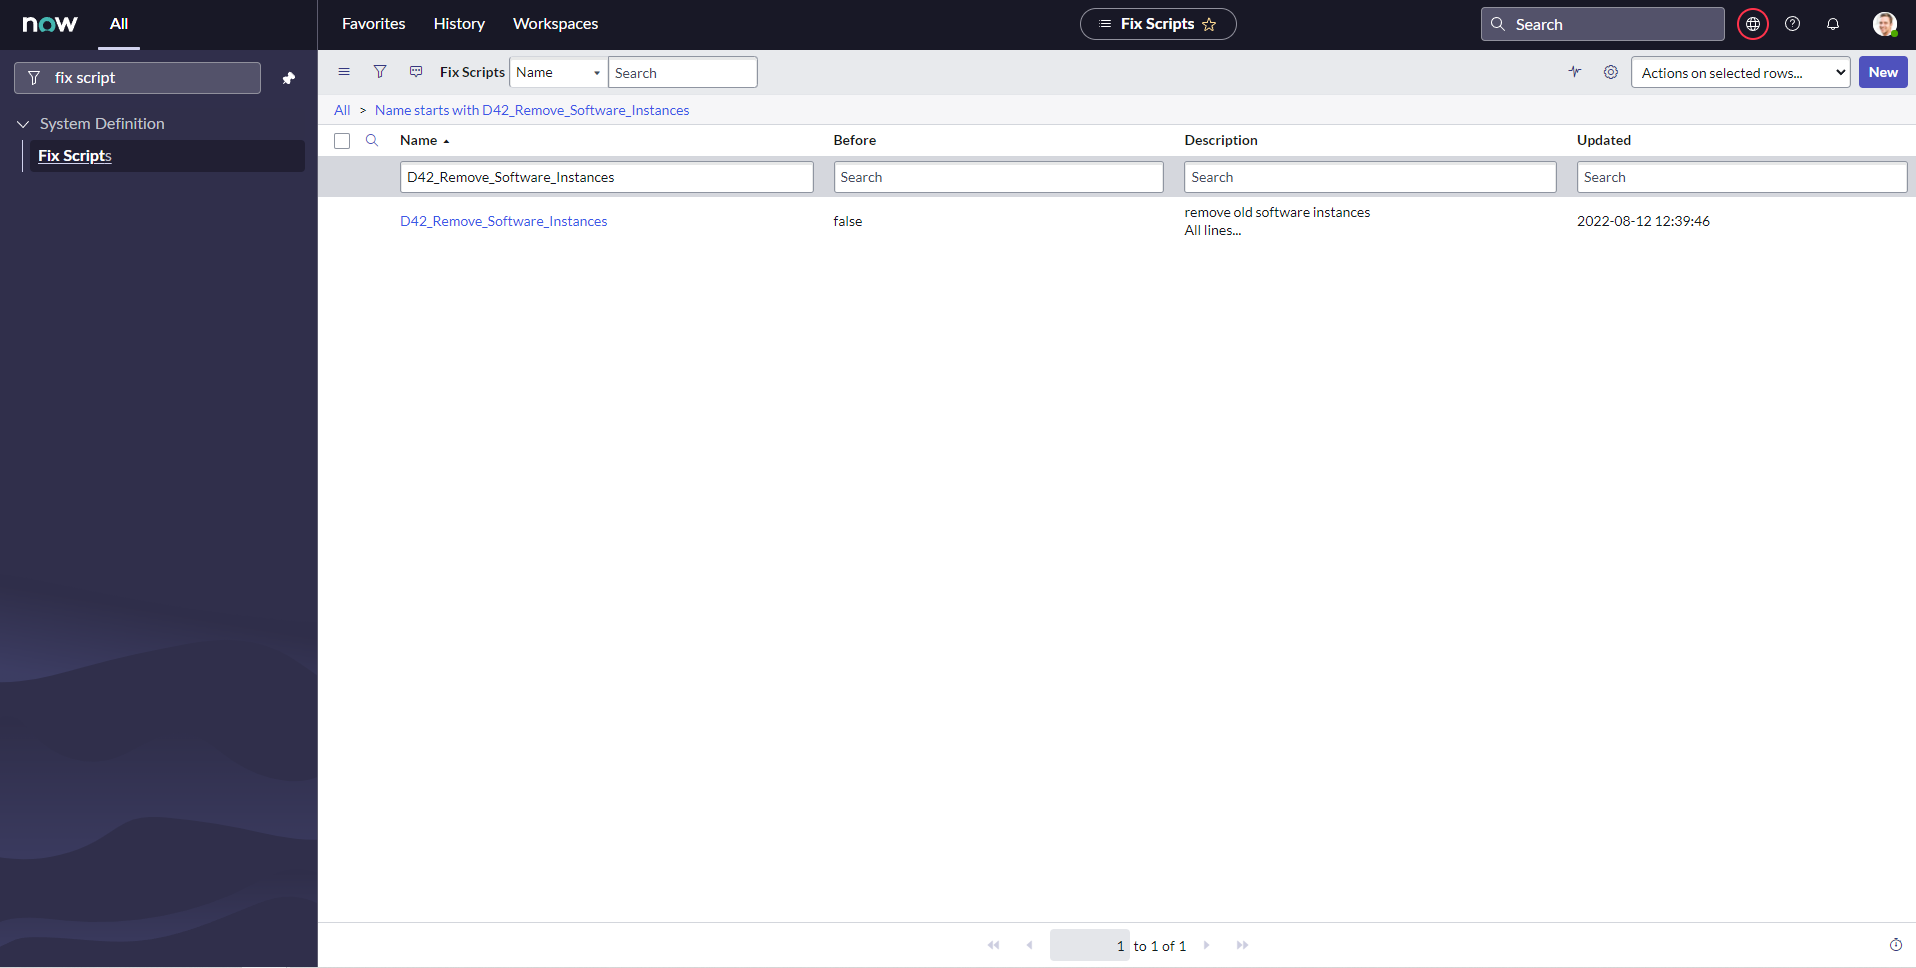
-
Click
D42_Remove_Software_Instances.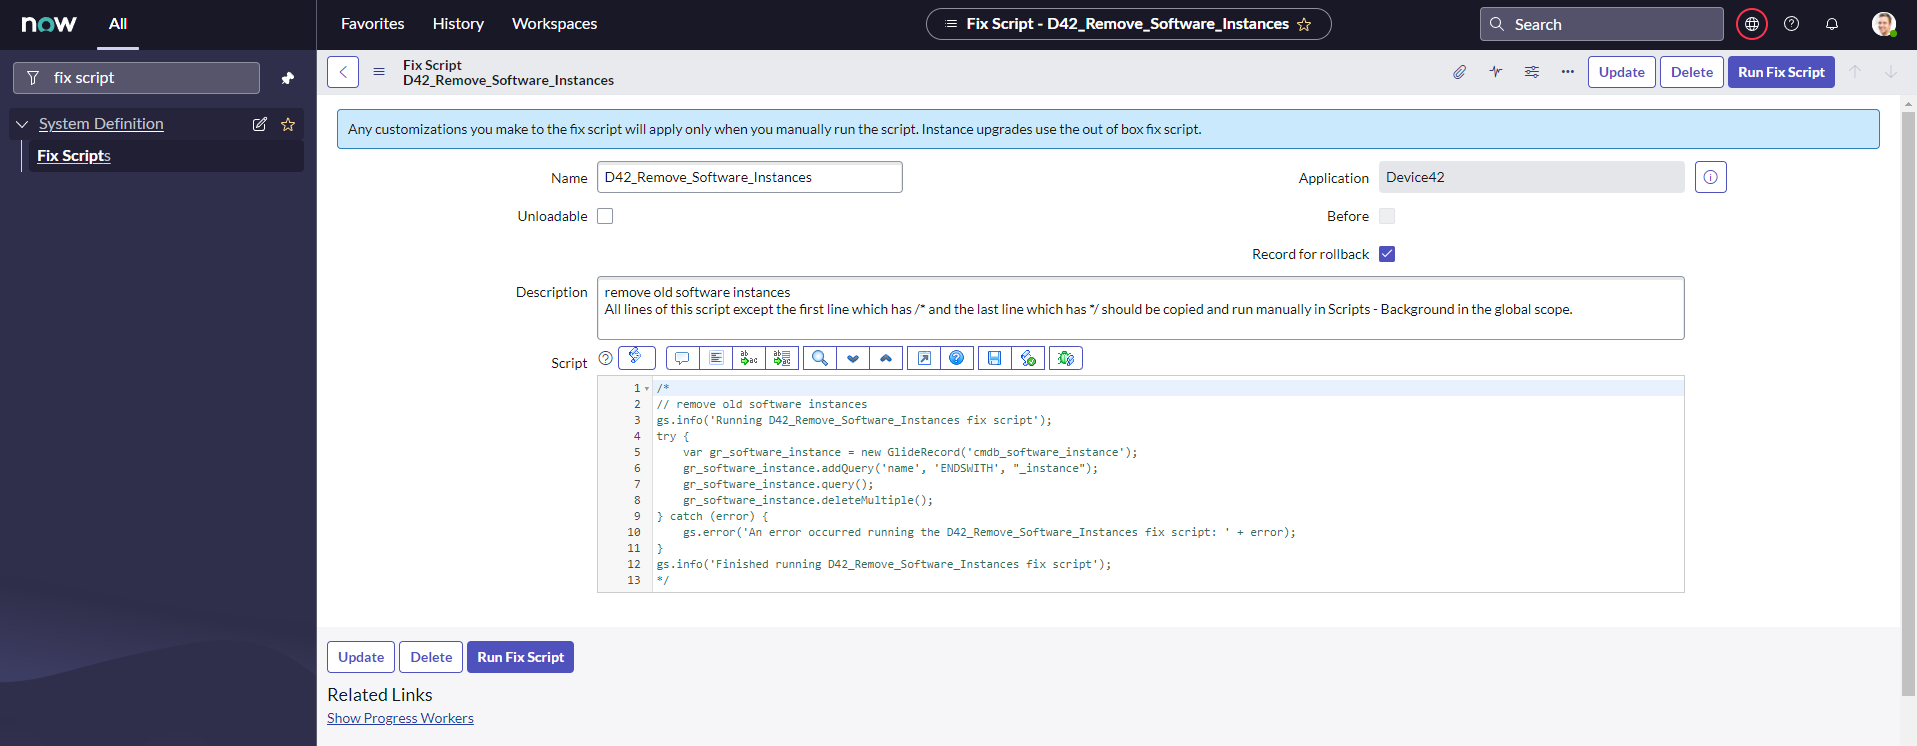
-
Copy all lines from the script field except the first line (
/*) and the last line (*/).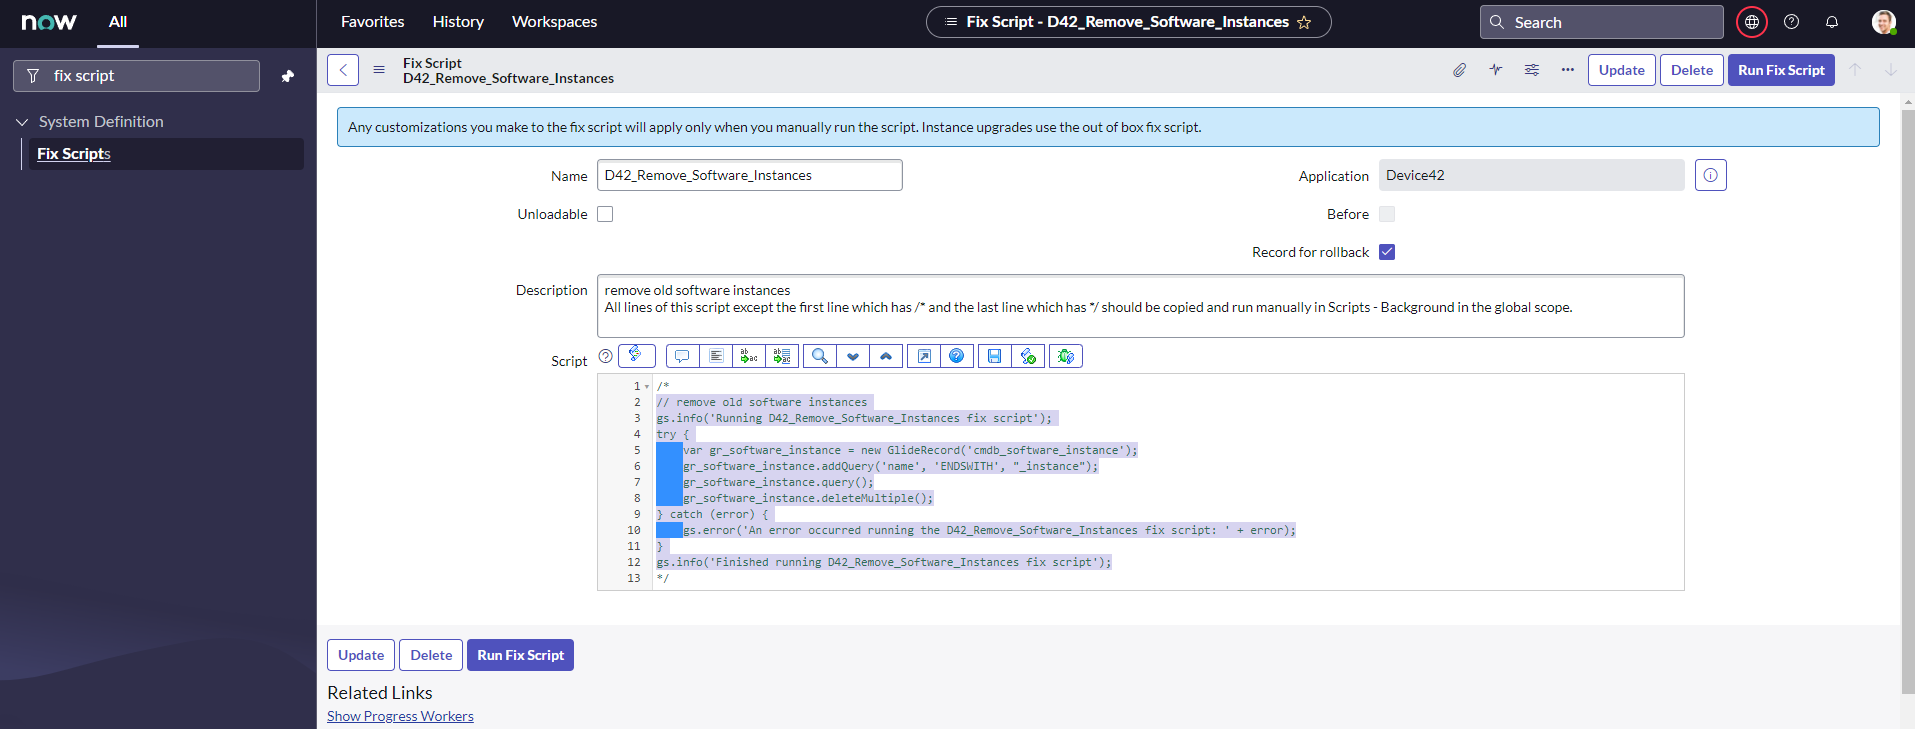
-
Go to System Definition > Scripts – Background.
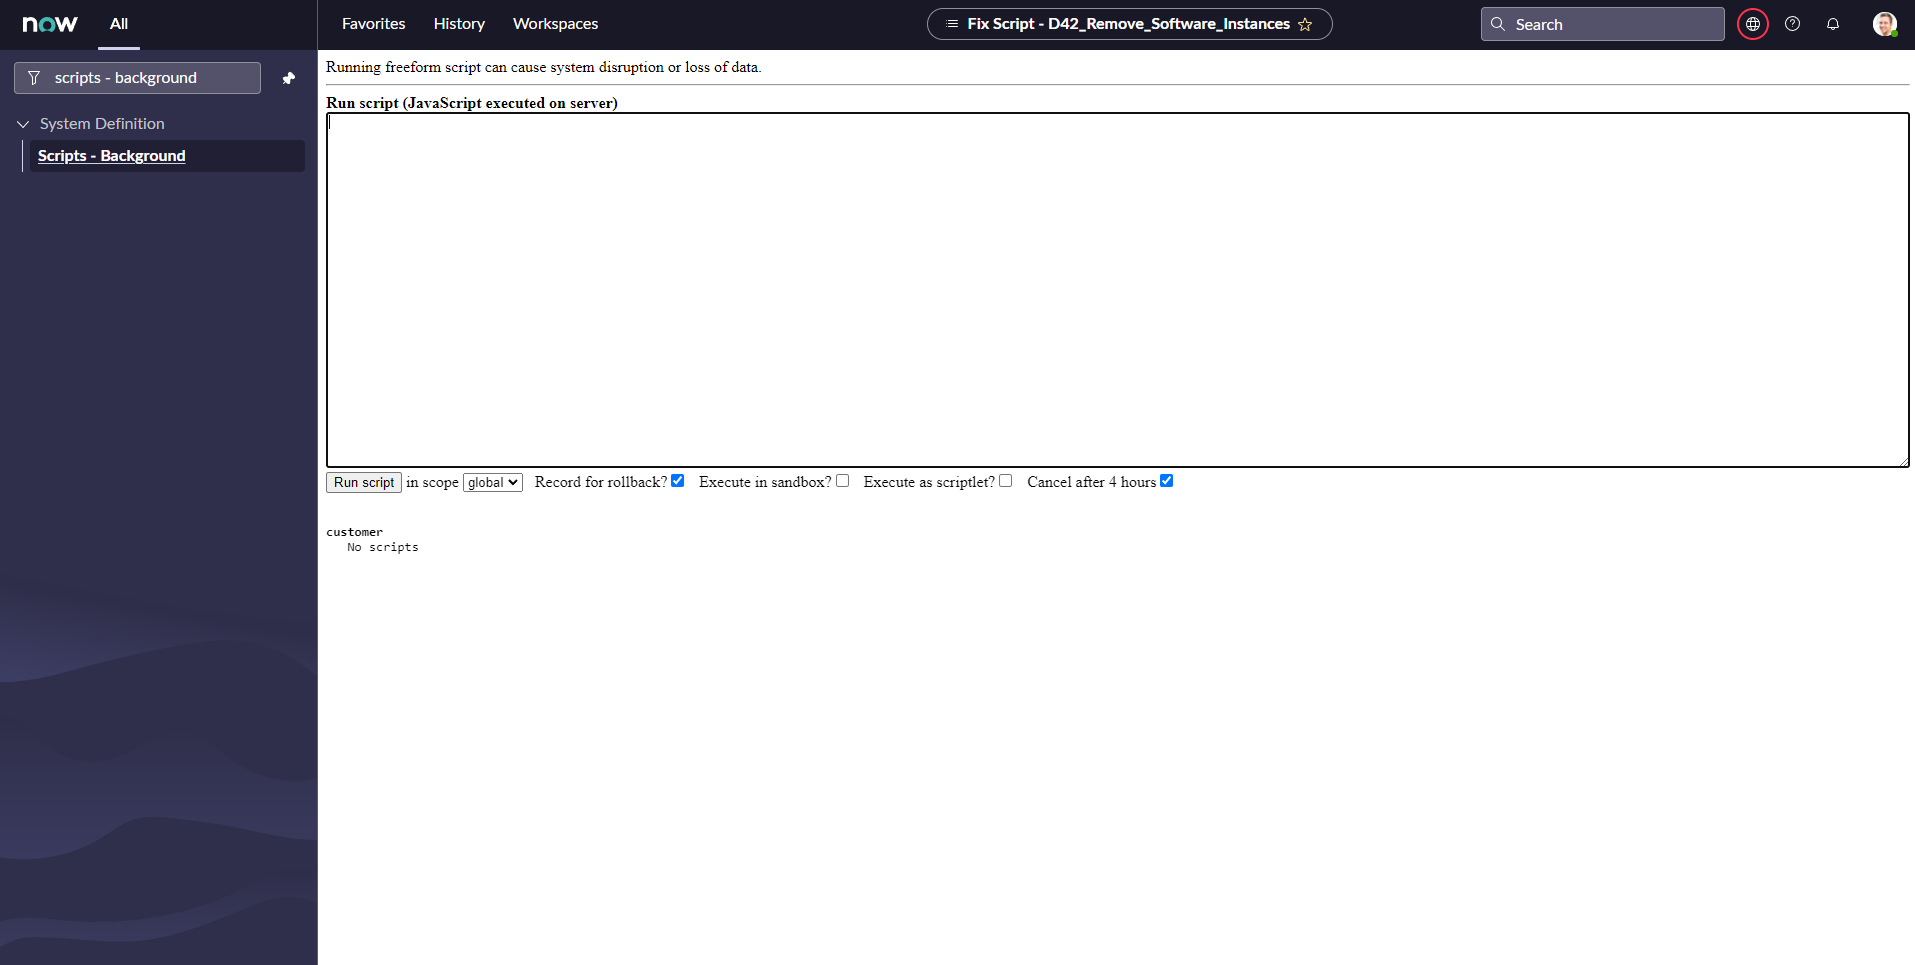
-
Paste the copied script into the Run script field.
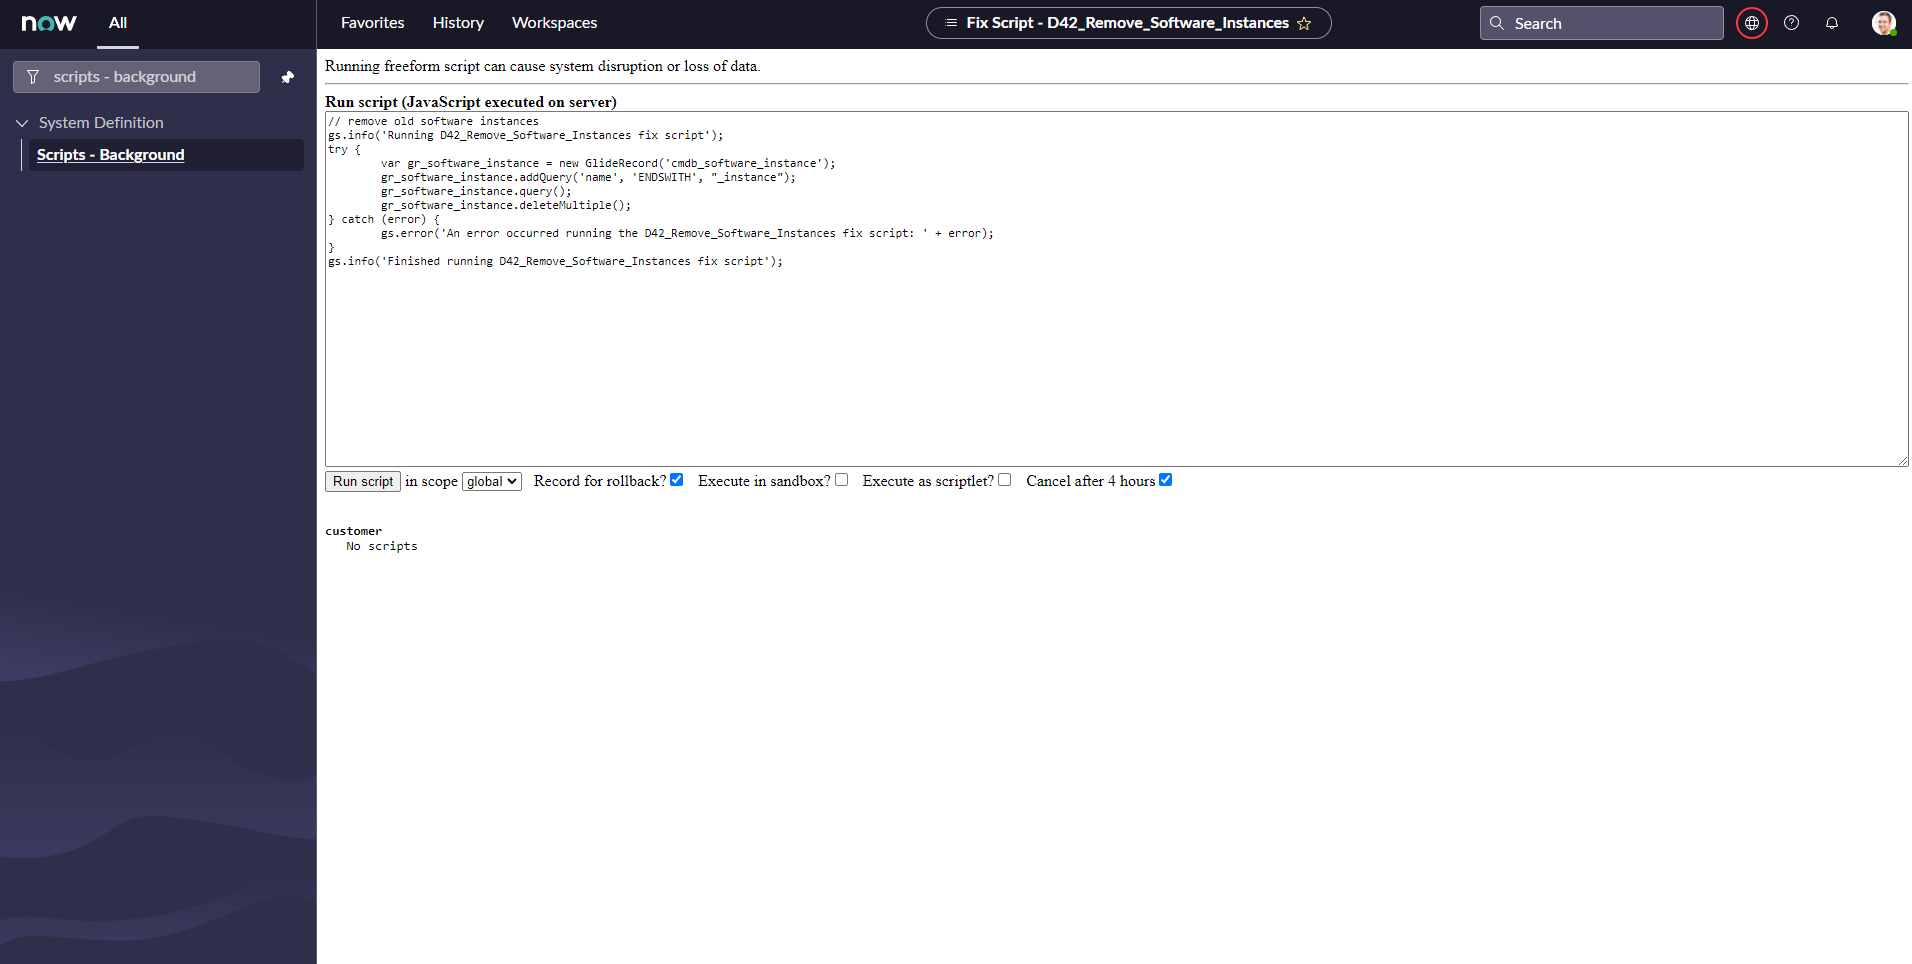
-
Set in scope to global, then click Run Script.
Add the Relationship
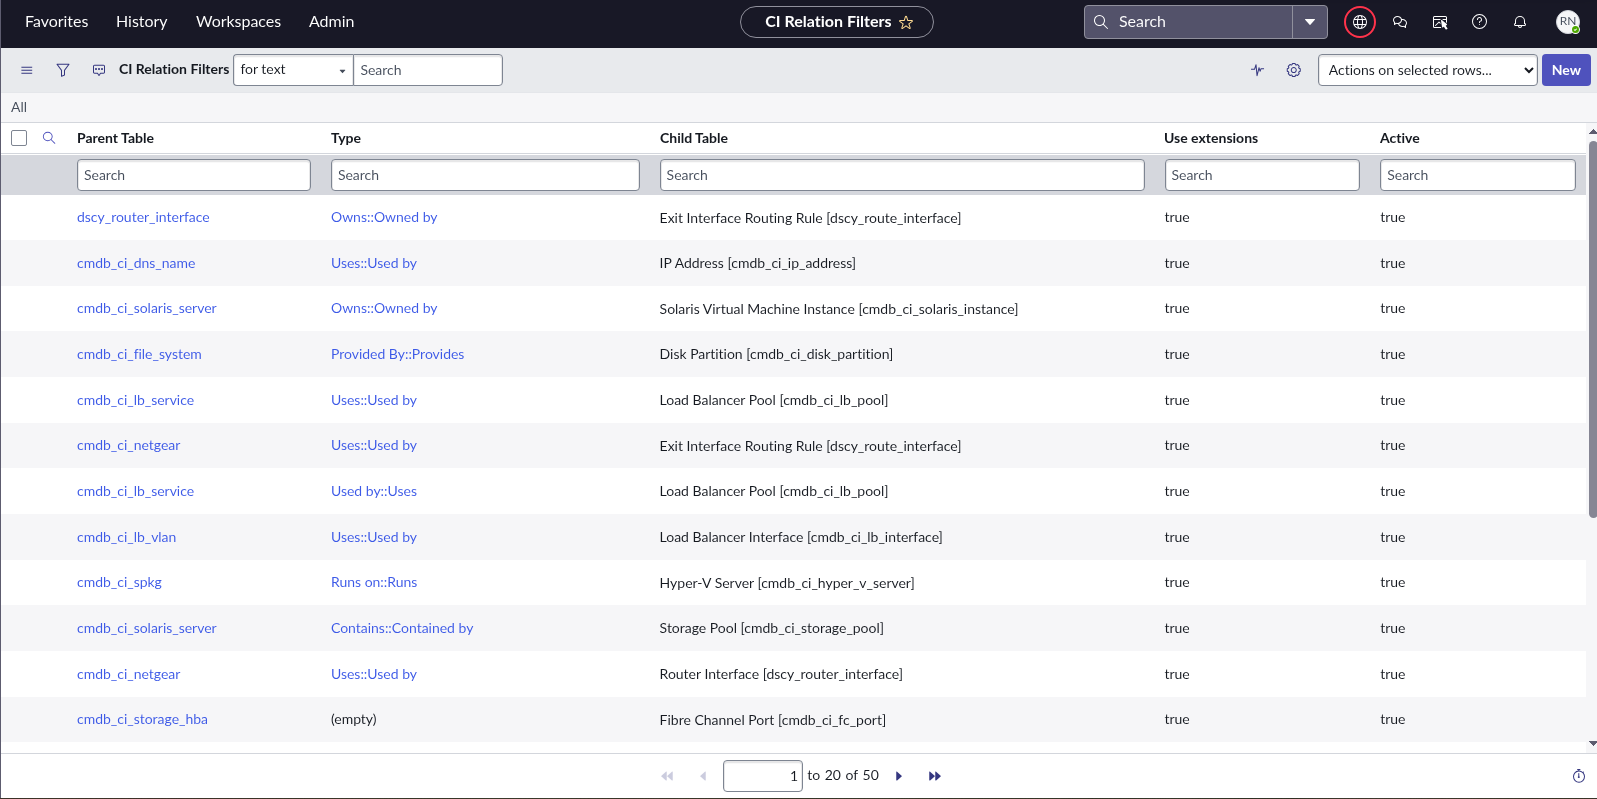
Check if the relationship exists and, if not, add it.
-
Go to Configuration > Relation Type Exclusion List.
-
Click New to add the relation.

Technical Support
Contact support@device42.com for technical assistance. You can leave feedback using the Page Feedback button at the top of this page.