Carbonite Migration
The Device42 Carbonite Migrate feature lets you migrate devices directly from Device42. This page covers system requirements, creating migration jobs, and controlling and managing jobs from the Device42 interface.
System Requirements
The following software must be installed and running:
- Device42 16.22.00+
- Carbonite Agent software version 8.4.0.313+ installed and running on both source and target machines.
- Source and target machines must have all necessary ports open and accessible as described in the Carbonite documentation. See the Windows section of the following document.
- Source and target machines must have valid Carbonite Move licenses installed and activated.
- (Optional) If you require fine-tuning of the migration job options, more features, or failover trigger configuration, the source and target machines need to have Carbonite Migrate Replication Console installed (usually installed by default during Carbonite Agent installation). The machines you want to monitor or control must be added to the Replication Console's Servers list.
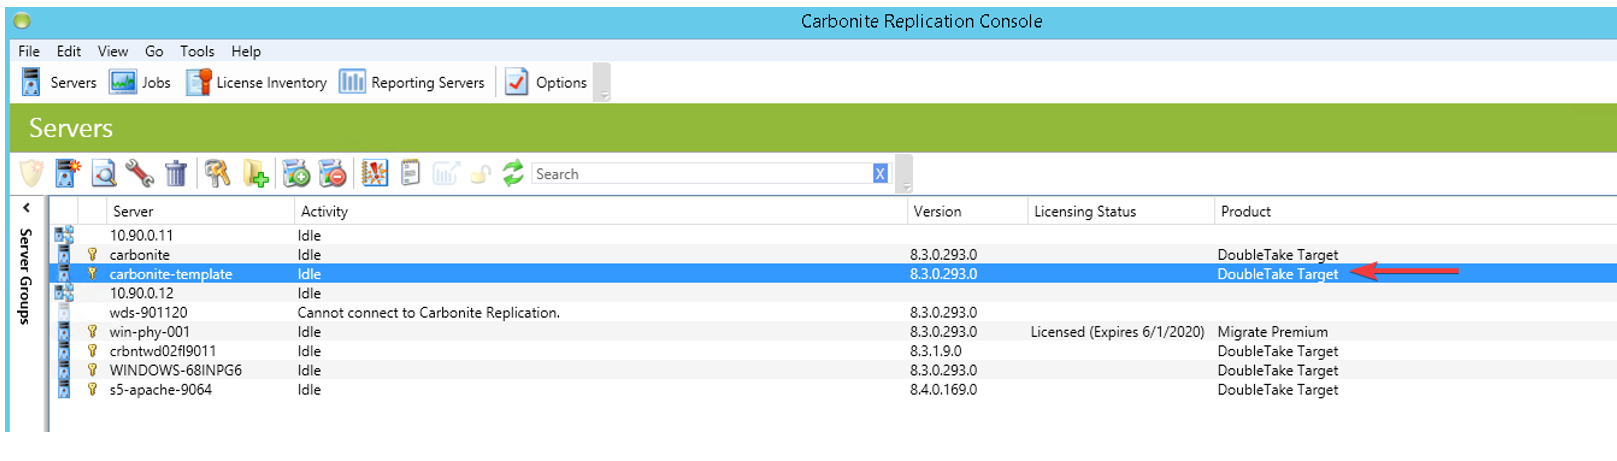
- Both the source and target machines need compatible Windows operating system versions. See the Carbonite Agent documentation for all requirements for the Full Server Migration job type: Full server migration requirements.
Create a Carbonite Migration Job
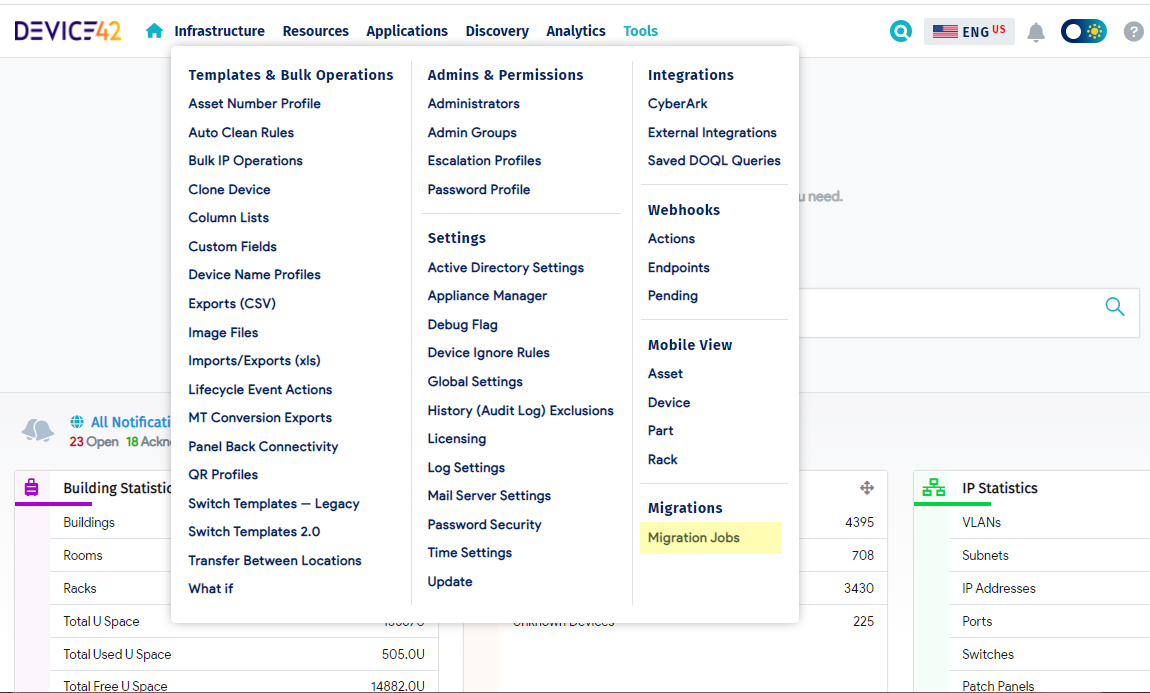
- From D42’s main page, click on the top menu bar’s Tools link and select Migrations > Migration Jobs.
- On the Migration Jobs list page, click Add Migration Job at the top right.

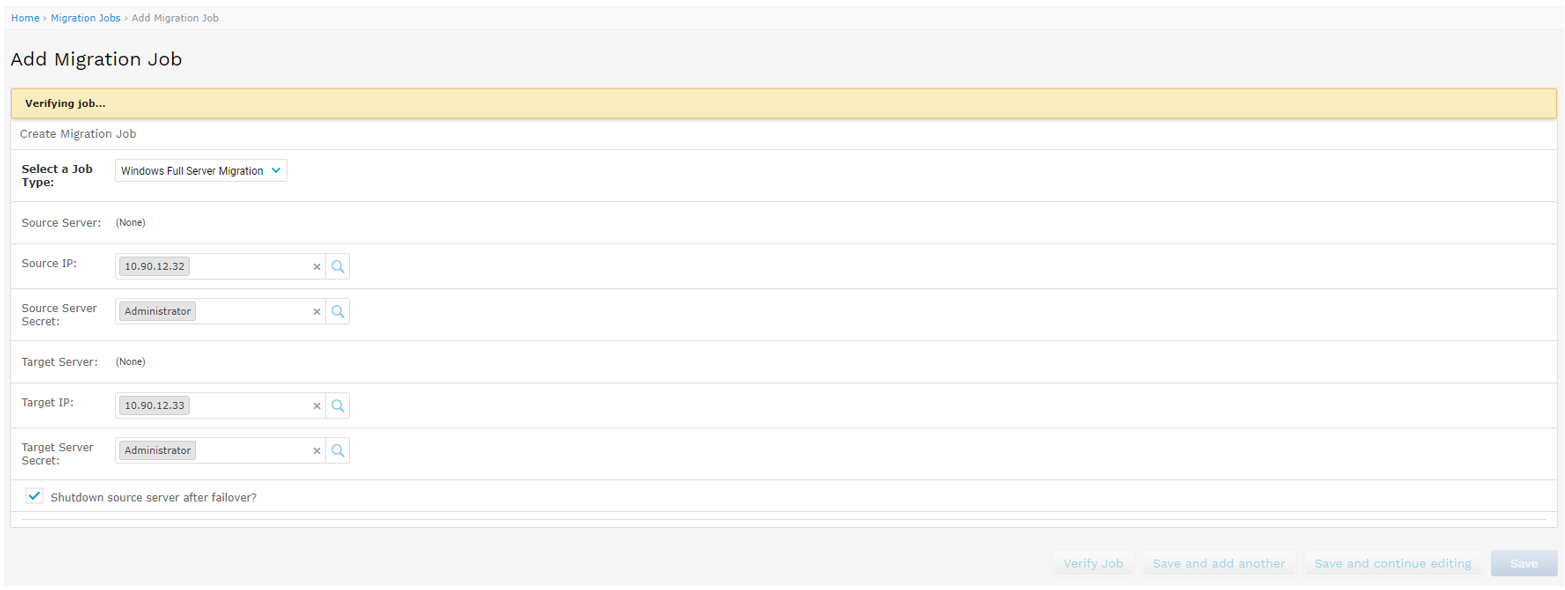
- On the next page, you need to fill out the Source and Target machines’ IP addresses and select their Secrets. Do this by clicking on the lens icon next to each field or typing in the IP address or secret directly into the text box.

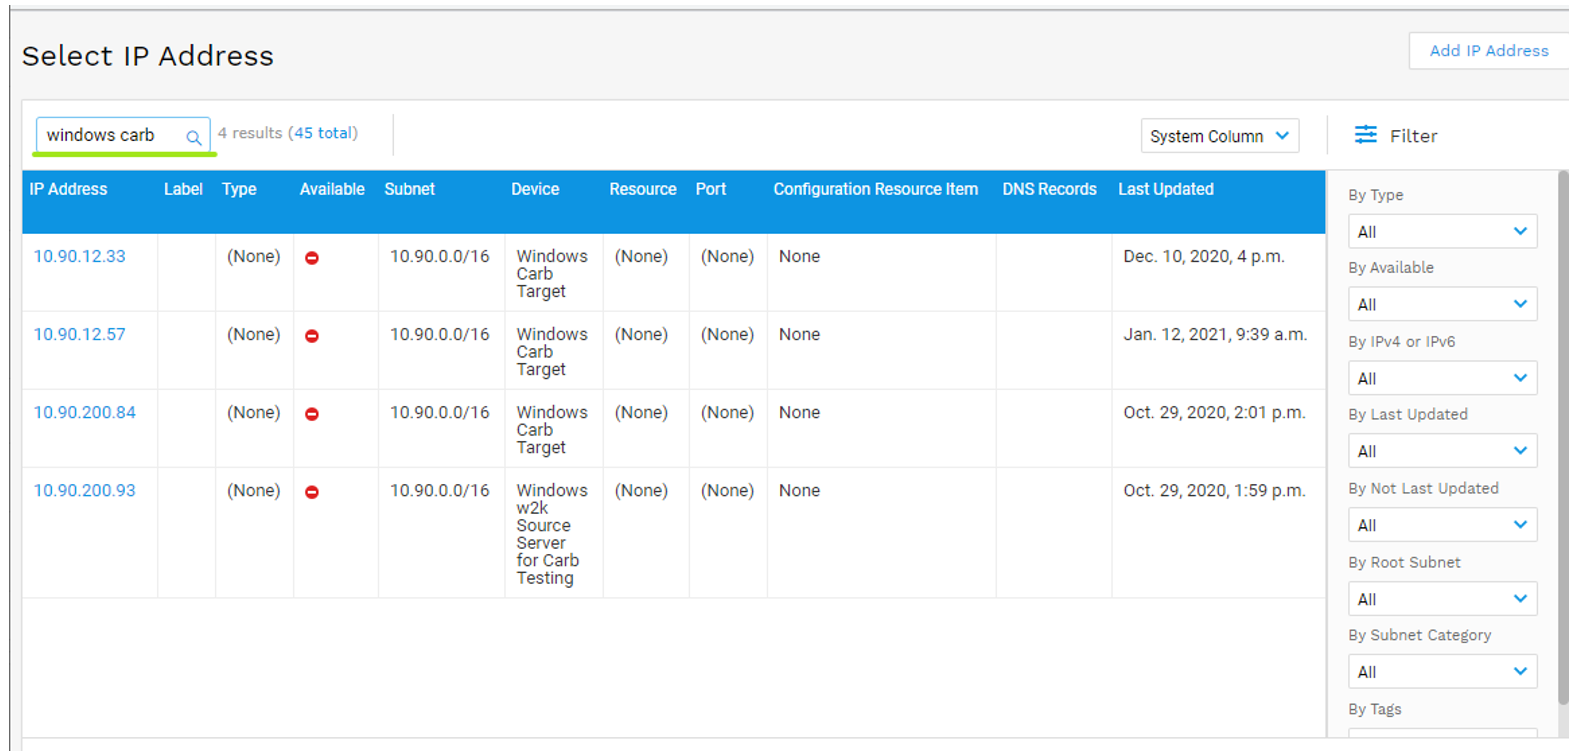
- If you click the lens icon, you are prompted with a pop-up window which lists all existing IP addresses in the system and the Device name associated with that IP address. Please note that before selecting an IP address, you should make sure it is attached to a device in D42. You can also search for a device by its name by entering the term in the search field.
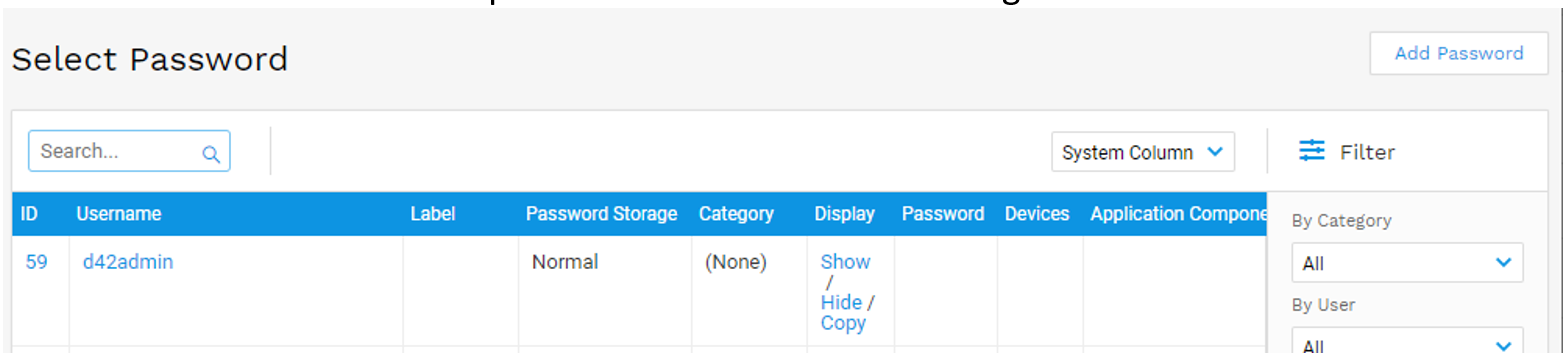
- The process is the same for selecting the Secret, which must first be created in D42 and consist of the username and password on the source and target machines.
- You have the option to leave the source server running or shut it down after a failover. The shutdown option is selected by default and should not normally be changed, as leaving it running will cause IP collisions — the target becomes a clone of the source, including its IP settings.

- After the steps above are complete, the Verify Job option on the bottom control panel is enabled; click it to save the selected settings. It may take a few minutes to complete as D42 waits for Carbonite Agent to generate the recommended job options and verify if the job can be successfully created.
- If verification is successful, a verification table is displayed below the fields.
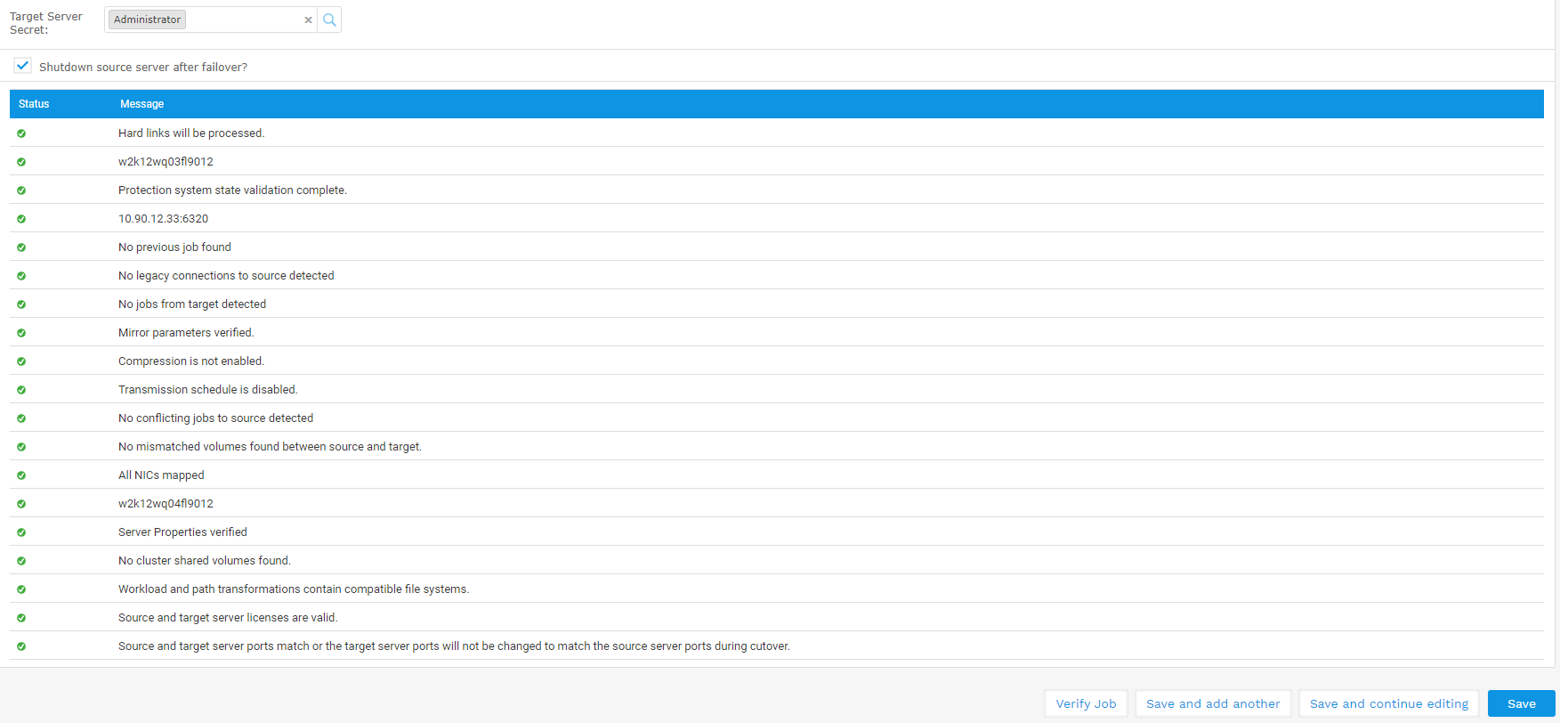
- If any errors are found, they will be displayed in this table and can only be fixed by using the Carbonite Replication console or performing system administrative tasks required to fix a particular failed verification step. In this case you will not be able to save this job until the issues are resolved. If resolved, you should click the Verify Job button again to have the job be verified.
- You can now click any of the Save buttons on the bottom control row to save this job in D42 and have it created on the target server you selected. If you click the regular Save button, you will be taken to the Migration Jobs list page.

Control Created Migration Jobs
From the jobs list page, you can control created jobs using the links next to each job's name.

Control a Single Job via the Links
- You can start, stop, pause and failover and refresh each job individually by clicking any one of the corresponding job commands. This mimics the functionality of the Carbonite Replication console. Here we click Start to start the first job; after that it may take a few minutes to get the job started and have the Activity column update initially. If the connection between your D42 machine and the source/target servers is slow, you will have to click the Refresh Status link to query the target server again to update the status of the job as we do below.

- You will need to click the Refresh Status link to see if the initial mirroring has completed.

- Once the Activity status changes to Protecting, the job will failover if any of the triggers set up in the Carbonite Replication console are triggered, or you initiate it manually by clicking the Failover link.
- You can also pause the job by clicking the Pause link to halt whatever is going on, and then resume the job at the point it left off by clicking the Start button.
- You can stop the job by clicking the Stop button to have the job stopped completely, and then clicking Start to start it back up from the very beginning.
- If you click Failover, the failover migration process will begin transforming your target machine into source and the source machine will be shut down.
- Once this process has started, it cannot be undone, and when it completes, the source and target IPs on the Migration Jobs list page will become the same. At this point, no other actions can be performed on this job and you will get a message warning you of that if you try the action links. The only thing that can be done at this point if you’re satisfied with the migration is to delete it via the edit screen.
Control Multiple Jobs via Actions
- You can control multiple jobs at once by selecting several jobs on the Migration Jobs list page and selecting one of the Action drop-down commands.

- All the functionality described in the Control a Single Job via the Links section above can be performed on multiple jobs.
- Here we select Start the selected jobs action from the menu and click the lightning bolt button to the right to run this command. You are prompted to confirm this action. Click Yes, I’m sure to continue.
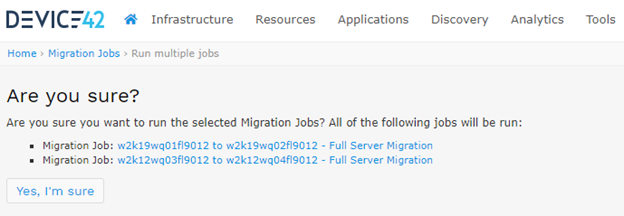
– This confirmation prompt also applies to all other bulk actions except Export selected items to CSV.
Some delay is possible when executing a bulk command on a large number of jobs, as execution occurs in a queue on the Carbonite Agent target server.

- You can now run the Refresh the selected jobs action item to have the status of all your selected jobs updated.
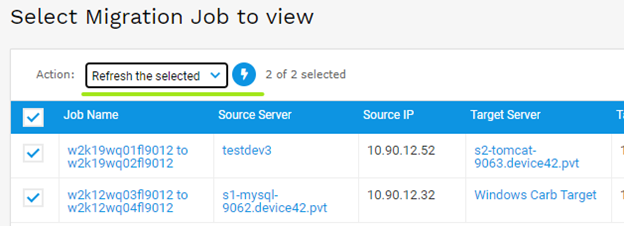

The status for both jobs has been updated.
Note: If any job present in Device42 has been deleted on the target server externally, it will be automatically removed from Device42 during a bulk refresh.
Control a Single Job via the Action Menu
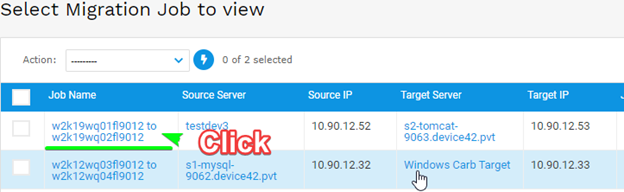
- Any single job can also be controlled via the view page’s Action menu. Click on the job name you want to control in the jobs list.
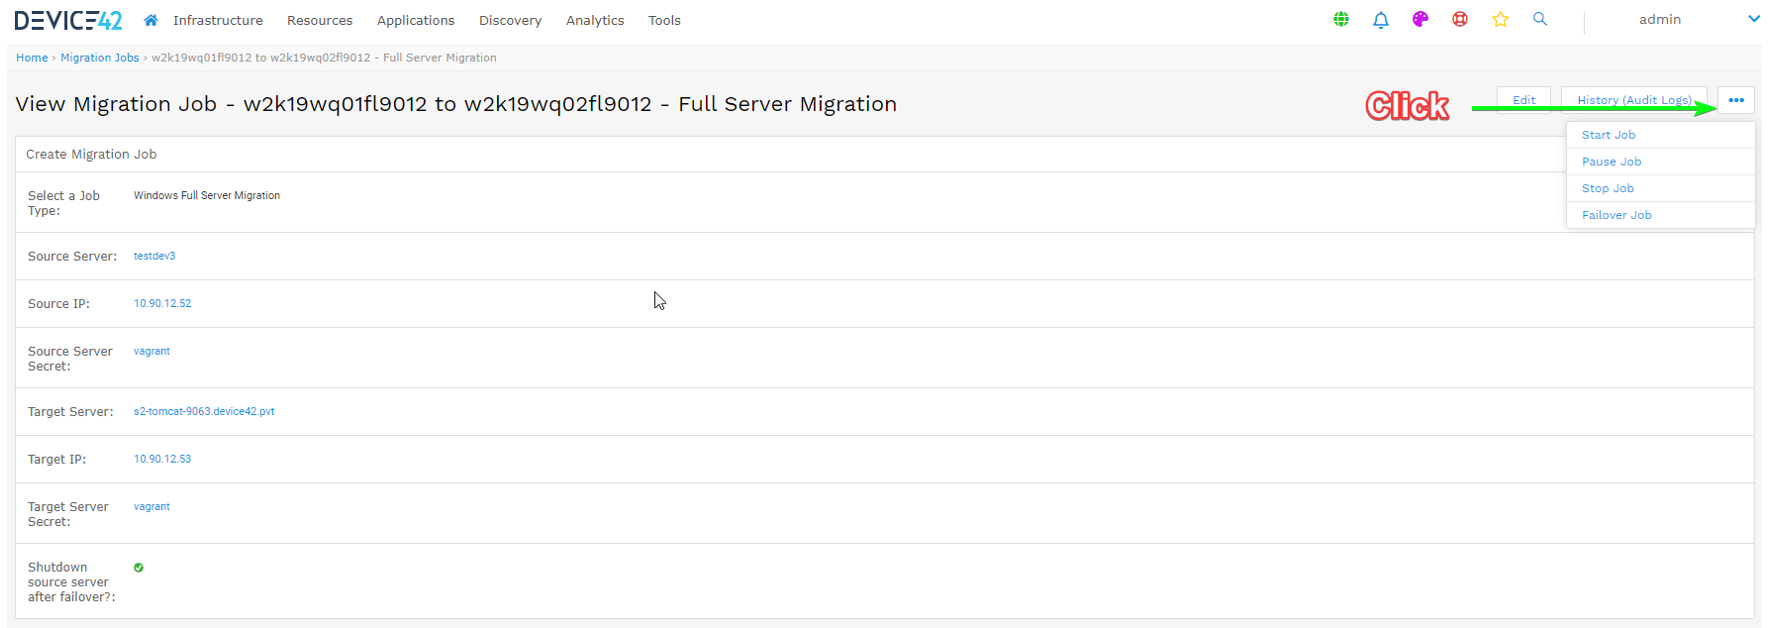
– Select the action you want to perform. Here we selected Stop Job.
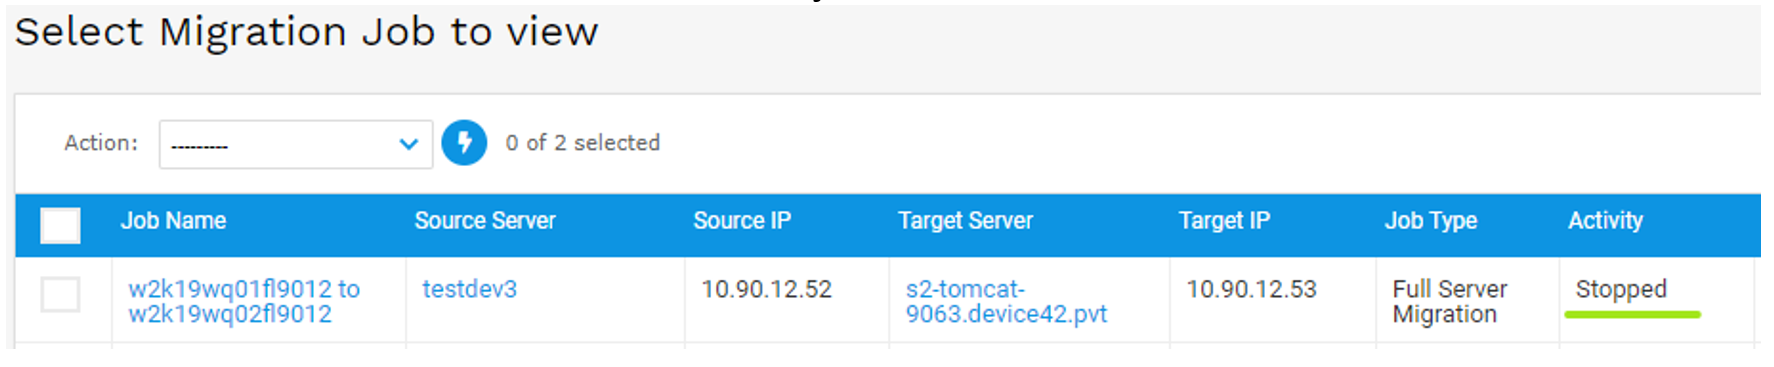
- After selecting the action, go back to the Migrate Jobs list page and the status of the job should be updated. If there’s a delay between your D42 machine and your target server, click the Refresh Status link to refresh the job status.
Delete Jobs
Delete a Single Job
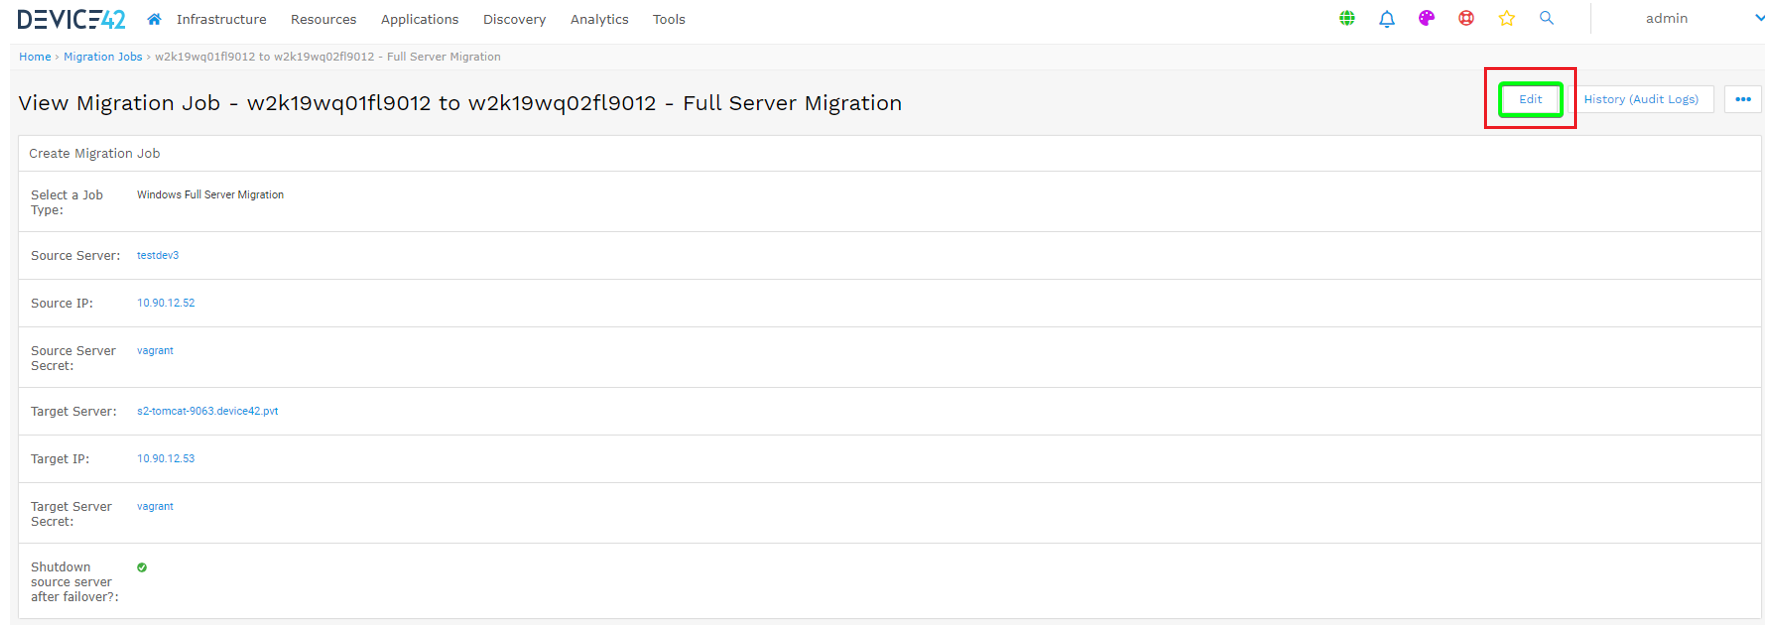
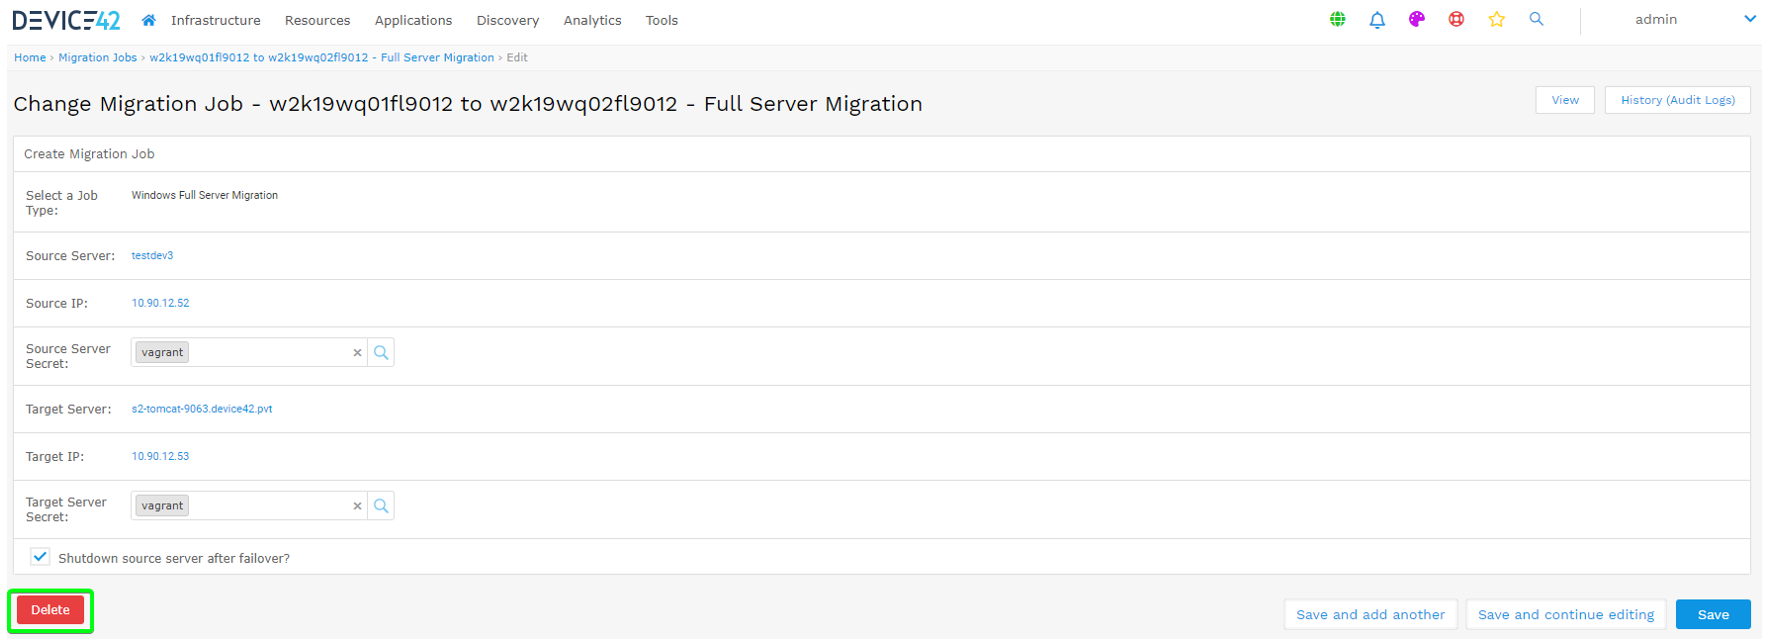
- To delete a job, click on the name of the job in the list and click Edit button at the top right.
- Now click Delete at the bottom left of the Change Migration Job page. The job will be deleted from D42 and the target server running Carbonite Migrate.
Delete Multiple Jobs via the Action Menu
- Check the jobs you would like to delete from the Migration Jobs list page and select Delete with Detailed Confirmation from the Action menu.
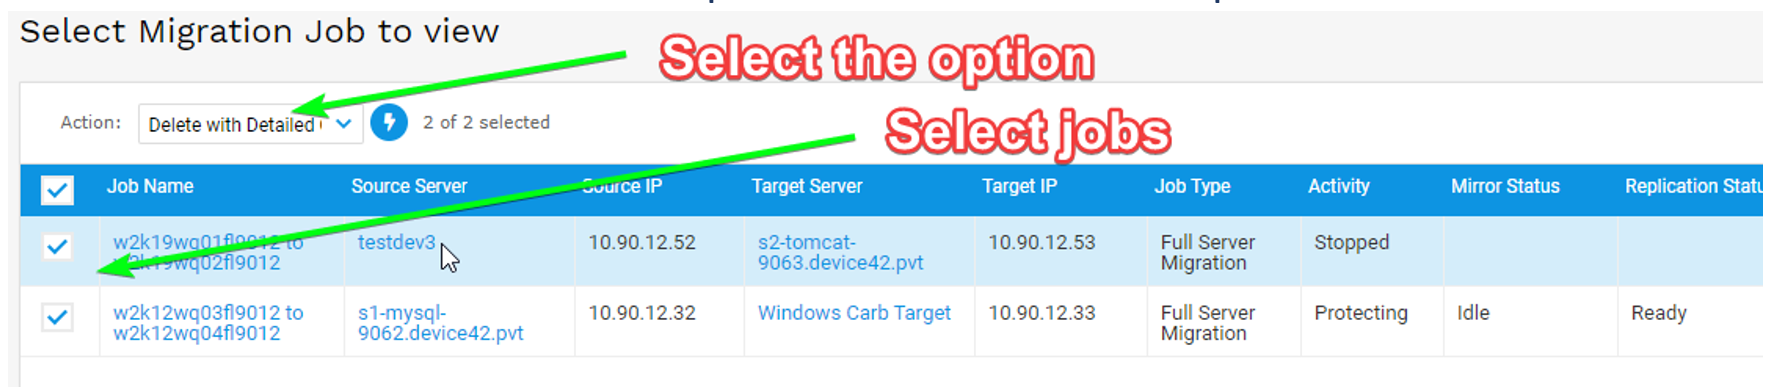
Click the lightning bolt button to begin the process. Confirm the action on the next page. The jobs will be deleted from Device42 and from the target server(s) running Carbonite Migration agent.
Modify Job Options
Shutdown Source Server After Failover
You can change whether the source server is shut down after a failover. This is mostly used for troubleshooting or testing the failover feature. Note that if you disable this option, the source and target will share the same IP address at the end of the failover, which may require you to shut down the source server manually.
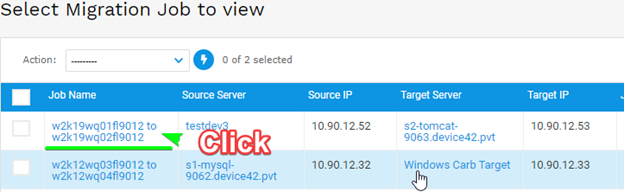
- Click the job name on the Migration Jobs list page to open it.
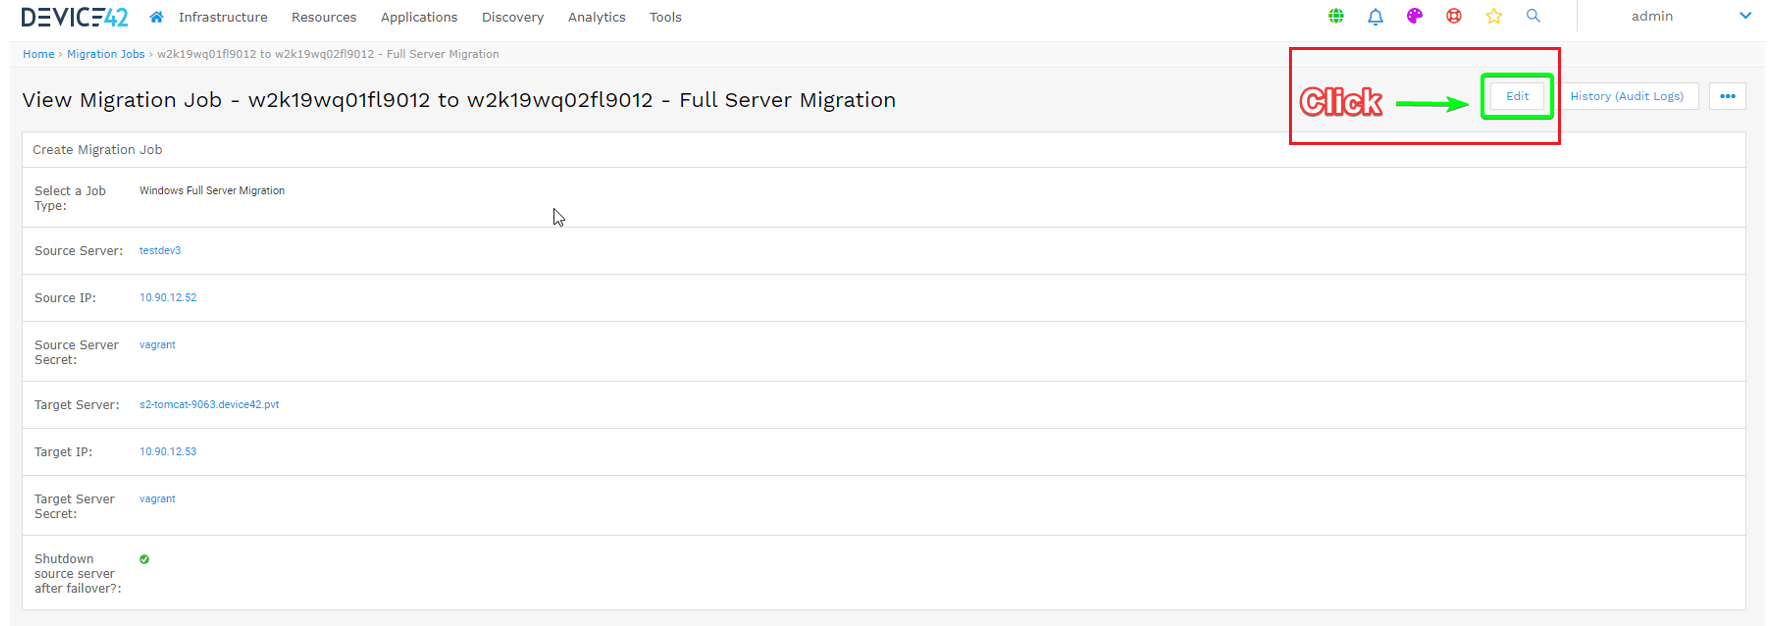
- On the following page, click Edit at the top right of the page.
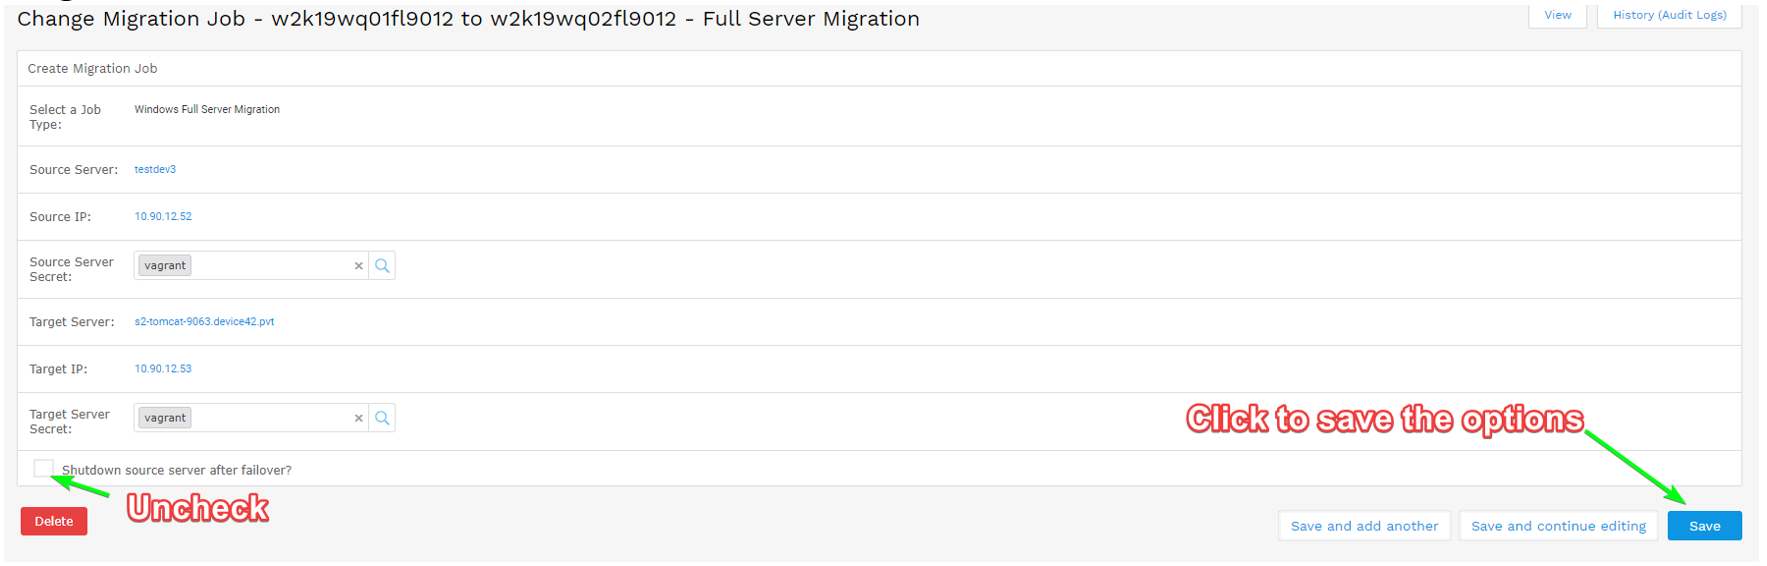
- On the next page, uncheck the Shutdown source server after failover checkbox and click Save at the bottom to have this option disabled on your Carbonite Agent target server.
Change and Update Credentials
If you have changed the username or password of your target or source servers, you can update these in the existing job without recreating it.
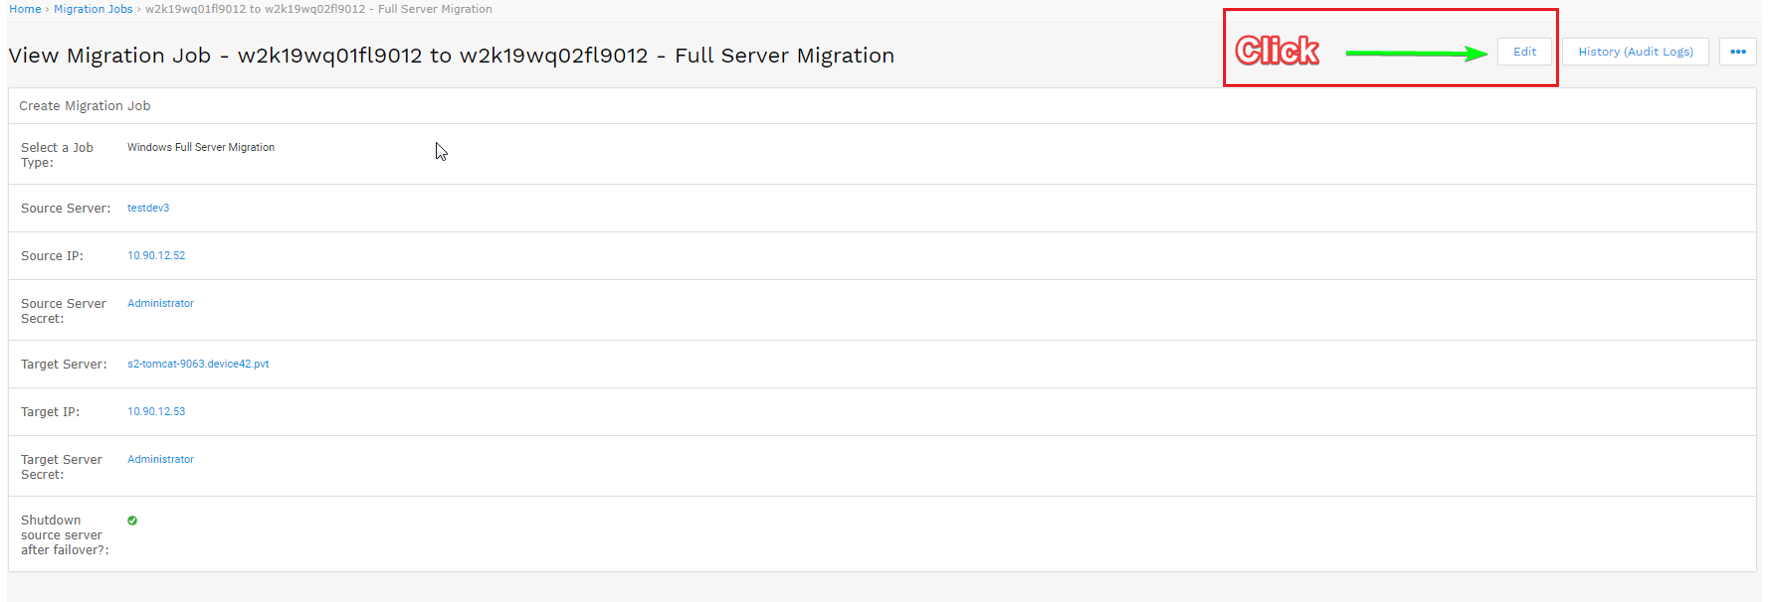
- Click the job name on the job list page, then click the Edit button on the View Migration Job page.
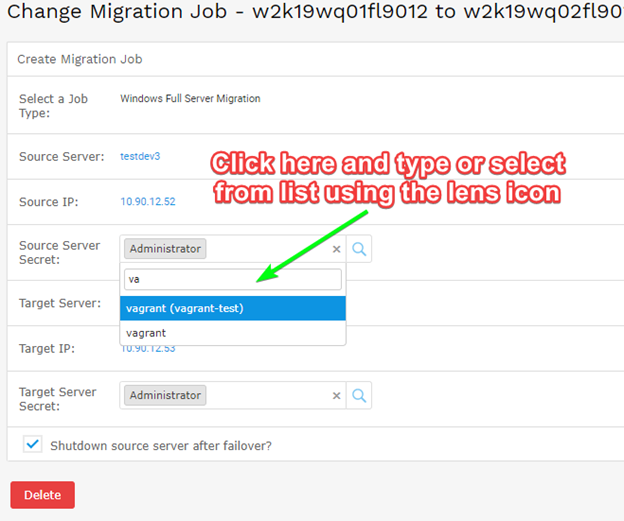
- In this example, we have added a new username
vagrantto the source and target machines, so we will select both the source and the target secrets to change. But you can also change just the source or the target secret.
- After the new secrets have been selected, just click Save button at the bottom or Save and continue editing to see if the changes have been accepted by the server and have been saved successfully. If there were issues while trying to update the credentials, the new settings will be canceled and the old secret will still show.
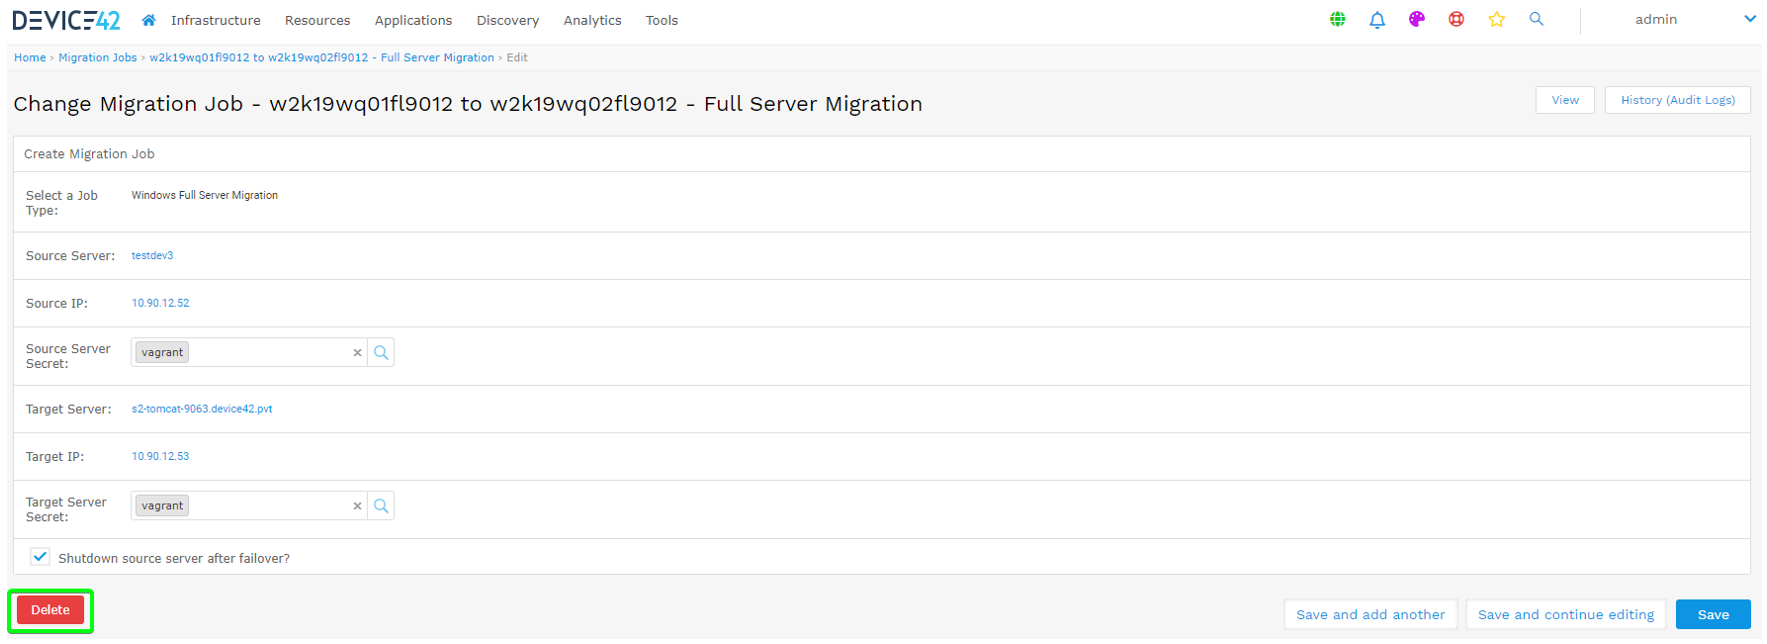
The source and target secrets have been updated and saved to the Carbonite target server's job and the Device42 database.
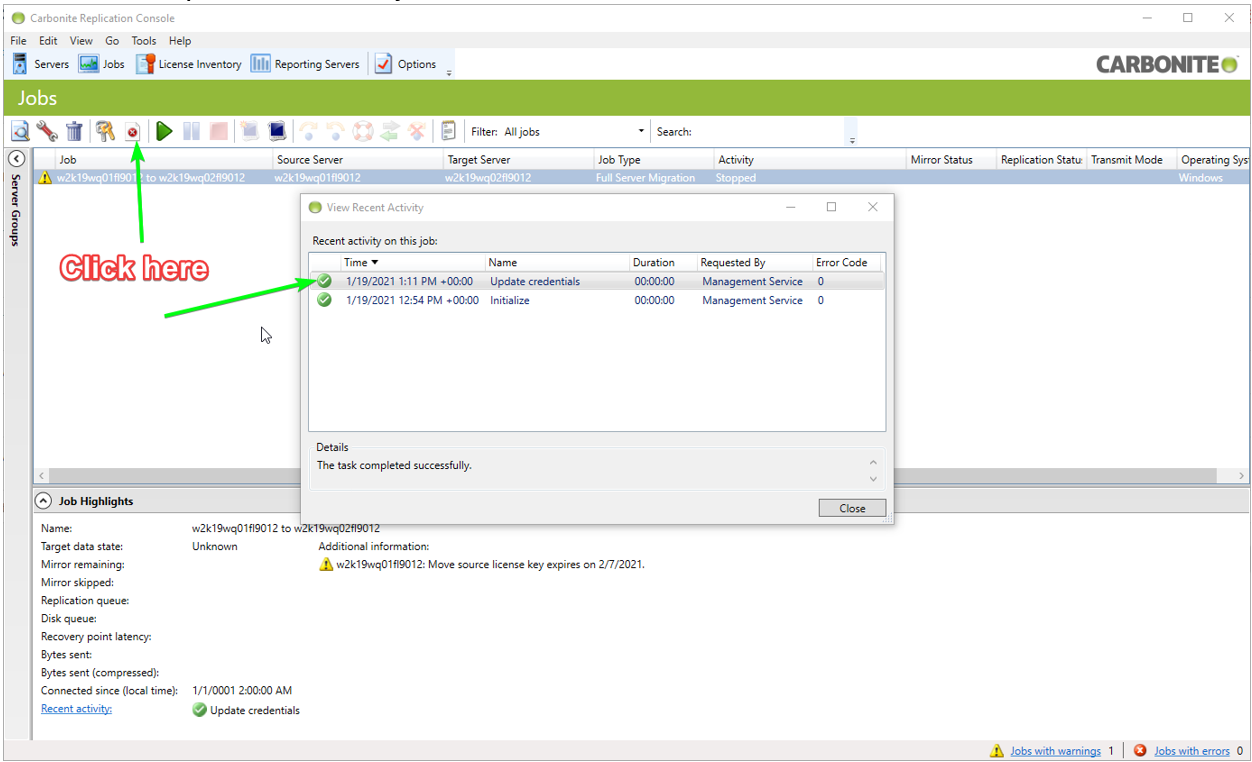
- You can also verify that the credentials update operation has successfully completed by examining the job in the Carbonite Replication console’s Jobs tab and clicking the View Recent Activity button in the job control row.
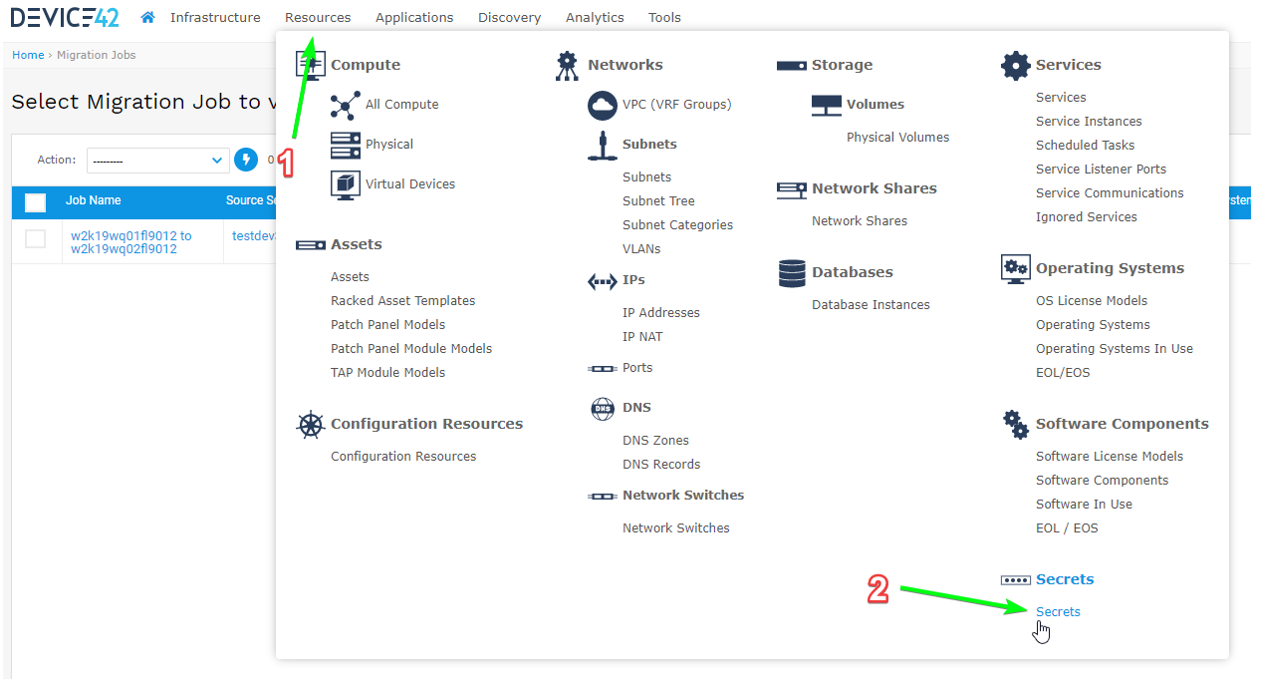
- Note: If you only updated the password on the source or target, you would first need to create a new D42 secret with the new login credentials information or update your existing secret from D42’s Resources > Secrets menu.
Once updated or added, you can perform the above procedure for the jobs of your choice.
Export Jobs to a CSV File
You can export the jobs displayed on the Migration Jobs list page via the Export selected items to CSV Action menu item.
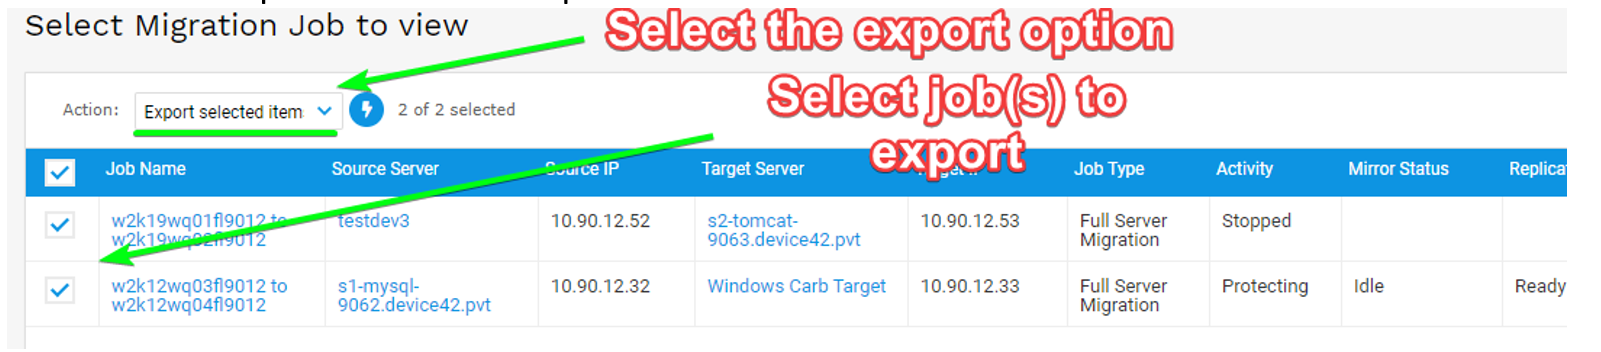
- Select the jobs you want exported to CSV from the list and select Export selected items to CSV from the Action menu. Click the lightning bolt icon to begin the process.
- You are prompted to save the
.csvfile to a directory of your choice. The file will be namedmigration-job.csv.
