Amazon Web Services - Installation
The Device42 Amazon Web Services (AWS) offering involves an EC2 instance that houses the Device42 Main Appliance (MA), Appliance Manager (AM), and Remote Collector (RC).
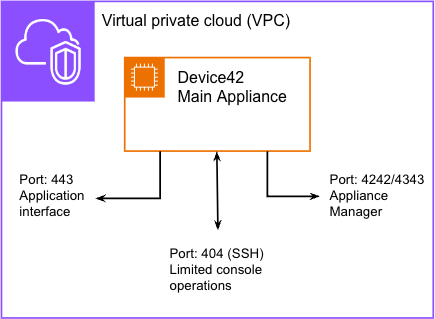
Overview
The Device42 Main Appliance is available on AWS, either as a manual installation or through the AWS Marketplace — this guide has instructions for both options.
The Device42 RC is only available via manual installation only. To request access, please submit a ticket to the Device42 RC Amazon Machine Image (AMI) and include the following information:
- The AWS region for Device42 deployment
- The AWS account number
Costs and Licensing
Each Device42 AWS offering comes with a pre-installed limited license. To make use of Device42's full capabilities, we recommend you obtain a more comprehensive license from a Device42 sales representative or business partner.
Refer to the Device42 Licensing page for more information on managing licenses.
Device42 on AWS operates using the Bring Your Own License (BYOL) model, meaning you can run on AWS with no additional charge from Device42. Other than the yearly fee for your Device42 license, the only costs you will incur via AWS are the charges Amazon bills you for the use of your instances. These are usually hourly fees, depending on the instance size you select. Larger instances generally cost more.
Device42 license pricing information is available on the Device42 Pricing page.
EC2 Instance Sizing for Device42
When running Device42 on AWS, we recommend you size your Device42 MA to run on a t3.xlarge EC2 instance. During appliance configuration on the AWS Marketplace, you have the option to select your EC2 instance size. The t3.xlarge EC2 instance size is the default and is currently the only instance size permitted.
The configuration will only allow you to Launch successfully using one of the sizes listed above.
Customers must regularly view and manage the quotas for AWS services using the AWS Service Quotas dashboard.
Refer to our Sizing Recommendations page for sizing recommendations.
Regional Availability
Device42 AWS deployments are supported in the following regions:
| Americas | EMEA | Asia |
|---|---|---|
| US East (N. Virginia) | Europe (Frankfurt) | Asia Pacific (Hong Kong) |
| US East (Ohio) | Europe (Zurich) | Asia Pacific (Tokyo) |
| US West (N. California) | Europe (Stockholm) | Asia Pacific (Seoul) |
| US West (Oregon) | Europe (Spain) | Asia Pacific (Mumbai) |
| Canada (Central) | Europe (Ireland) | Asia Pacific (Hyderabad) |
| South America (Sao Paulo) | Europe (London) | Asia Pacific (Singapore) |
| Europe (Paris) | Asia Pacific (Sydney) | |
| Israel (Tel Aviv) | Asia Pacific (Jakarta) | |
| Middle East (UAE) | Asia Pacific (Melbourne) |
Deploying Device42 from the AWS Marketplace
The following steps walk you through deploying Device42 from the AWS Marketplace, configuring security groups, and connecting to your instance.
Configuring Instance and Communication Settings
Launch your Device42 instance using the AWS Marketplace one-click feature and follow the on-screen instructions.
When you arrive at the Launch this software screen, select a key pair to use for SSH console access to the Device42 MA and configure incoming access for the appropriate administrative source:
-
Click Create a key pair in EC2 to generate a key. See the Generating a New AWS Key Pair section for more help with this step.
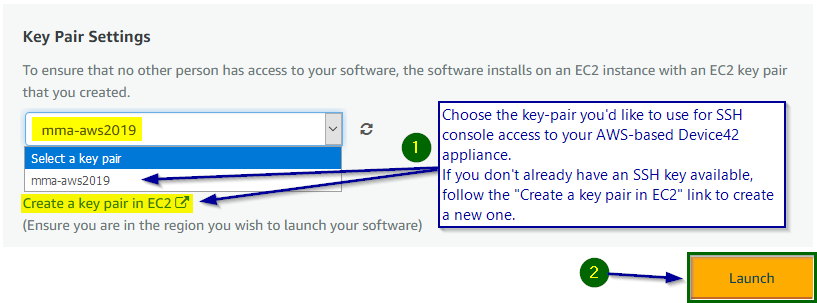
-
Create an appropriate security group via Security Group Settings by selecting Create new based on seller settings and allowing access from the appropriate administrative source for the default Device42 ports:
404 ssh,4242 appmgr-http,4343 appmgr-https, and443 https.These ports are part of the default Device42 AMI security group settings for incoming SSH, Appliance Manager, and web UI access.
-
For ports
404,4242, and4343, select Custom TCP as the rule type and enter the port number manually. Port443can use the standard HTTPS rule type.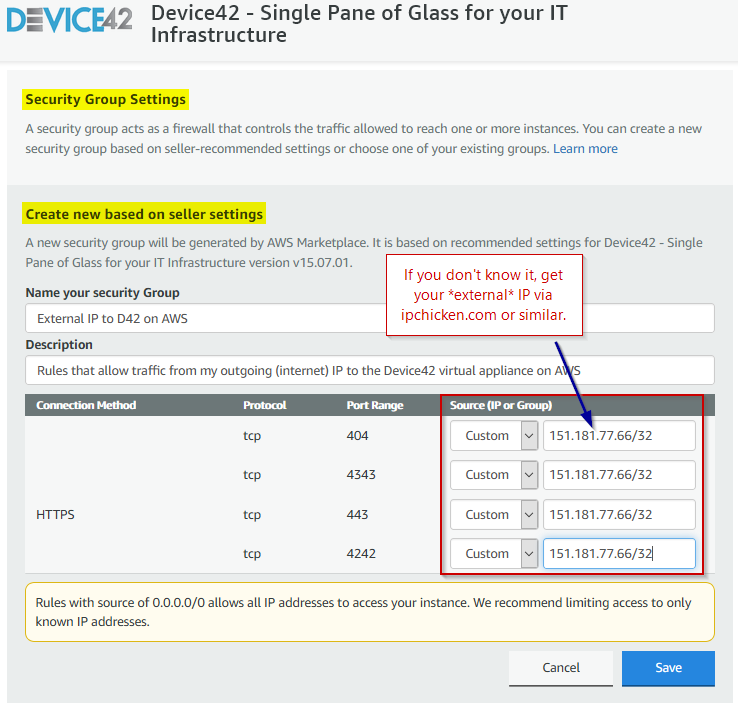
If you allow direct access from your PC or local network, the deployed Device42 instance will be reachable directly over the internet. This is not considered best practice and should only be used for testing. Set up a VPN or other secure means of communication for production AWS use.
Connect to the Instance
SSH to your Device42 MA on port 404 using one of the following methods:
- Public subnet (test/dev only — see the note above): Connect directly using the public DNS name or IP address from the AWS console.
- Private subnet: Connect via a bastion host, AWS Systems Manager Session Manager, or your VPN.
Use device42 as the username and the SSH key file you selected on the Launch this software screen for authentication (not a password). Ensure your instance's security group settings allow SSH access from your connection source.
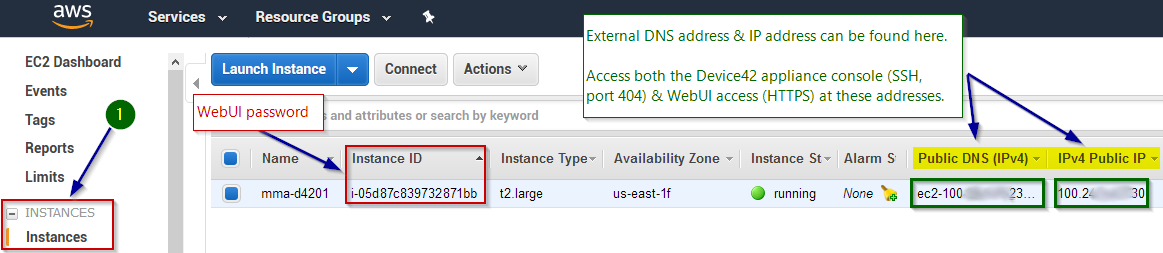
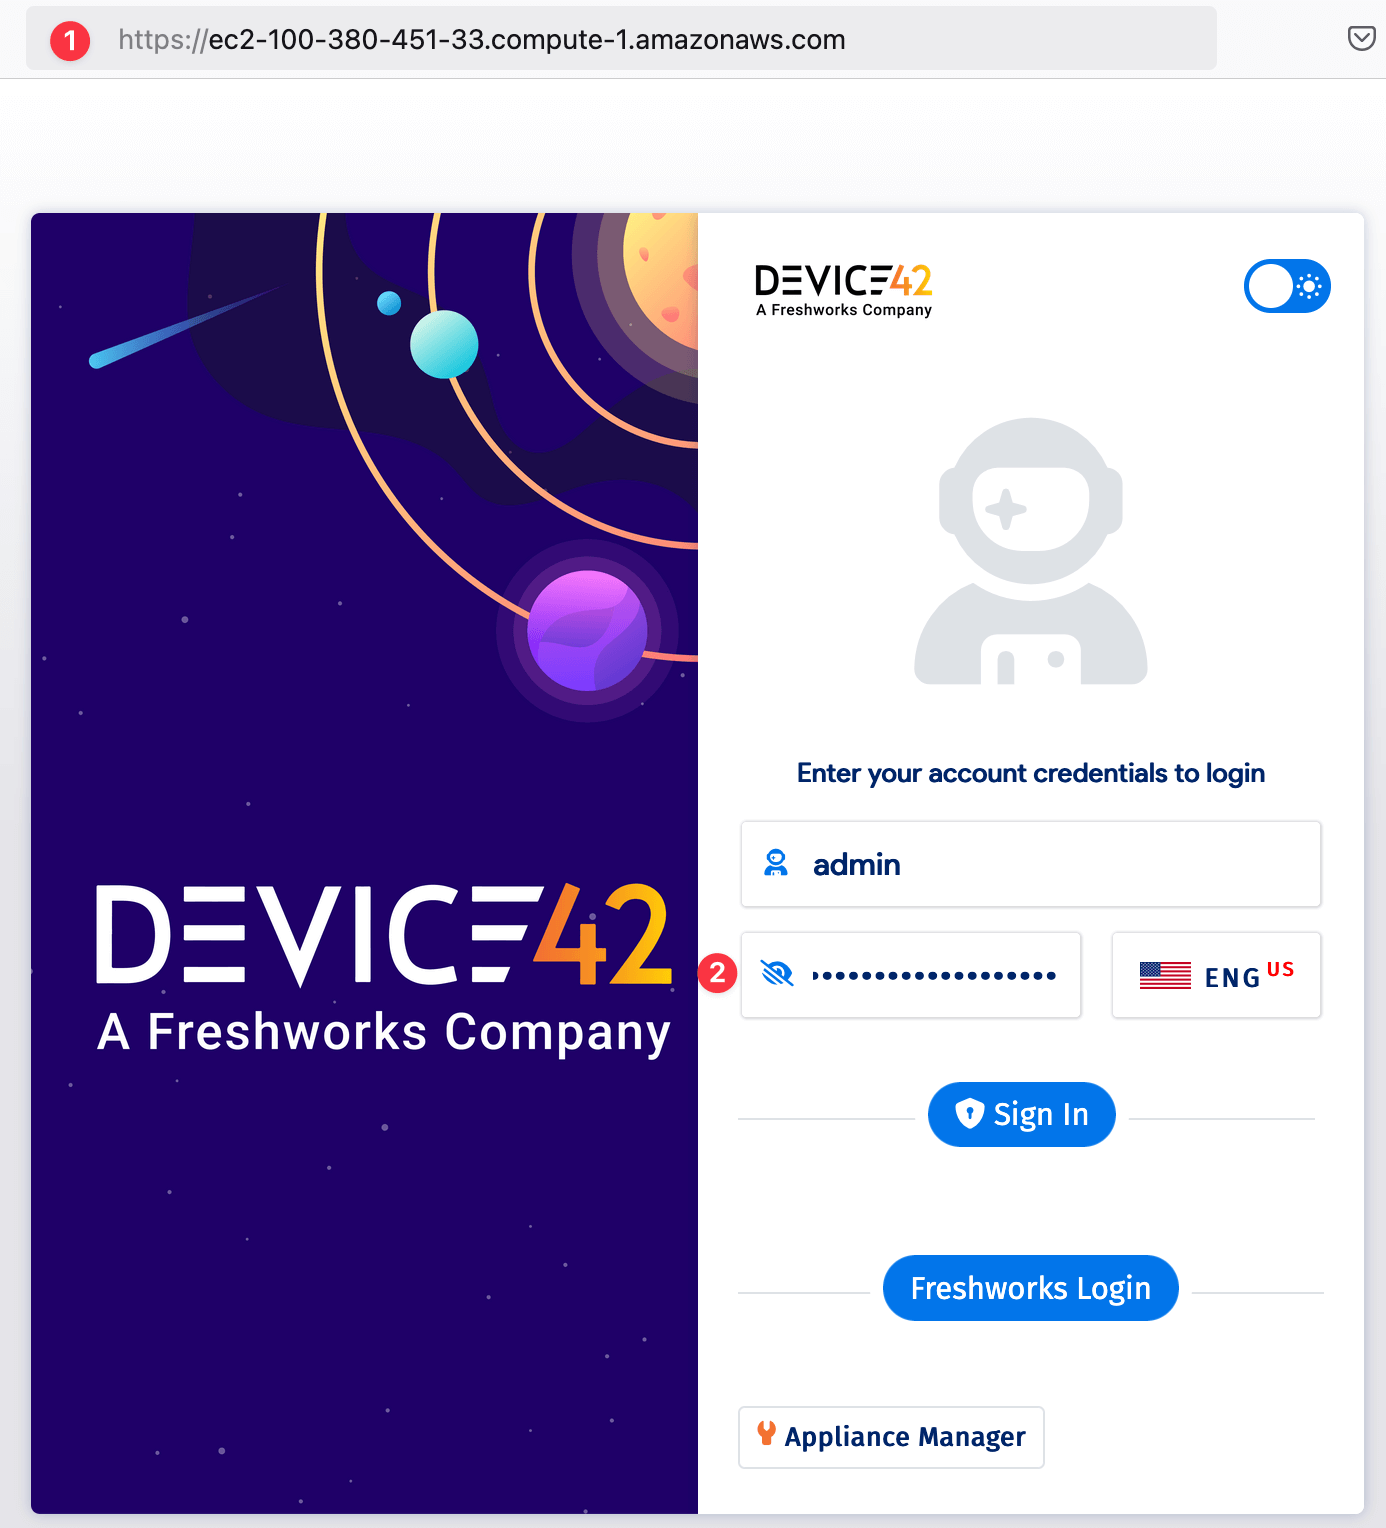
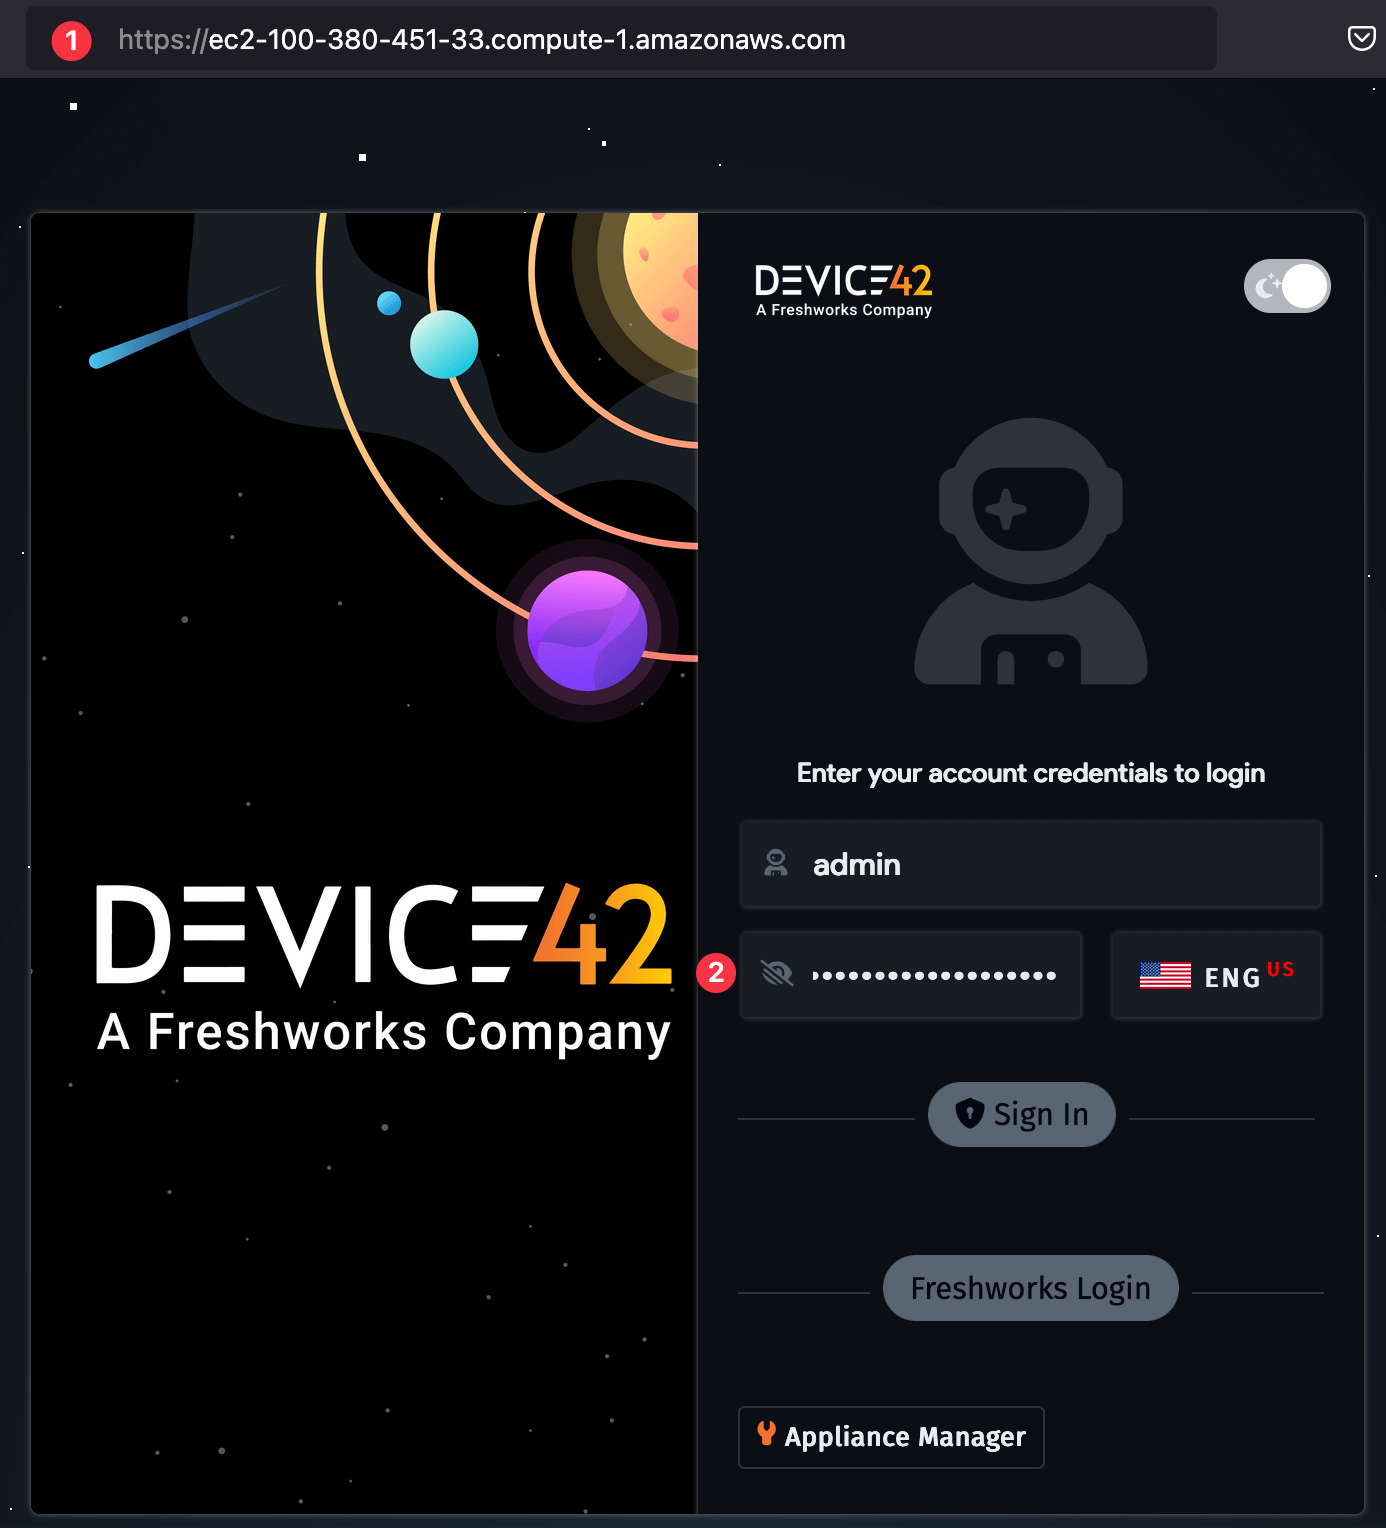
Navigate to the Device42 login screen by visiting https://Device42_AWS_address (1):
-
Device42_AWS_addressis the DNS name (preferred) or IP address you used to connect via SSH. -
Log in to the Device42 web UI using
adminas your username and your AWS instance ID (2) as your temporary password.It's a good idea to change these credentials to something more secure as soon as you log in!
Update the appliance license key, because the included key has expired:
-
Obtain an updated license by sending an email to sales@device42.com requesting a trial license for an AWS Marketplace Device42 installation.
-
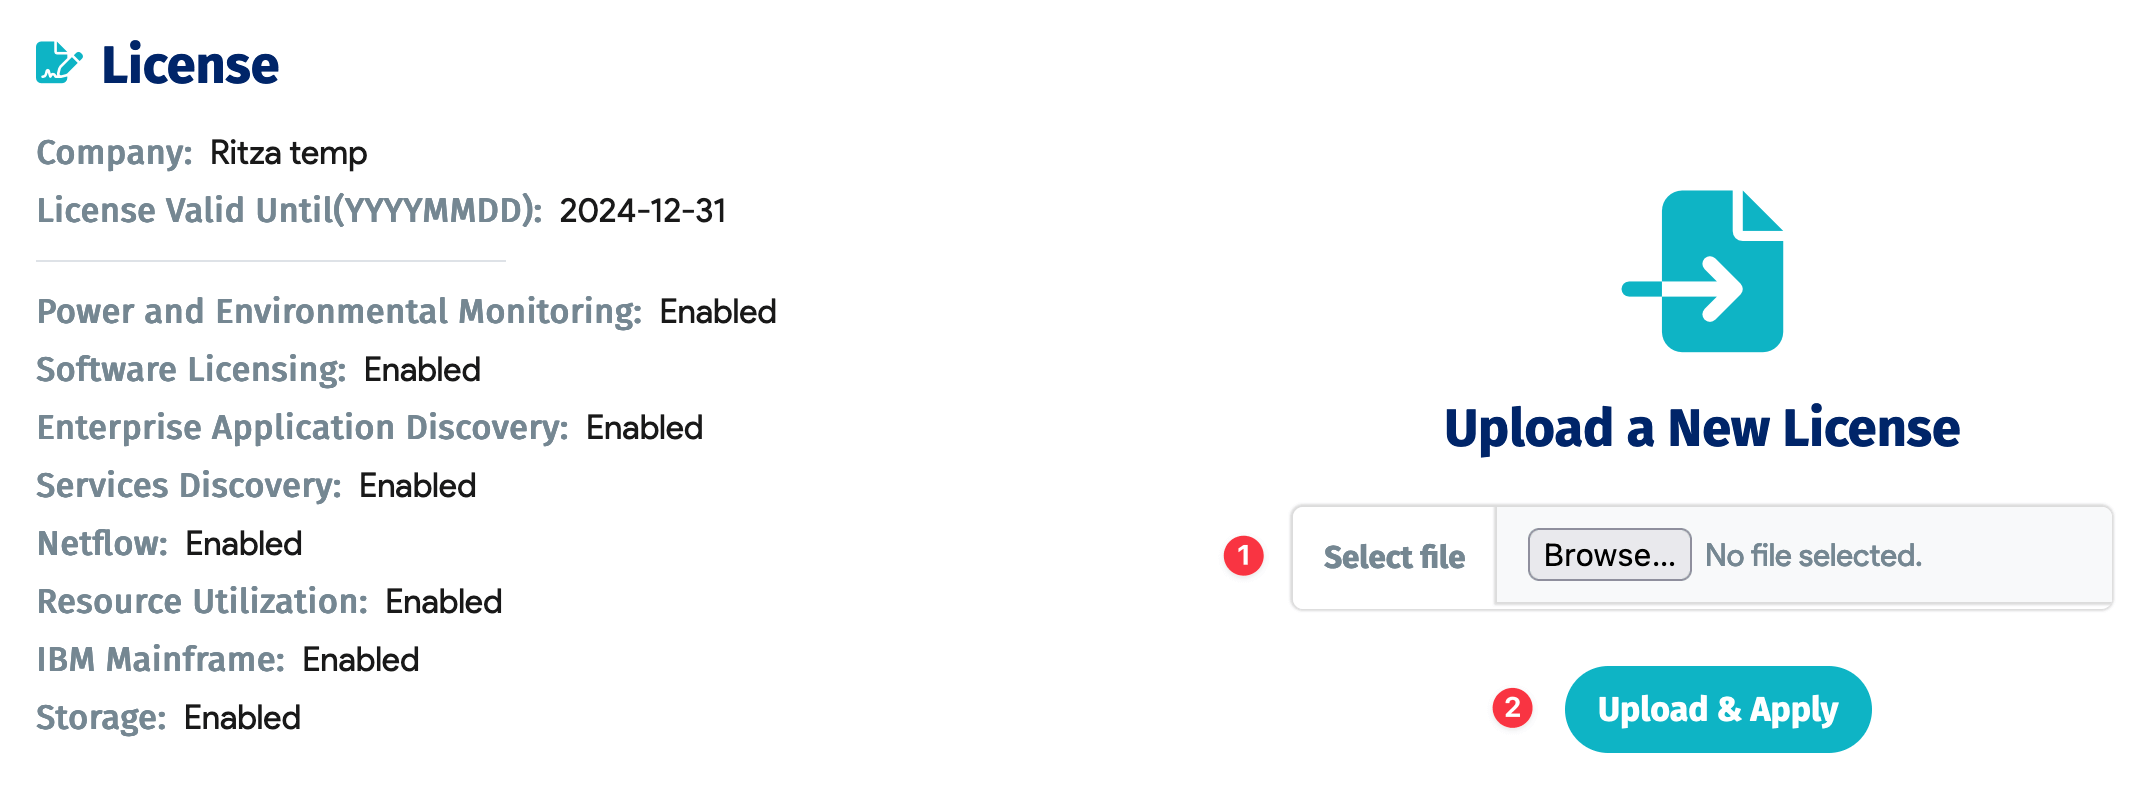
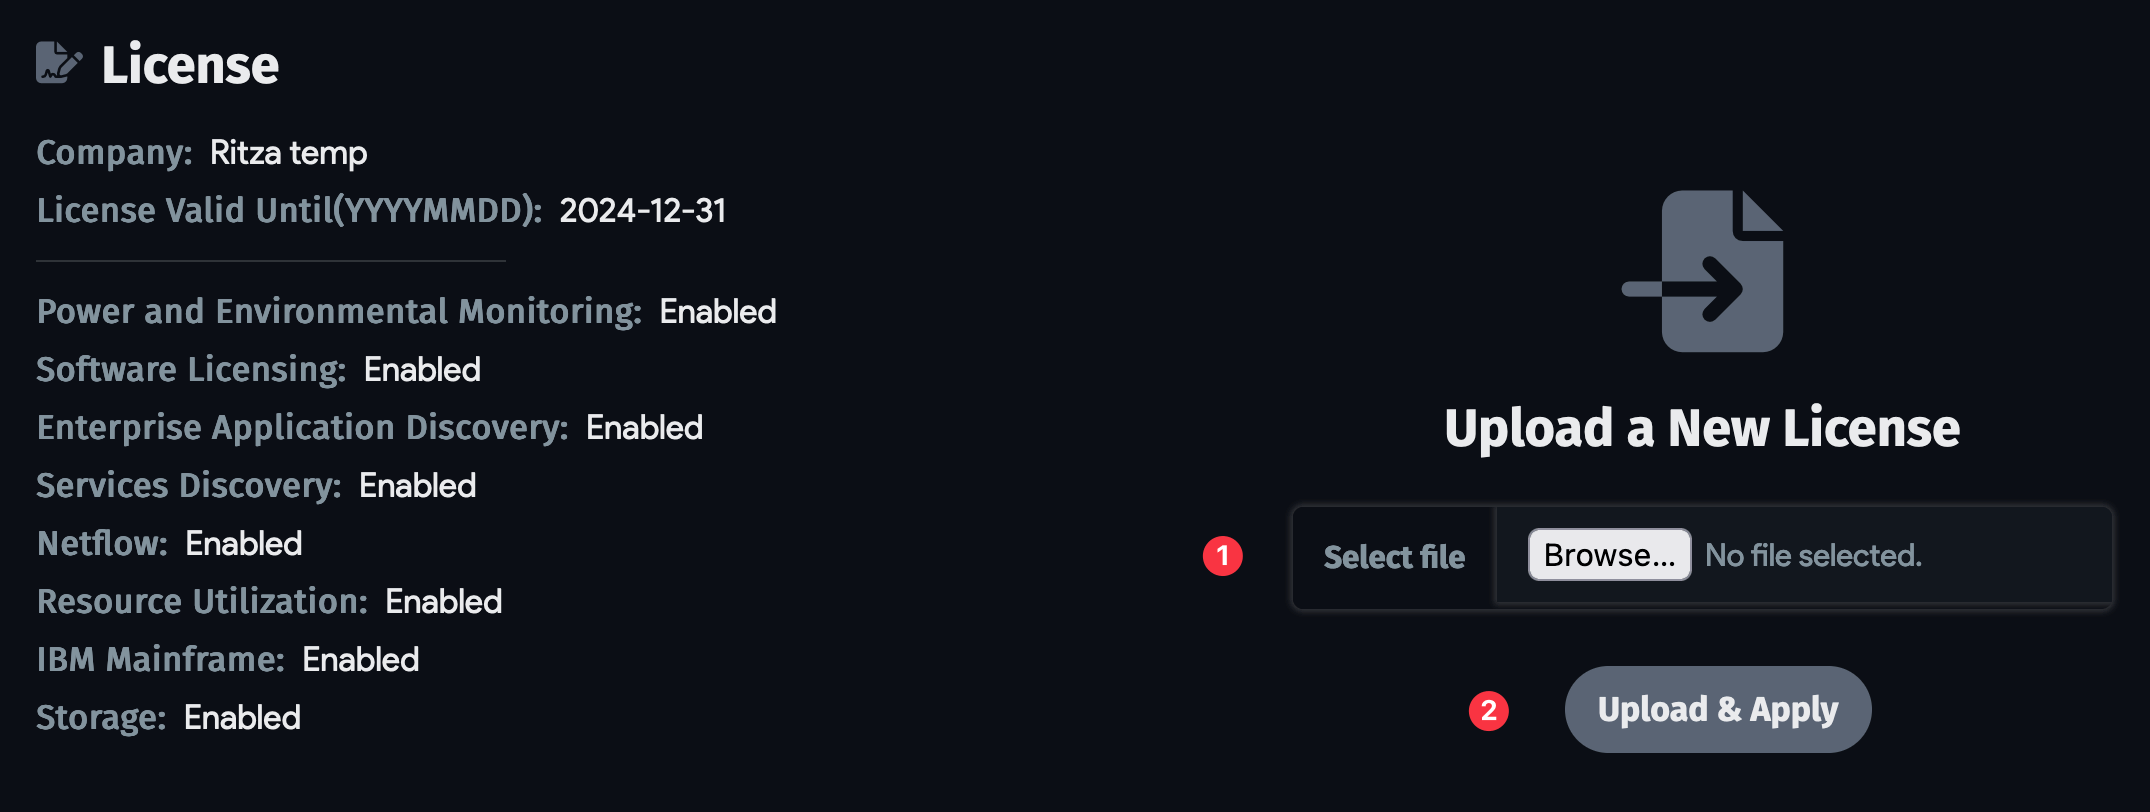
When you receive the updated key file, save it to your local filesystem and go to Tools > Settings > Licensing. Browse to the new key file (1) and click the Upload & Apply button (2).
Set the time zone and configure NTP to ensure autodiscovery scheduling and log history work correctly.
Make sure your AMI is running the latest version of Device42 and update it if necessary:
-
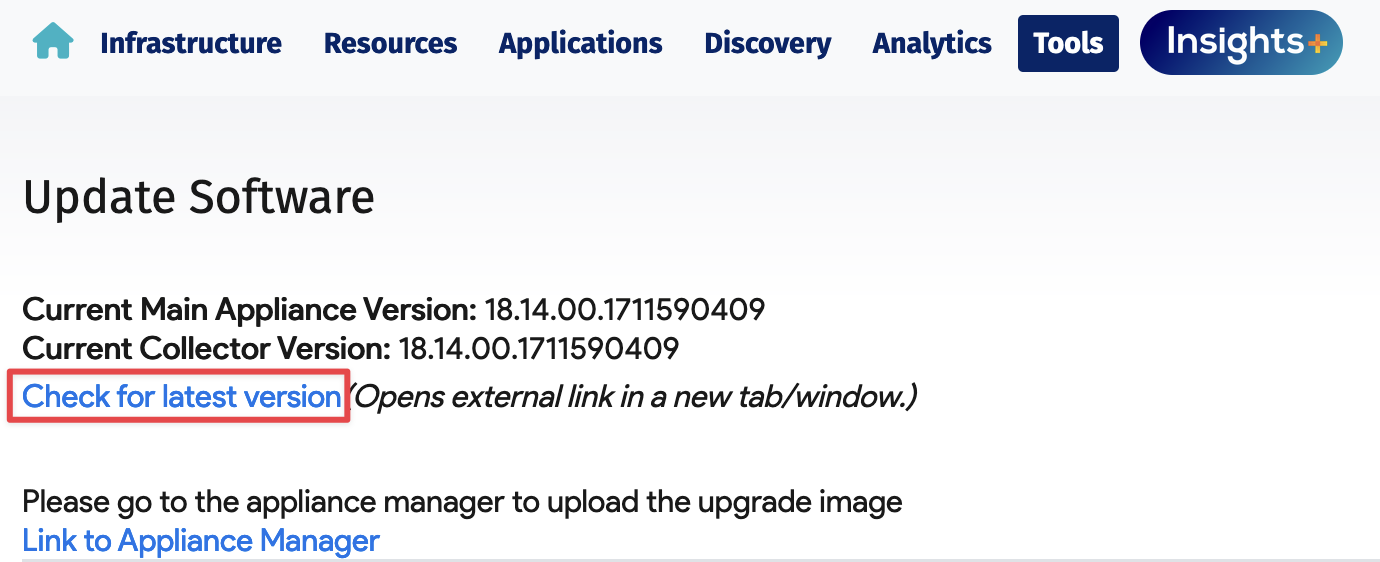
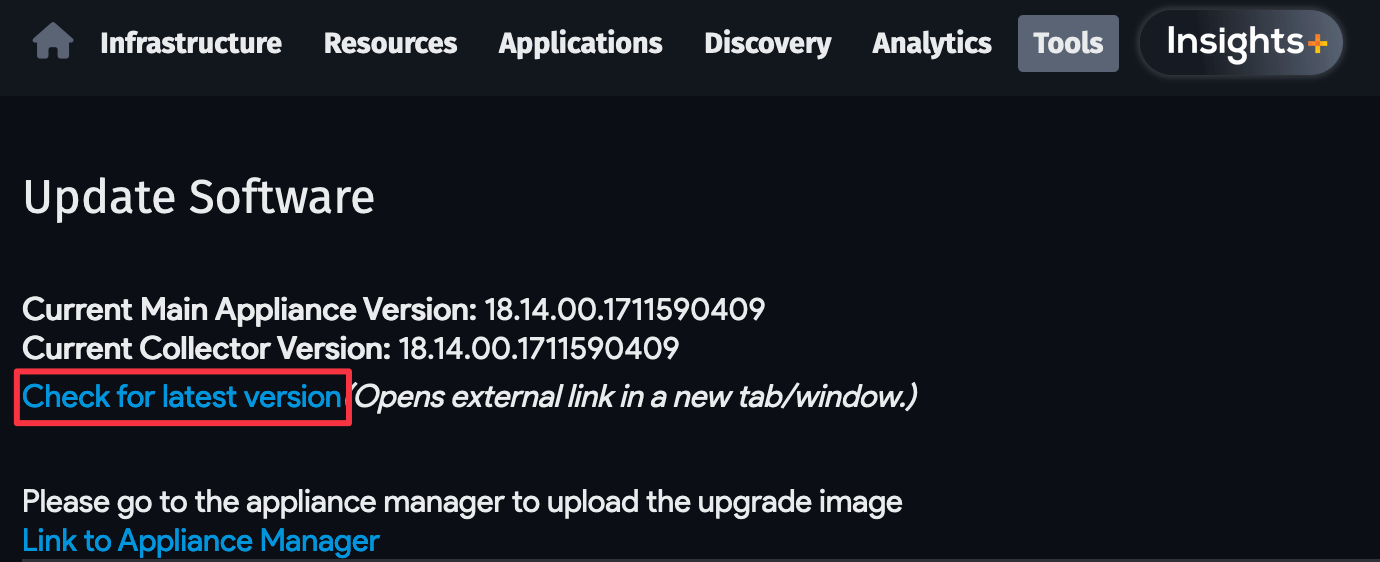
From the Device42 web UI, head to Tools > Update.
-
Make note of the Current Main Appliance Version number displayed.
-
Then, follow the Check for latest version link or visit https://www.device42.com/update/ to check for an update.
-
If the update page offers a newer release, enter your work email and install the update by following the Device42 Upgrade Steps. If you're working with a new appliance with no data, skip the backup step.
And you're all set!
If you have any questions or issues that the documentation doesn't address, visit the Device42 Support page or email support@device42.com to open a ticket.
Generating a New AWS Key Pair for SSH Access
To generate a new SSH key pair for use on AWS, you first need to access the Key Pairs page using one of the following options:
- Click Create a key pair in EC2 during the configuration of your appliance.
- Open the EC2 console, scroll to the Network & Security section of the left-hand menu, and choose Key Pairs.
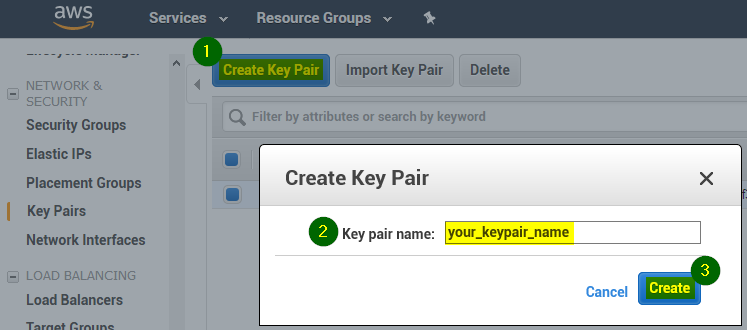
On the Key Pairs page, take the following steps:
-
Click the Create Key Pair button (1).
-
In the dialog that pops up, give your new key pair a meaningful name.
-
Click the Create button.
This creates your key file and automatically begins downloading the private key. Save your key somewhere safe.
The
FileName.pemfile contains the private key that you'll use for authentication. If you are using Linux, copy it to your key directory. -
To use your new SSH key with PuTTY on Windows, reference the helpful AWS article on connecting to your Linux instance using PuTTY.
Appliance Manager Access — AWS Marketplace Installation
All maintenance operations are performed through the Device42 Appliance Manager (AM). The AM listens on port 4343 (for example, https://YOUR_DEVICE42_INSTANCE:4343) (1).
Software updates, Device42 backups and restores, and certificate management are all performed through the AM:
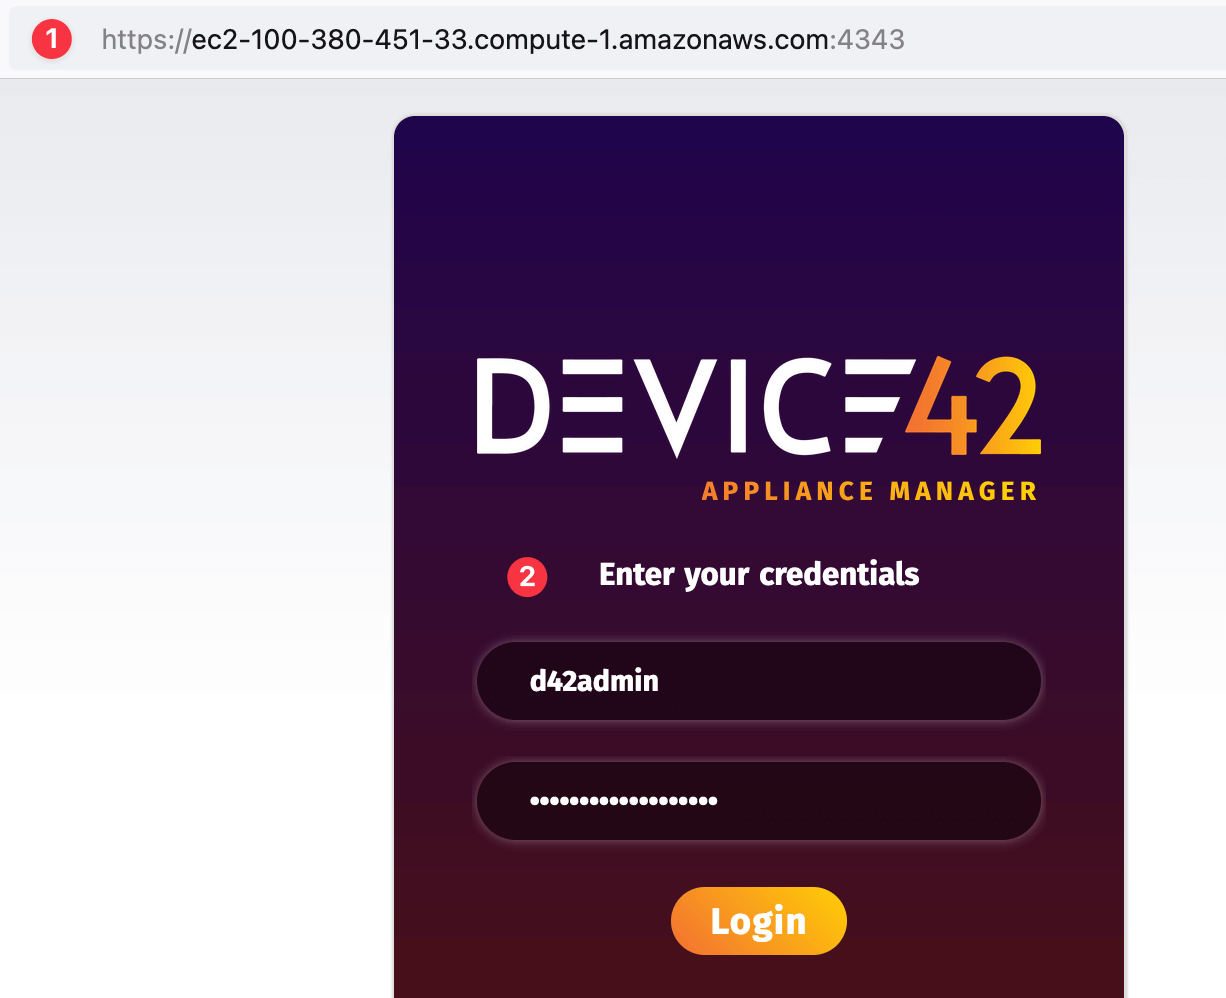
For one-click installations from the AWS Marketplace, log in to the AM using the following credentials (2):
- Username:
d42admin - Password: Your AWS instance ID
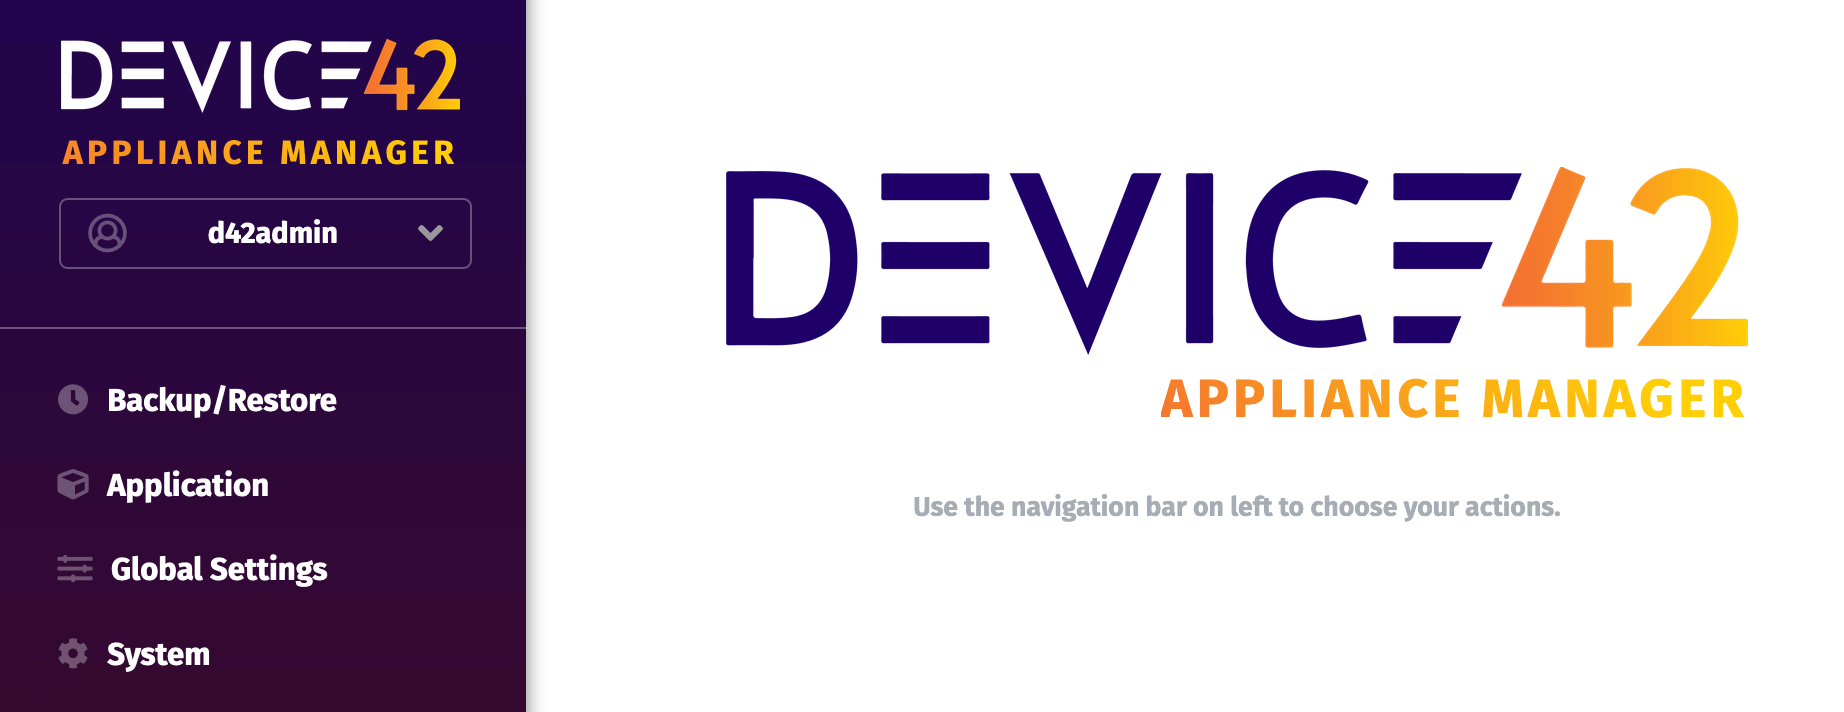
Once you've logged in, you'll see the AM main menu:
Deploying a Downloaded Image to an AWS Instance — Manual Installation
Prerequisites
Before you begin:
- Please submit a ticket requesting access to the Device42 AMI. Be certain to include the AWS region for Device42 deployment and the AWS account number.
- After Device42 Support has granted you access to the Device42 AMI, navigate to your EC2 Dashboard and launch a new instance.
- Select My AMIs, choose Shared with Me, and deploy your appliance. Device42 recommends
t3.xlargeas the instance size.
Appliance Manager Access: Manual Installation
For manual (image-based) AWS installations, you can log in to the AM using the default Device42 credentials:
- Username:
d42admin - Password:
default
Instance Access Security
Given the nature of discovery and the inherent access it requires, Device42 does not recommend direct access from unrestricted internet sources. Instead, we recommend you use VPN connections and security groups to protect access to the Device42 instance. While these requirements will vary from environment to environment, we recommend strict adherence to the principle of least privilege.
For additional visibility, Device42 recommends users enable AWS CloudTrail as a security and operational best practice.
Administration of Device42 on AWS
Software and Security Updates and Patches
Security patches are bundled with Device42 software updates. There is no need to manually apply patches to your Device42 instances outside of software updates. Software updates can be downloaded from the Device42 Update page.
Watch the How To Update the Device42 Appliance walkthrough video to discover our quick update process.
Backing Up and Restoring Device42 Data on AWS
The Device42 backup facilities are accessible through the AM. Backups can be executed immediately. You can download a backup file immediately or schedule automatic saving to an SFTP, NFS, or AWS S3 destination.
For more information on backing up and restoring Device42 data, see our guide to setting up backups.
Monitoring and Health Checks for Device42 on AWS
Device42 has a built-in health check that can be polled using your favorite monitoring tool. We offer a preconfigured Device42 Health Check module for Nagios.
The built-in health check monitors the following:
|
|

Configuring High Availability for Device42 on AWS
If a High Availability (HA) deployment of Device42 is desired or required for a Device42 instance running on AWS, Device42 offers a supported Warm HA solution. To configure your deployment to run Warm HA, failover, and (if desired) automatic backups, follow the instructions in the Device42 Warm HA documentation.
The documentation also includes an example configuration that leverages Nagios to automatically initiate a failover of the instance in the event of a failure.
Cross-Instance Discovery - Sample IAM Policy
The following sample IAM policy is not needed to simply run Device42 on AWS. You would only set up an IAM policy similar to this if you wanted to target your AWS inventory for discovery (to document your AWS deployment in Device42). No IAM policy is necessary for running Device42 in AWS, nor for discovering infrastructure that is running elsewhere.
Visit the Device42 Support page to open a ticket or reach out to support@device42.com if you have any more questions.
The following permissions are required to support discovery:
|
|
The following is a sample IAM policy (with minimum appropriate permissions) that allows Device42 to discover and inventory instances running on AWS. You may modify it, but we recommend that you only use it if you understand it:
Click to expand the code block
{
    "Version": "2012-10-17",
    "Statement": [
        {
            "Effect": "Allow",
            "Action": "ec2:Describe*",
            "Resource": "*"
        },
        {
            "Effect": "Allow",
            "Action": "elasticloadbalancing:Describe*",
            "Resource": "*"
        },
        {
            "Effect": "Allow",
            "Action": [
                "cloudwatch:ListMetrics",
                "cloudwatch:GetMetricStatistics",
                "cloudwatch:Describe*"
            ],
            "Resource": "*"
        },
        {
            "Effect": "Allow",
            "Action": "autoscaling:Describe*",
            "Resource": "*"
        },
        {
            "Action": [
                "elasticache:Describe*"
            ],
            "Effect": "Allow",
            "Resource": "*"
        },
        {
            "Effect": "Allow",
            "Action": [
                "s3:ListAllMyBuckets"
            ],
            "Resource": "*"
        },
        {
            "Action": [
                "rds:Describe*",
                "rds:ListTagsForResource",
                "ec2:DescribeAccountAttributes",
                "ec2:DescribeAvailabilityZones",
                "ec2:DescribeSecurityGroups",
                "ec2:DescribeVpcs"
            ],
            "Effect": "Allow",
            "Resource": "*"
        },
        {
            "Action": [
                "cloudwatch:GetMetricStatistics",
                "logs:DescribeLogStreams",
                "logs:GetLogEvents"
            ],
            "Effect": "Allow",
            "Resource": "*"
        }
    ]
}
Security, Privacy, and Other Considerations
-
The Device42 AWS offering does not restrict the Instance Metadata Service version.
-
The Device42 AWS offering does not require AWS data encryption to operate properly.
-
Customer data resides on the instance itself. Customer passwords and secrets are encrypted with AES-256 encryption.
Refer to the Device42 Secrets, Security, and Permissions page for additional information on how passwords and secrets are stored.
-
The Device42 AWS offering does not require the storage of any secrets in AWS Secrets Manager.